If there’s one treat that screams “comfort,” it’s a warm, chewy peanut butter cookie. For years, I thought they were off-limits. During my journey of losing 65 pounds, I saw foods like this as the enemy. A single cookie felt like a step backward, a trigger for a spiral of bad eating choices.
Living with ADHD means I wrestle with all-or-nothing thinking. A food is either “good” or “bad.” A day is either “perfect” or a “total failure.” This mindset is exhausting, and it’s what makes sustainable fat loss feel impossible. It wasn’t until I rejected this idea that things really started to change.
I realized I needed my favorite foods in my life, but in a way that served my goals. I needed a version that fought cravings, not fed them. So, I got to work creating a high-protein peanut butter cookie that was simple, delicious, and worked *with* my brain. This recipe is the result. It’s a tool for consistency, not a test of willpower.
Skip to My Flexibe Diet Recipe!
Why This Peanut Butter Cookie Is Great For Fat Loss
Let’s be brutally honest. Most cookies are a fast track to a sugar crash and more cravings. They are packed with sugar and fat, with almost zero protein. That combination sends your blood sugar on a rollercoaster, leaving you hungry and unfocused an hour later. For those of us with ADHD, that’s a recipe for executive dysfunction and poor food choices.
This peanut butter cookie recipe flips the script entirely. We’re building it with fat loss principles in mind. The number one rule is “protein first,” and these cookies deliver. By using both vanilla whey protein and powdered peanut butter, we’re packing a serious protein punch into each serving. Protein is the king of macronutrients for satiety. It keeps you feeling full and satisfied, which crushes cravings for junk food later.
We also tackle the sugar problem head-on by using a natural, zero-calorie sweetener like monk fruit or erythritol. You get all the sweetness you expect from a cookie without the empty calories and blood sugar spike. This is a game-changer for managing hunger and energy levels, which is 75 percent of the battle in any fitness journey.
Finally, we keep the healthy fats from the creamy peanut butter. Fat is not the enemy. The right amount of healthy fat provides flavor, contributes to feeling full, and makes the diet sustainable. This isn’t about restriction. It’s about smart substitution. You get to enjoy a delicious peanut butter cookie that actively supports your goals by managing hunger and providing quality nutrients. It’s a perfect example of flexible eating in action.
Ingredients You’ll Need for This Peanut Butter Cookie
The magic of this recipe is in the ingredient synergy. We’re using a few smart swaps to transform a classic treat into a high-protein powerhouse. Each component has a specific job, working together to create a cookie that’s both delicious and macro-friendly.
Here’s exactly what you’ll need to have on hand.
- ¾ cup powdered peanut butter
- ⅓ cup vanilla whey protein powder
- ¼ cup granulated monk fruit or erythritol sweetener
- ¼ teaspoon baking soda
- ⅛ teaspoon salt
- ½ cup creamy peanut butter
- ¼ cup nonfat plain Greek yogurt
- 1 large egg
- 1 teaspoon vanilla extract
The key ingredient that truly makes this recipe work is the powdered peanut butter. This is essentially roasted peanuts that have been pressed to remove most of the oil and fat, then ground into a fine powder. It gives you an intense, concentrated peanut butter flavor with a fraction of the calories and a significant protein boost. It’s our secret weapon for flavor and macros.
A quick note on protein powder. The brand and flavor you choose will have a big impact on the final taste and texture. I recommend using a vanilla whey protein that you genuinely enjoy drinking as a shake. If your protein powder is chalky or has a weird aftertaste, your cookies will too. A good quality whey-casein blend often bakes better than a pure whey isolate, resulting in a softer, less dry cookie.
For the creamy peanut butter, opt for a natural brand where the only ingredients are peanuts and salt. Many conventional brands add sugar and hydrogenated oils, which we don’t need here. The natural oils help give the cookie its classic chewy texture.
How To Make This Peanut Butter Cookie (Step-By-Step)
We’re keeping this process simple and straightforward. Remember, consistency beats intensity. A recipe you can actually make on a low-motivation day is better than a “perfect” one that sits in your bookmarks forever. We’ll use two bowls to keep things organized and minimize mess.
Step 1: Preheat Oven and Prep Your Pan
First things first, get your oven preheating to 350°F (175°C). Doing this at the start means you won’t be waiting around later. For an ADHD brain, immediate action builds momentum. While it’s heating, line a baking sheet with parchment paper. This is non-negotiable. It guarantees your cookies won’t stick and makes cleanup incredibly easy. No scraping pans required.
Step 2: Combine the Dry Ingredients
In a medium-sized bowl, add your powdered peanut butter, vanilla protein powder, monk fruit sweetener, baking soda, and salt. Use a whisk to mix them together thoroughly. This step is important for making sure the baking soda and salt are evenly distributed, which helps the cookies rise properly and have a consistent flavor.
Step 3: Combine the Wet Ingredients
In a separate, larger bowl, add the creamy peanut butter, nonfat Greek yogurt, large egg, and vanilla extract. Using an electric hand mixer (or a stand mixer), beat these ingredients together on medium speed. Keep mixing until everything is smooth, creamy, and well combined. This should only take about a minute or two.
Step 4: Mix Wet and Dry to Form Dough
Now, pour the dry ingredients from the first bowl into the large bowl with the wet ingredients. Start mixing on low speed to avoid a cloud of protein powder dust. Gradually increase the speed as the dough comes together. Mix just until a thick, uniform dough forms. Be careful not to overmix.
Step 5: Chill The Dough
This is a crucial step for a great cookie texture. Cover the bowl and chill the dough in the refrigerator for at least 30 minutes. Chilling solidifies the fat, which prevents the cookies from spreading into thin, crispy wafers in the oven. ADHD tip: Set a timer on your phone or Alexa immediately so you don’t forget it’s in there.
Step 6: Scoop and Roll the Dough
Once chilled, use a tablespoon or a small cookie scoop to portion out the dough. Roll each portion into a smooth ball, about one inch in diameter. Place the balls on your parchment-lined baking sheet, leaving about two inches of space between them to allow for some spreading.
Step 7: Create the Criss-Cross Pattern
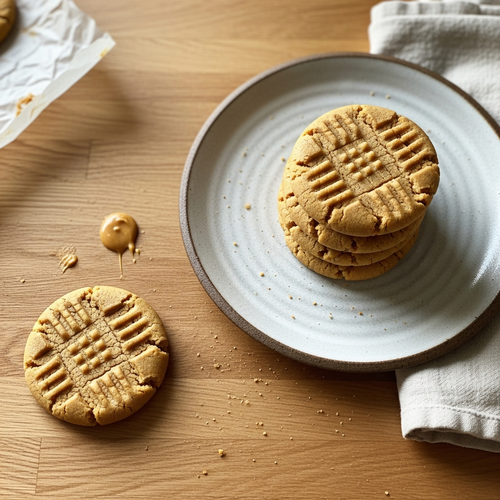
Here comes the classic peanut butter cookie look. Take a fork and gently press down on the top of each dough ball. Then, rotate the fork 90 degrees and press down again to create that iconic criss-cross pattern. This also helps to flatten the cookie slightly for more even baking.
Step 8: Bake The Cookies
Place the baking sheet in your preheated oven and bake for 8 to 10 minutes. The edges should look set and be a light golden brown. The centers will still appear slightly soft and underdone. This is what you want. Pulling them out at this stage ensures a soft, chewy final product.
Step 9: Cool The Cookies
Let the cookies cool on the hot baking sheet for about 5 minutes. They will continue to cook and set up from the residual heat. After 5 minutes, carefully transfer them to a wire rack to cool completely. This prevents the bottoms from getting soggy and allows them to firm up perfectly.
How To Serve Peanut Butter Cookie (ADHD-Friendly)
Having a batch of these high-protein peanut butter cookies ready to go is a huge win for staying on track. The key is to make them an easy, pre-planned part of your day. For those of us with ADHD, reducing friction and decision fatigue is everything. If the healthy choice is the easiest choice, we’re more likely to make it.
The best way to do this is through pre-portioning. Once the cookies have cooled completely, decide on a serving size that fits your macros. Maybe it’s one cookie as a post-workout snack or two cookies for an evening treat. Then, bag them up.
Here are a few ADHD-friendly ways to serve and integrate them:
- The Grab-and-Go Snack Pack: Place your chosen serving size into small sandwich bags or reusable containers. Stack them at the front of your pantry or fridge. When a craving hits, you don’t have to think, count, or decide. You just grab one pack and you’re done. This eliminates the risk of mindlessly eating half the batch.
- The Dessert Enhancer: Crumble one cookie over a bowl of Greek yogurt or a low-calorie ice cream. This adds amazing flavor and texture, making a simple dessert feel much more decadent and satisfying. It turns a basic food into a planned, enjoyable treat.
- The Post-Workout Refuel: Pair a cookie or two with a glass of skim milk or an unsweetened almond milk. The combination of protein and carbs is perfect for helping your muscles recover after a workout, and it feels like a genuine reward for your hard work.
By preparing them this way, you’re setting your future self up for success. You’re turning a potential “danger food” into a reliable tool for hitting your protein goals and managing your hunger. It’s about working with your brain’s need for simplicity and immediate gratification, not fighting against it.
How To Store, Reheat, and Reuse Peanut Butter Cookie
Proper storage is key to making your batch of high-protein peanut butter cookies last. You want them to stay fresh and delicious so they’re ready when you need a smart snack. The goal is to make your meal prep effort count all week long. Thankfully, these are very easy to store.
Once the cookies have cooled completely on the wire rack, you have a couple of great options for storage. The most important thing is to keep them away from air, which will make them dry and stale.
Here are the best ways to store and reuse them:
- Room Temperature Storage: Place the cookies in an airtight container. They will stay soft and chewy for up to 4-5 days. You can place a slice of bread in the container with them; the cookies will absorb moisture from the bread, helping them stay softer for longer. This is perfect for easy access throughout the week.
- Freezer Storage (The ADHD Pro Move): This is my favorite method. Freezing is a fantastic tool for managing portions and ensuring you always have a healthy treat on hand. Place the cookies in a single layer on a baking sheet and freeze for about an hour until solid. Then, transfer them to a freezer-safe zip-top bag. Don’t forget to label the bag with the name and date! They’ll last for up to 3 months this way.
When you’re ready for a cookie from the freezer, you can either let it thaw at room temperature for about 15-20 minutes or, if you’re impatient like me, pop it in the microwave for 10-15 seconds. This will make it warm and soft, almost like it just came out of the oven. This method is a lifesaver for curbing those sudden, intense cravings without derailing your progress.
Easy Swaps & Variations for Peanut Butter Cookie
One of the core principles at ADHD FIT is flexibility. A recipe needs to work for you, your pantry, and your preferences. If you’re missing an ingredient or want to change things up, you shouldn’t have to abandon the whole plan. This peanut butter cookie recipe is very adaptable. Here are some simple swaps and variations you can try.
These adjustments can help you cater to different dietary needs, use up ingredients you already have, or just experiment with new flavors.
- Protein Powder Flavors: While vanilla whey is a great neutral base, you can easily swap it for chocolate protein powder to create a chocolate peanut butter cookie. A salted caramel or cinnamon-flavored protein would also be delicious. Just make sure it’s a flavor that pairs well with peanut butter.
- Nut Butter Options: If you’re not a fan of peanut butter or have an allergy, you can substitute it with creamy almond butter or cashew butter. The macros will shift slightly, but the recipe structure will hold up well. Use a natural, drippy nut butter for the best results.
- Fun Add-Ins: Feel free to mix in about ¼ cup of sugar-free chocolate chips, cacao nibs, or chopped nuts like walnuts or pecans. Add them to the dough at the very end, after the wet and dry ingredients are combined. This is an easy way to add texture and more flavor.
- For a Vegan/Dairy-Free Version: This is a bit more advanced, but you can experiment with a plant-based vanilla protein powder, a dairy-free yogurt (like a thick coconut or almond-based one), and a flax egg (1 tablespoon ground flaxseed mixed with 3 tablespoons water). The texture will be different—likely a bit denser—but it’s a workable option.
The key is to not be afraid to experiment. The base recipe is solid. Start with small changes and see what you like best. Making a recipe your own is one of the best ways to stay engaged and consistent with your nutrition plan.
High-Protein Peanut Butter Cookie Recipe
Description: A soft, chewy, and delicious peanut butter cookie packed with protein to crush cravings and support your fat loss goals. Perfect for a healthy dessert or post-workout snack.
Prep Time: 10 minutes | Chill Time: 30 minutes | Cook Time: 10 minutes
Servings: 18 cookies
Macros per Serving | Calories: 95 | Protein: 7g | Fat: 6g | Carbohydrates: 5g
Ingredients
- ¾ cup powdered peanut butter
- ⅓ cup vanilla whey protein powder
- ¼ cup granulated monk fruit or erythritol sweetener
- ¼ teaspoon baking soda
- ⅛ teaspoon salt
- ½ cup creamy peanut butter
- ¼ cup nonfat plain Greek yogurt
- 1 large egg
- 1 teaspoon vanilla extract
Instructions
- Preheat oven to 350°F (175°C) and line a baking sheet with parchment paper.
- In a medium bowl, whisk together powdered peanut butter, protein powder, sweetener, baking soda, and salt.
- In a large bowl, beat creamy peanut butter, Greek yogurt, egg, and vanilla until smooth.
- Add the dry ingredients to the wet ingredients and mix on low speed until a thick dough forms.
- Chill the dough for at least 30 minutes.
- Roll dough into 1-inch balls and place on the baking sheet.
- Use a fork to create a criss-cross pattern on top of each cookie.
- Bake for 8-10 minutes, until edges are lightly golden. Centers will be soft.
- Cool on the baking sheet for 5 minutes before moving to a wire rack to cool completely.
Notes
The type of protein powder you use will affect the final texture. A whey-casein blend is often best for baking. Do not overbake the cookies, as they will become dry and crumbly upon cooling.
FAQs About Peanut Butter Cookie For Weight Loss
Here are some straightforward answers to the most common questions I receive about this peanut butter cookie recipe.
Can I make this peanut butter cookie recipe without protein powder?
You can try, but I don’t recommend it for this specific recipe. The protein powder isn’t just for a protein boost; it’s a key structural ingredient. It acts like flour, providing bulk and absorbing moisture. If you simply omit it, the dough will be far too wet and greasy, and the cookies will spread into thin, oily crisps. The balance of wet-to-dry ingredients is carefully calibrated, and removing a major dry component will throw it off completely.
If you wanted to experiment, you could try substituting the protein powder with more powdered peanut butter or perhaps a small amount of oat flour or almond flour. However, this would fundamentally change the recipe and its nutritional profile. You would lose the significant protein content that makes these cookies so effective for hunger management and fat loss. My goal with this recipe was to create a treat that is high in protein, so removing that element defeats the primary purpose. For best results, stick with the protein powder.
Why did my peanut butter cookies turn out dry and crumbly?
Dry cookies are almost always a result of one of two things: the type of protein powder used or overbaking. Some protein powders, particularly pure whey isolates, are extremely absorbent and can suck the moisture right out of a recipe. A whey-casein blend typically bakes much better, as the casein helps retain moisture and results in a softer, more tender texture. If you’re using a whey isolate and finding your results are dry, that could be the culprit.
The other likely issue is overbaking. The visual cues for these cookies are subtle. You need to pull them from the oven when the edges are just set and lightly golden, and the centers still look soft and slightly underdone. They will continue to bake from the residual heat of the pan as they cool. If you wait until the center looks fully cooked, they will be hard and crumbly once they cool down completely. Always err on the side of underbaking them by a minute.
Is this high-protein peanut butter cookie recipe good for meal prep?
Absolutely. This recipe is fantastic for meal prep, and that’s one of the main reasons I designed it this way. For those of us with ADHD, having healthy, appealing options ready to go is a complete game-changer. It removes the guesswork and decision fatigue when you’re hungry, which is often when we reach for less-than-ideal snacks. Spending 30 minutes on a Sunday to bake a batch of these cookies sets you up with a perfect snack for the entire week.
The best way to incorporate them into your meal prep is to bake the full batch and let them cool completely. Then, immediately portion them out into small bags or containers based on your daily macro goals. You can store these pre-portioned packs in the pantry for easy access or, even better, stick most of them in the freezer. That way, you have a controlled, delicious, protein-packed treat ready to grab whenever you need it, preventing the temptation to eat the whole batch at once.
Can I make these peanut butter cookies gluten-free?
The great news is that this recipe is naturally gluten-free as written. None of the core ingredients—peanut butter, protein powder, eggs, Greek yogurt—contain gluten. We aren’t using any traditional wheat flour. This makes it an excellent option for anyone with celiac disease or gluten sensitivity without needing any special substitutions or alterations to the recipe.
However, it’s always crucial to check the labels of your specific ingredients if you have a serious sensitivity or allergy. Some brands of protein powder or powdered peanut butter can be processed in facilities that also handle wheat products, leading to a risk of cross-contamination. To be completely safe, look for products that are certified gluten-free to ensure there are no hidden sources of gluten in your ingredients.
What is the best kind of peanut butter to use for this cookie recipe?
For the best texture and flavor, I strongly recommend using a creamy, natural-style peanut butter. Look at the ingredients list on the jar. It should say “peanuts” and maybe “salt.” That’s it. This type of peanut butter has a runnier consistency because the oil separates naturally, which helps it mix better with the other wet ingredients to create a smooth, cohesive dough.
I would advise against using “no-stir” conventional brands like Jif or Skippy for this recipe. Those products contain added sugars, hydrogenated oils, and emulsifiers. The added oils change the fat composition and can make the cookies greasy, while the added sugar will throw off the sweetness and macros. Sticking with a natural peanut butter gives you a more intense peanut flavor and keeps the recipe clean and aligned with our fat loss goals.
Try These High-Protein Recipes Next
If you enjoyed this simple and effective recipe, here are a few other high-protein treats you should try.
- High Protein Chocolate Chip Cookies – A macro-friendly version of the ultimate classic cookie, perfect for satisfying your sweet tooth.
- Easy High Protein Sugar Cookies – Soft, chewy sugar cookies that are simple to make and packed with protein.
- Nutella Stuffed Peanut Butter Cookies – A more indulgent take on peanut butter cookies for when you want an extra special treat.
Building a collection of go-to healthy recipes is the key to long-term success.