If there’s one food that screams comfort, it’s a warm, flaky biscuit. For years, I thought they were completely off-limits. During the first phase of my fitness journey, where I lost about 70 pounds without medication, I was running on pure discipline. That meant cutting out a lot of the foods I loved, and classic biscuits were at the top of that list.
They were just too high in fat and refined carbs. They’d spike my blood sugar, leave me hungry an hour later, and frankly, I could never eat just one. It was an all-or-nothing food for my ADHD brain. So, I avoided them entirely. It worked for a while, but it wasn’t sustainable. Living without your favorite comfort foods forever is a recipe for burnout.
When I started ADHD FIT, I knew I had to find a better way. A sustainable lifestyle isn’t about restriction; it’s about integration. It’s about taking the foods you love and making them work for your goals, not against them. That’s what motivated me to develop this high-protein biscuit recipe. I wanted that fluffy, buttery goodness without the energy crash and calorie bomb.
This recipe is the result of a lot of trial and error. It’s designed to satisfy that craving for comfort food while keeping you on track with your fat loss goals. It’s a biscuit that works with your brain, providing steady energy and protein to keep you full. It’s a perfect example of our core principle: flexible eating always wins.
Skip to My Flexibe Diet Recipe!
Why These Biscuits Are Great For Fat Loss
Let’s be brutally practical. When you’re trying to lose fat, every calorie needs to pull its weight. A traditional biscuit is mostly refined flour and butter. It tastes amazing, but it offers very little in terms of nutrition that keeps you full and satisfied. That’s where this recipe changes the game entirely.
First and foremost, we’ve packed these biscuits with protein. The addition of unflavored protein powder and non-fat Greek yogurt significantly boosts the protein content. Why does that matter? Protein is the king of macros for fat loss. It’s highly satiating, meaning it keeps you feeling full for much longer than carbs or fats. This helps crush cravings and prevent the mindless snacking that can derail your progress.
We also engineered the ingredients to manage hunger and energy levels. By using a blend of whole wheat and all-purpose flour, we’re adding fiber. Fiber slows down digestion, which helps prevent the sharp blood sugar spikes and crashes you get from regular biscuits. No more feeling tired and foggy an hour after breakfast. You get steady, sustained energy, which is a lifesaver for the ADHD brain.
Finally, this recipe embraces the principle of flexible eating. Banning foods you love is a short-term strategy that almost always leads to a long-term binge. By having a go-to biscuit recipe that fits your macros, you can enjoy your comfort food without guilt or the feeling of being on a restrictive diet. This psychological win is huge. It makes your fat loss journey feel less like a punishment and more like a sustainable lifestyle you can actually stick with. Consistency beats intensity, every single time.
Ingredients You’ll Need for Biscuits
Getting these biscuits right is all about using a few smart ingredients that boost nutrition without sacrificing that classic flavor and texture. Everything here is straightforward and easy to find. The key is how they work together to create a macro-friendly masterpiece.
The real game-changer in this recipe is the combination of unflavored protein powder and non-fat Greek yogurt. The protein powder adds a significant protein boost that you won’t even taste, while the Greek yogurt stands in for traditional buttermilk. It provides acidity to activate the baking soda for a beautiful rise, adds more protein, and keeps the biscuits incredibly moist with much less fat.
Here’s the full list of what you’ll need:
- 1 cup whole wheat flour
- 1 cup all-purpose flour
- 1/4 cup unflavored whey or casein protein powder
- 2 tsp baking powder
- 1/2 tsp baking soda
- 1/4 tsp salt
- 1/4 cup cold, unsalted butter, cut into small pieces
- 1 large egg, lightly beaten
- 3/4 cup plain non-fat Greek yogurt
- 2 tbsp unsweetened almond milk (or more, as needed)
- 1 tbsp maple syrup or honey (optional, for a hint of sweetness)
A quick note on the ingredients. For the protein powder, make sure it’s truly unflavored. A vanilla-flavored powder will completely change the taste, making it less suitable for savory dishes. I find that a whey-casein blend or just casein works best for baking as it tends to keep things more moist than whey alone, but plain whey will work fine.
Also, make sure your butter is cold. Straight from the fridge is perfect. Cold butter creates little pockets of steam as it melts in the oven, which is the secret to getting those flaky layers everyone loves in a good biscuit. Don’t skip this detail.
How To Make Biscuits (Step-By-Step)
Making biscuits can seem intimidating, but this process is simple and forgiving. We’re working with our ADHD brains here, so the key is to break it down into small, manageable steps. Don’t aim for perfection. Aim for done.
Step 1: Prep Your Oven and Dry Ingredients
First things first, preheat your oven to 400°F (200°C). While it’s heating up, line a baking sheet with parchment paper. This is a crucial ADHD-friendly tip: prepping your station prevents that last-minute scramble and makes cleanup a breeze. In a large bowl, whisk together both flours, the protein powder, baking powder, baking soda, and salt. Whisking is important because it distributes the leavening agents evenly, ensuring every biscuit rises perfectly.
Step 2: Cut in the Cold Butter
Take your cold, cubed butter and add it to the dry ingredients. Using a pastry blender or just your fingertips, cut the butter into the flour until the mixture looks like coarse crumbs. You want to see some pea-sized chunks of butter remaining. This is not the time to be a perfectionist. Overworking the butter will melt it, and you’ll lose the flakiness. Work quickly and confidently.
Step 3: Mix the Wet Ingredients
In a separate, smaller bowl, whisk the egg, Greek yogurt, and optional maple syrup or honey together until smooth. Keeping the wet and dry ingredients separate until the very end is a core principle of biscuit making. It prevents gluten from developing too early, which would lead to a tough biscuit instead of a tender one.
Step 4: Combine and Gently Knead
Pour the wet mixture into the dry ingredients. Use a fork to stir until a shaggy, slightly sticky dough forms. The key phrase here is “just combined.” Stop mixing the second you don’t see any more dry flour. Dump the dough onto a lightly floured surface and knead it gently just three or four times. All you’re doing is bringing it together into a cohesive ball.
Step 5: Cut and Bake the Biscuits
Pat the dough out to a thickness of about half an inch. Don’t use a rolling pin unless you have to; the warmth from your hands is fine. Use a round cutter to stamp out your biscuits. When you do, press straight down and pull straight up. Twisting the cutter can seal the edges and prevent a good rise. Place them on your prepared baking sheet, brush the tops with a little almond milk, and bake for 12-15 minutes until they are beautifully golden brown. Let them cool for a few minutes before diving in.
How To Serve Biscuits (ADHD-Friendly)
These protein biscuits are incredibly versatile, which is perfect for an ADHD-friendly kitchen. A flexible food means less decision fatigue. You can use them for breakfast, lunch, or as a side with dinner. The goal is to pair them with other foods that support your energy and fat loss goals.
My favorite way to eat them is for a high-protein breakfast. A single biscuit is the perfect vehicle for a scrambled egg and a slice of cheese or a lean sausage patty. This creates a balanced meal with protein, healthy fats, and complex carbs. It’s a breakfast sandwich that will actually keep you full until lunch, helping you avoid that mid-morning energy slump that often leads to reaching for sugary snacks.
For those of us with ADHD, planning ahead is everything. Here are a few brutally practical ways to incorporate these biscuits into your week:
- Breakfast Sandwiches: On Sunday, bake a batch of these biscuits. At the same time, cook up some egg rounds (in a muffin tin) and lean breakfast sausage. Store everything separately in the fridge. Each morning, just assemble and microwave for 60 seconds. Breakfast is done.
- Savory Shortcakes: Instead of a sweet shortcake, use these biscuits as a base for a savory meal. Top a warm biscuit with shredded rotisserie chicken (a great store-bought shortcut) and a simple, low-fat gravy made with a cornstarch slurry and chicken broth. Add a side of steamed green beans for a complete, comforting dinner.
- Soup and Salad Side: A warm biscuit is the perfect companion to a big bowl of veggie-packed soup or a hearty salad. It adds that satisfying, carby element to the meal without overloading you. It makes a simple soup feel like a complete, intentional meal.
By batch-prepping the biscuits, you create a “grab and go” component that you can easily pair with a protein and a vegetable. This reduces the mental energy required to eat healthy during a busy week. You’re making a decision once that pays off for days.
How To Store, Reheat, and Reuse Biscuits
One of the best things about this biscuit recipe is how well it lends itself to meal prep. For those of us with ADHD, having ready-to-go food options is non-negotiable. It’s the barrier between a healthy choice and ordering takeout because you’re out of energy. Storing these biscuits correctly ensures you have a delicious, macro-friendly option available anytime.
Once the biscuits have cooled completely, you can store them in an airtight container at room temperature. They will stay fresh for about 2-3 days. Any longer than that and they start to get a bit dry. I find that placing a paper towel in the container helps absorb any excess moisture and keeps them from getting soggy.
For longer-term storage, the freezer is your best friend. This is my preferred method because it locks in freshness and gives me maximum flexibility. Here are two ways you can freeze them:
- Freeze After Baking: Let the baked biscuits cool completely. Place them on a baking sheet in a single layer and pop them in the freezer for about an hour, until they’re firm. This is called flash-freezing, and it prevents them from sticking together. Once frozen, transfer them to a freezer-safe bag or container. They’ll last for up to 3 months.
- Freeze Before Baking: You can also freeze the unbaked, cut-out biscuit dough. Place the raw biscuits on a parchment-lined baking sheet and flash-freeze them. Once solid, transfer them to a freezer bag. You can bake them straight from frozen, no thawing required. Just add a few extra minutes to the baking time.
To reheat, the oven or a toaster oven is your best bet for restoring that fresh-baked texture. A quick 5-7 minutes at 350°F (175°C) will warm them through and crisp up the outside. While you can use a microwave in a pinch, it can make them a bit soft and chewy. If you do use the microwave, wrap the biscuit in a damp paper towel and heat it for just 20-30 seconds. This is perfect for when you need a quick breakfast sandwich on a busy morning.
Easy Swaps & Variations for Biscuits
The beauty of a flexible system is that you can adapt it to what you have on hand or what fits your specific dietary needs. This biscuit recipe is a solid foundation, but don’t be afraid to make it your own. Perfection is the enemy of progress, so if a small swap means you actually get the recipe made, do it.
One of the most common questions I get is about making recipes gluten-free. While I haven’t tested a GF version extensively, you could certainly try using a good quality, all-purpose gluten-free flour blend that contains xanthan gum. The texture will be a bit different, likely more dense and cake-like, but it’s a viable option if you have a gluten intolerance.
Here are a few other easy swaps and fun variations you can try to change things up:
- Make Them Cheesy: For a savory kick, fold in about 1/2 cup of shredded sharp cheddar cheese and a pinch of garlic powder or cayenne pepper into the dry ingredients. These are fantastic for breakfast sandwiches or as a side for chili.
- Dairy-Free Version: To make these dairy-free, you can substitute the butter with a cold, plant-based butter substitute. For the Greek yogurt, use a plain, unsweetened dairy-free yogurt, like one made from coconut or almonds. You will also want to use a plant-based protein powder (like pea or soy) instead of whey or casein.
- Herb Biscuits: Add 2 tablespoons of freshly chopped herbs to the dry ingredients. Chives, rosemary, or thyme work wonderfully. This is an easy way to add a ton of flavor without adding calories, and it makes them a perfect side for roasted chicken or steak.
- Sweeter Version: If you want a biscuit to serve with fruit and a dollop of yogurt, you can increase the maple syrup or honey to 2-3 tablespoons and add 1/2 teaspoon of cinnamon to the dry ingredients for a warmer, sweeter flavor profile.
Remember, the core of the recipe—the protein powder and yogurt base—is what makes it work for fat loss. As long as you keep that foundation, feel free to experiment with the flavorings to prevent boredom and keep your meals exciting.
High-Protein Buttermilk-Style Biscuits
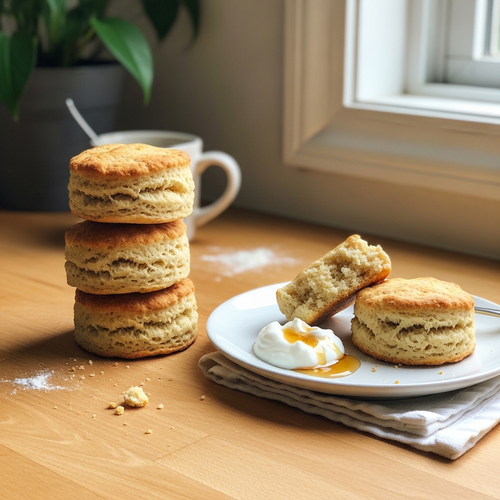
Description: Fluffy, tender, and flaky biscuits packed with protein to support fat loss goals. These macro-friendly biscuits use Greek yogurt and protein powder to keep you full and satisfied, making them the perfect comfort food for a sustainable fitness lifestyle.
Prep Time: 10 minutes | Cook Time: 15 minutes
Servings: 12 biscuits
Macros per Serving | Calories: 123 | Protein: 6g | Fat: 4g | Carbohydrates: 15g
Ingredients
- 1 cup whole wheat flour
- 1 cup all-purpose flour
- 1/4 cup unflavored whey or casein protein powder
- 2 tsp baking powder
- 1/2 tsp baking soda
- 1/4 tsp salt
- 1/4 cup cold, unsalted butter, cut into small pieces
- 1 large egg, lightly beaten
- 3/4 cup plain non-fat Greek yogurt
- 2 tbsp unsweetened almond milk (or more, as needed)
- 1 tbsp maple syrup or honey (optional)
Instructions
- Preheat oven to 400°F (200°C) and line a baking sheet with parchment paper.
- In a large bowl, whisk together flours, protein powder, baking powder, baking soda, and salt.
- Cut in the cold butter with your fingers or a pastry blender until the mixture resembles coarse crumbs.
- In a small bowl, whisk the egg, Greek yogurt, and optional honey/syrup.
- Pour wet ingredients into dry and stir with a fork until just combined. Do not overmix.
- Turn dough onto a floured surface, knead gently 3-4 times, and pat to 1/2-inch thickness.
- Cut out biscuits with a round cutter, pressing straight down. Place on baking sheet.
- Brush tops with almond milk and bake for 12-15 minutes, until golden brown.
Notes
For the flakiest biscuits, make sure your butter and Greek yogurt are very cold. Work the dough as little as possible to keep it tender. Biscuits can be frozen before or after baking for easy meal prep.
FAQs About Biscuits For Weight Loss
Here are some straightforward answers to the most common questions I receive about this biscuit recipe.
Can I make this biscuit recipe without protein powder?
Yes, you absolutely can make this biscuit recipe without protein powder. If you choose to omit it, you should replace the 1/4 cup of protein powder with an equal amount of flour (I’d suggest using all-purpose flour for the best texture). This will ensure the ratio of wet to dry ingredients remains correct and your dough has the right consistency.
However, it’s important to understand the trade-off. The protein powder is a key component that makes these biscuits align with fat loss goals. Removing it will lower the total protein per biscuit significantly, which means they won’t be as filling or as effective at managing hunger. The recipe will still be healthier than a traditional biscuit due to the Greek yogurt and whole wheat flour, but it loses some of its “superpower” for satiety. If you don’t have protein powder, this is a fine adjustment, but if your goal is hunger management, I highly recommend keeping it in.
Why is my protein biscuit dough so sticky?
Biscuit dough, especially one made with Greek yogurt, is supposed to be slightly sticky and shaggy. That’s a good sign. It means you haven’t overworked it, which is the number one cause of tough, dense biscuits. A sticky dough has a high moisture content, which translates to a tender, moist final product. If you add too much flour to get rid of the stickiness, you’ll end up with dry, crumbly biscuits.
The trick is to handle it minimally and with confidence. Use a generous amount of flour on your work surface and on your hands when you turn the dough out of the bowl. This creates a barrier between the sticky dough and everything else. When you pat it out, do it gently. If it’s sticking too much, just sprinkle a tiny bit more flour on top. Remember, you’re only kneading it 3-4 times. You are not trying to create a smooth, elastic bread dough. Embrace the slight messiness; it’s the secret to a perfect texture.
Is this high-protein biscuit recipe good for meal prep?
This biscuit recipe is fantastic for meal prep. In fact, it’s one of the main reasons I designed it this way. For those of us with ADHD, having pre-made, healthy components ready to go is a complete game-changer. It removes the friction and decision-making that can lead to poor food choices on low-motivation days. You can bake a full batch on a Sunday and have a key part of your breakfast or lunch ready for the next few days.
The best meal prep strategy is to use your freezer. Bake the biscuits as directed, let them cool completely, and then freeze them. This way, they’ll last for months and you can just pull one out whenever you need it. Reheating them in a toaster oven or air fryer for a few minutes makes them taste almost freshly baked. You can also freeze the unbaked dough, which allows you to have truly fresh-baked biscuits in about 15 minutes with zero prep work. Having these on hand makes building a balanced meal, like a quick egg sandwich, incredibly simple.
What makes this a “healthy” biscuit recipe?
This is a great question. The term “healthy” can be subjective, but in the context of fat loss and sustainable energy, this biscuit recipe has several key advantages over a traditional one. First, the macronutrient profile is significantly improved. We’ve intentionally increased the protein using Greek yogurt and protein powder, and increased the fiber by using whole wheat flour. Protein and fiber are crucial for making you feel full and satisfied, which helps control overall calorie intake.
Second, we’ve reduced the amount of saturated fat. While butter is essential for flavor and flakiness, this recipe uses less of it than most traditional recipes because the Greek yogurt provides a lot of the necessary moisture and tenderness. Finally, it helps manage blood sugar. The combination of protein and fiber slows down the digestion of carbohydrates, leading to a more gradual release of energy rather than a sharp spike and crash. This provides sustained energy and focus, which is especially beneficial for managing ADHD symptoms.
Can I use these biscuits for sandwiches?
Absolutely. These biscuits are sturdy enough to make excellent sandwiches, which is one of my favorite ways to use them. They are not as crumbly as some super-flaky traditional biscuits, which means they hold together well when sliced in half and filled. Their savory, slightly tangy flavor from the Greek yogurt pairs well with a wide variety of fillings, making them incredibly versatile for quick meals.
For a classic breakfast sandwich, they are perfect with a fried egg, a slice of cheese, and a lean protein like Canadian bacon or a turkey sausage patty. For lunch, you could use them to make mini sandwiches with sliced deli turkey, a bit of light mayo, and some lettuce. They are also fantastic for mini pulled chicken or pork sandwiches. Just be mindful of your fillings to ensure the final sandwich aligns with your overall fat loss goals.
Try These High-Protein Recipes Next
If you loved how simple and satisfying these high-protein biscuits are, here are a few other recipes designed to work with your ADHD brain, not against it.
- High-Protein Sugar Cookies: A guilt-free way to satisfy your sweet tooth, these cookies are packed with protein to keep you full and your cravings in check.
- ADHD-Friendly Protein Cornbread: The perfect side for a bowl of chili or soup, this cornbread is moist, flavorful, and macro-friendly.
- Classic Sausage Gravy: For a truly comforting meal, pair these protein biscuits with a lighter take on classic sausage gravy. This recipe from This Gal Cooks is a great place to start.
Give these a try next time you’re looking for a simple, delicious meal that fits your lifestyle.