If you looked in my fridge at any point over the last five years, you would find a batch of these no bake protein bars. They have been a non-negotiable part of my routine, both during my 70-pound fat loss journey and now for maintenance. When I first started, the idea of “meal prep” felt overwhelming. My ADHD brain wanted results now, not after an hour of complicated cooking and baking.
That’s where the beauty of a no-bake recipe came in. It’s brutally practical. Mix, press, chill, and cut. The instant gratification of seeing a tray of healthy snacks ready for the week was a huge win. It short-circuited the procrastination and overwhelm that so often derailed my efforts.
I needed a tool to fight my biggest enemy: the 3 PM snack attack. That’s when my willpower was lowest and the call of the vending machine or gas station candy aisle was loudest. Having these high-protein, delicious bars ready to go was my secret weapon. They tasted like a treat but were built to crush cravings and keep me full, making it so much easier to stay consistent. This recipe is the result of years of tweaking to get the perfect balance of flavor, texture, and macros for fat loss.
Skip to My Flexibe Diet Recipe!
Why No Bake Protein Bars Are Great For Fat Loss
Let’s be direct. Food is about 75 percent of your fat loss results. You can’t out-train a bad diet, and consistency with your nutrition is what moves the needle. These no bake protein bars are designed specifically to make that consistency easier, especially for the ADHD brain.
First, we lead with protein. Each bar is packed with high-quality protein from a whey/casein blend and Greek yogurt. Protein is the superstar macro for fat loss. It keeps you feeling full and satisfied for hours, which drastically reduces mindless snacking and overeating. It also helps preserve your muscle mass while you’re in a calorie deficit, ensuring you’re losing fat, not just weight.
Second, this recipe is a masterclass in hunger management. Cravings are not a moral failing; they are a biological signal. This recipe tackles them head-on. The protein, healthy fats from peanut butter, and fiber from oat flour work together to stabilize your blood sugar. You avoid the energy spikes and crashes that send you running for sugary junk food. It feels like an indulgence, which helps prevent the restriction-binge cycle.
Finally, convenience is king. The biggest challenge for many of us with ADHD is planning ahead. When you’re hungry and your executive function is tapped, you’ll grab whatever is fastest. Having a batch of these in the fridge is a system that works with your brain, not against it. It’s a pre-made good decision, waiting for you when you need it most. This is how you build a sustainable lifestyle, not just follow a temporary diet.
Ingredients You’ll Need for No Bake Protein Bars
We keep the ingredients list simple and focused on nutrient-dense foods that work together to create the perfect taste and texture. There are no weird, hard-to-find items here. Everything serves a purpose, from providing protein to ensuring the bars hold together perfectly.
The secret weapon in this recipe is the combination of a whey/casein protein blend and non-fat Greek yogurt. The protein blend creates a much better, less chalky texture than whey alone, while the Greek yogurt adds a creamy, dense quality and an extra protein boost without adding fat. It’s a simple hack that elevates these bars from good to great.
- Dry Ingredients:
- 1 ½ cups (120g) Vanilla or Chocolate Whey/Casein Blend Protein Powder
- ½ cup (40g) Oat Flour (blend rolled oats into a fine powder)
- ¼ cup (30g) Coconut Flour or Almond Flour
- 2-4 tablespoons Zero-Calorie Monk Fruit/Erythritol Sweetener Blend (to taste)
- Pinch of Sea Salt
- Wet Ingredients:
- ½ cup (120g) Unsweetened Almond Milk or Skim Milk
- ¼ cup (64g) Creamy Natural Peanut Butter or Almond Butter
- ¼ cup (57g) Non-fat Plain Greek Yogurt
- 1 teaspoon Vanilla Extract
- Optional Mix-ins:
- ¼ cup Sugar-Free Chocolate Chips
- ¼ cup Chopped Nuts or Seeds
A quick note on protein powder. I strongly recommend a blend of whey and casein. Casein absorbs more liquid and creates a thicker, more satisfying dough that results in a brownie-like texture. If you only have whey, you may need to reduce the milk slightly. For the peanut butter, choose a natural brand where the only ingredients are peanuts and salt. The oily kind works best here, as it mixes in more smoothly than the thicker, no-stir varieties.
How To Make No Bake Protein Bars (Step-By-Step)
This process is designed to be as straightforward as possible. There is no oven, no precise timing, and very little that can go wrong. It’s a perfect recipe for a low-motivation day when you still want to set yourself up for a successful week.
Step 1: Prepare Your Pan
First, grab an 8×8 inch baking pan. Line it with parchment paper, making sure to leave some extra paper hanging over the sides. These overhangs will act as handles later, allowing you to lift the entire block of bars out easily for cutting. This is a crucial ADHD-friendly tip. It eliminates the frustration of trying to dig the first bar out of the corner of the pan and makes cleanup practically nonexistent.
Step 2: Whisk the Dry Ingredients
In a large mixing bowl, add your protein powder, oat flour, coconut or almond flour, sweetener, and a pinch of salt. Use a whisk to combine everything thoroughly. Don’t skip this step. Whisking breaks up any clumps in the protein powder and ensures the sweetener and salt are evenly distributed. This guarantees every bite tastes great, with no surprise pockets of unmixed powder.
Step 3: Combine the Wet Ingredients
In a separate, medium-sized bowl, mix together your almond milk, creamy peanut butter, Greek yogurt, and vanilla extract. Stir until the mixture is completely smooth and uniform. Getting the peanut butter and yogurt fully incorporated here, before adding them to the dry ingredients, is key to achieving a consistent dough without over-mixing later.
Step 4: Combine Wet and Dry Ingredients
Pour the smooth wet mixture into the large bowl with the dry ingredients. Switch to a sturdy spatula or spoon and start mixing. The dough will quickly become very thick and stiff. Keep working it until no dry spots remain. If you’re adding any optional mix-ins like chocolate chips or nuts, fold them in now. Don’t be afraid to use your hands to fully combine everything if needed.
Step 5: Press the Dough into the Pan
Transfer the protein bar dough into your prepared pan. This is where you’ll need a little muscle. The dough is dense. Use the back of your spatula or your hands to press it down firmly and evenly across the entire pan. A great trick is to slightly dampen your fingertips or the spatula with water to prevent sticking. This makes the process much smoother and less frustrating. Get it as flat and compact as possible.
Step 6: Let the Bars Chill and Set
Cover the pan and place it in the freezer for at least 30 minutes or in the refrigerator for 1-2 hours. This step is essential for allowing the bars to firm up. The coconut flour and protein powder will absorb the moisture, and the peanut butter will solidify, creating a firm, sliceable texture. The freezer is faster if you’re in a hurry.
Step 7: Lift and Cut Your Protein Bars
Once the bars are firm to the touch, take the pan out. Use the parchment paper handles you created in step one to lift the entire block out and place it on a cutting board. Use a large, sharp knife to cut it into 12 equal bars. A clean, sharp knife will give you nice, straight edges.
Step 8: Store Your Finished Bars
Your no bake protein bars are now ready. For the best texture, they should be stored in the refrigerator. We’ll cover the best ways to do that in the storage section below.
How To Serve No Bake Protein Bars (ADHD-Friendly)
Having these bars ready is one thing; incorporating them into your life is how you get results. Their versatility is what makes them such a powerful tool for anyone, but especially for those of us managing ADHD. They are a pre-made solution for moments of low executive function.
Think of these bars as your go-to defense against poor food choices. They are perfect for a variety of situations where hunger and impulsivity might otherwise take over. Here are a few ways I use them every week:
- The Pre-Workout Boost: Eating a full meal before a workout can feel heavy. One of these bars about 30-45 minutes before hitting the gym provides quick-digesting carbs from the oats and protein to fuel your muscles without weighing you down.
- The Afternoon Slump Savior: We all know that 3 PM feeling when your energy tanks and your brain screams for sugar. This bar provides steady energy from protein and healthy fats, satisfying your sweet tooth without the subsequent crash. It helps you stay productive and on track.
- The Healthy Dessert: After dinner, when you’re craving something sweet, this is the perfect answer. It feels like a rich, decadent treat, especially with a few sugar-free chocolate chips mixed in. It’s a planned indulgence that fits your macros.
Here’s a critical ADHD tip: fight object permanence. Don’t hide these in a drawer in your fridge. Store them in a clear, airtight container right at eye level. When you open the fridge, they should be one of the first things you see. If you see them, you will remember you have them, and you will use them. It removes the mental load of having to “remember” your healthy options.
How To Store, Reheat, and Reuse No Bake Protein Bars
Proper storage is essential to keep your no bake protein bars fresh, delicious, and ready to grab whenever you need them. Since there’s no baking involved, you don’t need to worry about reheating. The goal is to maintain their firm, chewy texture and prevent them from drying out.
Your two best options for storage are the refrigerator and the freezer, depending on how quickly you plan to eat them. I recommend making a batch on Sunday to have ready for the entire week.
- In the Refrigerator: This is the ideal method for short-term storage. Place the cut bars in an airtight container. You can stack them with a small piece of parchment paper in between each layer to prevent any sticking. They will stay fresh and delicious for up to one week. They are perfect to eat straight from the fridge.
- In the Freezer: The freezer is your best friend for long-term storage and batch prepping. For ADHD-friendly convenience, I recommend wrapping each bar individually in plastic wrap or parchment paper. Then, place all the wrapped bars into a larger freezer-safe bag or container. This allows you to grab just one at a time. They will last for up to a month in the freezer.
To enjoy a bar from the freezer, you can eat it frozen for a very chewy, firm texture, or let it sit on the counter for about 10-15 minutes to soften up. There is no need for a microwave. As for reusing, you can crumble a bar over a bowl of Greek yogurt and berries for a high-protein parfait or even blend one into a smoothie to add a delicious cookie-dough flavor and a boost of nutrients.
Easy Swaps & Variations for No Bake Protein Bars
One of our core principles is that flexible eating always wins. This recipe is designed to be a template, not a rigid set of rules. You can easily adapt it based on what you have in your pantry, your dietary needs, or just your flavor preferences. Perfection isn’t the goal; consistency is.
Don’t be afraid to experiment. Finding a version you absolutely love means you’ll be more likely to make it consistently, and that’s what drives long-term success. Here are some simple and reliable swaps you can make:
- For a Different Protein Source: While a whey/casein blend is recommended for texture, you can use 100% whey protein. Just be prepared that the dough might be a bit stickier. You may need to add an extra tablespoon of coconut or oat flour to compensate. For a vegan version, use a high-quality plant-based protein blend. Plant proteins are very absorbent, so you will likely need to add more almond milk to get the right consistency.
- To Make It Nut-Free: If you have a nut allergy, simply swap the peanut or almond butter for sunflower seed butter (SunButter). Also, be sure to use oat flour and coconut flour, not almond flour. Double-check that your protein powder is manufactured in a nut-free facility if cross-contamination is a concern.
- To Change the Flavor Profile: The possibilities are endless here. Use chocolate protein powder instead of vanilla for a rich, brownie-like bar. Add 1-2 tablespoons of unsweetened cocoa powder for a deeper chocolate flavor. Mix in a teaspoon of cinnamon or pumpkin pie spice for a fall-inspired treat. Or, try different extracts like almond or peppermint instead of vanilla.
- For Different Mix-ins: Sugar-free chocolate chips are a great choice, but you can also use chopped walnuts, pecans, or almonds for a nice crunch. Dried fruit like raisins or chopped dates can also be used, but be mindful that they will add extra sugar and calories.
ADHD-Friendly No Bake Protein Bars
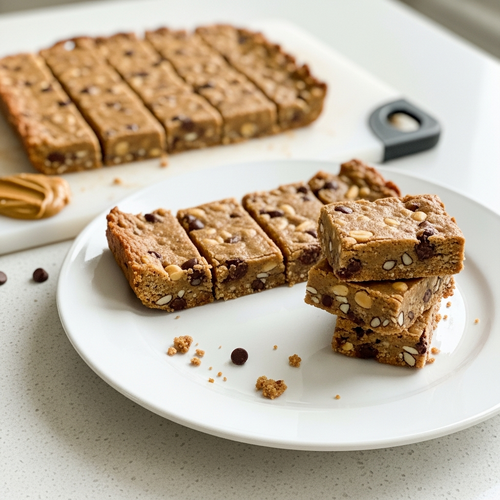
Description: Easy, no-bake protein bars packed with flavor and protein to crush cravings and keep you on track with your fat loss goals. The perfect grab-and-go snack for a busy lifestyle.
Prep Time: 10 minutes | Chill Time: 30 minutes
Servings: 12 bars
Macros per Serving | Calories: 160 | Protein: 15g | Fat: 8g | Carbohydrates: 9g
Ingredients
- 1 ½ cups (120g) Vanilla or Chocolate Whey/Casein Blend Protein Powder
- ½ cup (40g) Oat Flour
- ¼ cup (30g) Coconut Flour or Almond Flour
- 2-4 tbsp Zero-Calorie Monk Fruit/Erythritol Sweetener
- Pinch of Sea Salt
- ½ cup (120g) Unsweetened Almond Milk
- ¼ cup (64g) Creamy Natural Peanut Butter
- ¼ cup (57g) Non-fat Plain Greek Yogurt
- 1 tsp Vanilla Extract
- Optional: ¼ cup Sugar-Free Chocolate Chips
Instructions
- Line an 8×8 inch pan with parchment paper, leaving an overhang on the sides.
- In a large bowl, whisk together protein powder, oat flour, coconut flour, sweetener, and salt.
- In a separate bowl, mix almond milk, peanut butter, Greek yogurt, and vanilla until smooth.
- Pour wet ingredients into dry and mix until a thick dough forms. Fold in optional chocolate chips.
- Press the dough firmly and evenly into the prepared pan.
- Freeze for 30 minutes or refrigerate for 1-2 hours until firm.
- Lift from the pan using the parchment paper and cut into 12 bars.
Notes
The dough will be very thick and sticky. Wetting your hands or a spatula helps when pressing it into the pan. Store in an airtight container in the refrigerator.
FAQs About No Bake Protein Bars For Weight Loss
Here are some straightforward answers to the most common questions I receive about this no bake protein bars recipe.
Are no bake protein bars actually good for weight loss?
Yes, absolutely, but the key is in the ingredients. Many store-bought bars are essentially candy bars with added protein, loaded with sugar, unhealthy fats, and artificial ingredients that can actually increase your cravings. Homemade no bake protein bars like these put you in complete control.
This recipe is specifically designed for weight loss because it prioritizes protein and fiber to keep you full and satisfied, helping you maintain a calorie deficit without feeling constantly hungry. By making them yourself, you avoid added sugars and use whole-food ingredients that support your metabolism and energy levels. They serve as a perfect tool to replace high-calorie, low-nutrient snacks, making it much easier to stick to your plan.
Can I use whey protein instead of a blend for these no bake protein bars?
You can, but you should expect a difference in the final texture. A whey/casein blend is highly recommended because casein is a slow-digesting protein that absorbs more liquid. This property helps create a softer, chewier, more dough-like texture that is very satisfying and less sticky. It makes the bars hold together beautifully.
If you only have 100% whey protein isolate or concentrate, the bars might turn out a bit gummier or stickier. To counteract this, you might need to adjust the recipe slightly. Try adding an extra tablespoon of coconut flour or oat flour to help absorb some of the excess moisture and firm up the dough. You may also need to reduce the amount of almond milk by a tablespoon or two. Just experiment a little to get the consistency right.
How can I make these no bake protein bars nut-free?
Making a nut-free version of these protein bars is very simple. The primary ingredient to swap is the peanut or almond butter. A fantastic nut-free alternative is sunflower seed butter, often sold under the brand name SunButter. It provides a similar creamy texture and healthy fat profile. You can also use tahini (sesame seed butter) for a slightly different, more savory flavor profile that works surprisingly well with chocolate.
Additionally, ensure you are using a combination of oat flour and coconut flour, not almond flour. Finally, double-check the labels on your protein powder and any mix-ins like chocolate chips to ensure they were produced in a nut-free facility if cross-contamination is a serious concern for you or your family.
Why are my no bake protein bars falling apart?
If your bars are crumbly, the issue is almost always the ratio of wet to dry ingredients. It’s an easy fix. The most common reason is that the mixture is too dry. This can happen if you use a particularly absorbent protein powder or coconut flour. The solution is to add more liquid or a “binder” to the dough. Try mixing in another tablespoon of peanut butter, Greek yogurt, or almond milk until the dough comes together and holds its shape when squeezed.
Another reason could be that you didn’t press the mixture into the pan firmly enough. You need to apply significant pressure to compact the dough, which helps it bind together as it chills. Lastly, make sure you are chilling the bars for the recommended amount of time. The chilling process is not just for flavor; it’s what solidifies the fats and allows the dry ingredients to fully hydrate, which is crucial for holding the bars together.
Can I make these no bake protein bars vegan and dairy-free?
Yes, you can easily make this recipe vegan and dairy-free with a few simple substitutions. First, replace the whey/casein protein powder with your favorite plant-based protein powder. A blend of pea and brown rice protein typically works very well and has a good flavor profile. Be aware that plant-based proteins are often much more absorbent, so you will likely need to increase the amount of almond milk to achieve a workable dough.
Next, swap out the non-fat Greek yogurt. You can use a dairy-free yogurt like coconut or almond-based yogurt, or simply replace it with an extra tablespoon of your nut/seed butter or even a tablespoon of mashed banana or applesauce. Ensure you are using a plant-based milk like almond, soy, or oat milk, and check that your chocolate chips are dairy-free. With these swaps, you can enjoy a fully vegan version of these delicious bars.
Try These High-Protein Recipes Next
If you loved how simple and effective these bars are, here are a few other recipes designed for a fit, sustainable lifestyle.
- ADHD-Friendly Protein Overnight Oats: For another incredibly easy, grab-and-go breakfast that you can prep in five minutes the night before.
- Simple High-Protein Banana Bread: When you want a warm, comforting, and healthy baked good that satisfies sweet cravings without derailing your progress.
- No-Bake Chocolate Peanut Butter Granola Bars: For a different take on a no-bake bar that has more of a crunchy, chewy granola texture, perfect for a satisfying snack.
Building a library of simple, high-protein recipes is the key to staying consistent for the long haul.