I have a complicated history with sweets. For years, during the first phase of my fitness journey where I lost over 65 pounds, I viewed them as the enemy. A single cookie felt like a failure. A slice of cake was a guaranteed way to send me into a shame spiral. This all-or-nothing thinking is a classic ADHD trap, and it made sustainable fat loss feel impossible.
Lemon bars were one of those “forbidden” foods. That perfect balance of tart and sweet, the buttery shortbread crust, it was pure temptation. But the traditional recipes are packed with sugar, butter, and white flour. They’re a fast track to a blood sugar crash and intense cravings, which my brain just can’t handle.
After I got my ADHD diagnosis and started medication, my approach to food shifted. I realized that rigid restriction was the real enemy, not the lemon bars themselves. The key was to build a system that worked *with* my brain. A system that allowed for treats without derailing my progress.
That’s why I created these high-protein lemon bars. They are the result of years of refining my approach. They satisfy the craving for something sweet and delicious while packing a serious protein punch to keep you full and stable. This isn’t about cheating. It’s about having a flexible, practical plan that makes a fit lifestyle enjoyable and, most importantly, sustainable.
This recipe is for anyone who has felt that same struggle. It’s proof that you can hit your goals without giving up the foods you love.
Skip to My Flexibe Diet Recipe!
Why Lemon Bars Are Great For Fat Loss
When people think about fat loss, dessert is usually the first thing they cut out. But that’s where most plans fail. For those of us with ADHD, extreme restriction often leads to a rebound binge. These high-protein lemon bars are designed to break that cycle by working within our core principles: protein first and flexible eating.
Food is 75 percent of your results. The biggest challenge is managing hunger and cravings so you can consistently stay in a calorie deficit. That’s where protein becomes your most valuable tool. Each one of these bars is loaded with protein from whey powder and Greek yogurt. Protein is the most satiating macronutrient, meaning it keeps you feeling full and satisfied for longer.
By hitting your protein goals, you dramatically reduce the nagging hunger that leads to grabbing high-calorie, low-nutrient snacks. Instead of a sugar-filled treat that leaves you wanting more 30 minutes later, you get a dessert that actually helps you stick to your plan. It quiets the food noise in your brain.
We’ve also engineered these lemon bars to be lower in calories and sugar. We swap out most of the traditional butter and all of the refined sugar for lighter alternatives like unsweetened applesauce and erythritol. This prevents the sharp blood sugar spike and subsequent crash that triggers more cravings. You get the sweet, tangy flavor you love without the metabolic chaos.
This isn’t a “cheat meal.” It’s a strategic tool. Having a batch of these in the fridge means you have a planned, macro-friendly option ready to go when a craving strikes. It’s a brutally practical way to manage your appetite, support your workouts, and build a sustainable lifestyle where dessert is part of the plan, not a reason for guilt.
Ingredients You’ll Need for Lemon Bars
The magic of these lemon bars is in the ingredient list. We’re taking a classic dessert and rebuilding it from the ground up to support your fitness goals. Every component is chosen with a purpose: to boost protein, cut empty calories, and deliver incredible flavor. The real star of the show here is the strategic use of vanilla protein powder in both the crust and the filling.
Here’s exactly what you’ll need to have on hand. Don’t worry, most of these are pantry staples in a high-protein kitchen.
- For the High-Protein Crust:
- 1/2 cup oat flour (you can make your own by blending rolled oats)
- 1/2 cup almond flour
- 1/2 cup vanilla protein powder (a whey or whey-casein blend works best)
- 1/4 teaspoon salt
- 3 tablespoons light butter or coconut oil, melted
- 2 tablespoons unsweetened applesauce
- 1-2 tablespoons water, as needed
- For the Low-Calorie Lemon Filling:
- 3/4 cup plain nonfat Greek yogurt
- 1/2 cup vanilla or unflavored protein powder
- 1/3 cup granulated erythritol or another sugar substitute that measures like sugar
- 3 large eggs
- 1/2 cup fresh lemon juice (from about 2-3 lemons)
- 1 tablespoon lemon zest
- 2 tablespoons cornstarch
- Dash of turmeric for color (optional)
Let’s talk about a few key players. For the protein powder, a whey or whey-casein blend is your best bet. These types of protein bake well, creating a smoother, less gritty texture than many plant-based options. The vanilla flavor adds a subtle sweetness that complements the lemon perfectly.
Using fresh lemon juice is non-negotiable. The bottled stuff just can’t compare and often has a metallic or overly bitter taste. Taking a couple of minutes to juice a few lemons will make a world of difference in the final product. Similarly, the lemon zest contains essential oils that provide a huge amount of bright, fresh lemon flavor without adding extra liquid.
Finally, erythritol is my go-to sugar substitute for baking. It measures cup-for-cup like sugar, has almost zero calories, and doesn’t have the strange aftertaste some other sweeteners do. It helps create that classic sweet-tart balance we’re looking for in perfect lemon bars.
How To Make Lemon Bars (Step-By-Step)
Making these lemon bars is straightforward, even on a low-motivation day. We’ve broken it down into simple, scannable steps to prevent overwhelm. The key is to follow the cooling instructions carefully. Patience here is rewarded with perfectly set, delicious bars.
Step 1: Prepare Your Baking Station
First things first, preheat your oven to 350°F (175°C). While it’s heating up, prepare your 8×8 inch baking pan. This is a critical step for easy removal later. Take a sheet of parchment paper and line the pan, making sure to leave some overhang on two opposite sides. These will act as “handles” to lift the bars out cleanly once they’re done. An ADHD tip: get all your ingredients and tools out on the counter before you start. It’s a technique called “mise en place” and it saves you from frantic searching mid-recipe.
Step 2: Create the High-Protein Crust
In a medium-sized bowl, combine the dry ingredients for the crust. That’s the oat flour, almond flour, 1/2 cup of vanilla protein powder, and salt. Give it a quick whisk to mix everything together evenly. Now, add your melted light butter (or coconut oil) and the unsweetened applesauce. Mix it with a fork or your hands until it looks like crumbly, wet sand. Add one tablespoon of water at a time until the dough just begins to clump together when you squeeze it.
Step 3: Pre-Bake the Crust
Transfer the dough to your prepared pan. Use your fingers or the bottom of a flat glass to press it down into an even, compact layer. Don’t skip the corners. We’re going to pre-bake, or blind bake, the crust for 12-15 minutes. This step is crucial because it ensures the crust stays firm and doesn’t get soggy after you add the wet filling. You’ll know it’s ready when the edges are just starting to turn a light golden brown.
Step 4: Whisk Together the Lemon Filling
While the crust is in the oven, you can make the filling. In a separate, larger bowl, whisk the Greek yogurt, the remaining 1/2 cup of protein powder, and the erythritol until it’s completely smooth. Getting rid of any protein powder lumps now is key. Next, whisk in the eggs one by one. Finally, add the fresh lemon juice, lemon zest, and cornstarch. If you want that classic bright yellow color, add a tiny dash of turmeric. Keep whisking until everything is smooth and uniform.
Step 5: Combine and Bake to Perfection
Once the crust is done, pull it out of the oven. Immediately and carefully pour the lemon filling over the warm crust, spreading it evenly. Place the pan back into the oven and bake for another 20-25 minutes. The center should be *almost* set. This is the important part: it should still have a very slight jiggle when you gently shake the pan. If it’s completely solid, it will be overcooked and rubbery once it cools.
Step 6: The Crucial Cooling Process
This is the most important step for texture. Once you take the pan out of the oven, you must let it cool completely to room temperature on a wire rack. Do not put it in the fridge while it’s still warm, as this can cause the filling to crack. An ADHD tip: Set a timer on your phone for 1 hour to remind you to check on it. Once it’s at room temperature, transfer the pan to the refrigerator and let it chill for at least 2 hours, though overnight is even better. This allows the filling to firm up completely.
Step 7: Lift, Slice, and Serve
When the bars are fully chilled and firm, use those parchment paper handles you made to lift the entire block out of the pan and onto a cutting board. Use a large, sharp knife to slice them into squares. For extra clean cuts, you can wipe the knife with a damp paper towel between each slice. Now they’re finally ready to enjoy.
How To Serve Lemon Bars (ADHD-Friendly)
Once your lemon bars are chilled and sliced, the best way to serve them is straight from the fridge. They are a fantastic standalone snack or dessert, perfect for satisfying a sweet craving without derailing your progress. The cool temperature makes them incredibly refreshing, and the firm, custardy texture is at its peak when chilled.
For those of us with ADHD, managing portions and making healthy choices can be a challenge, especially when we’re low on executive function. That’s why building simple systems around our food is so important. These lemon bars are a perfect example of a “grab-and-go” solution you create for your future self.
Here are a few ADHD-friendly ways to incorporate them into your routine:
- The Post-Workout Reward: The combination of protein and quick-digesting carbs makes this a great snack after a workout. It helps replenish your energy stores and provides the protein your muscles need to repair and grow. Having one ready to eat can prevent you from grabbing a less healthy option on your way home from the gym.
- The Planned Afternoon Treat: Do you get a slump around 3 PM? That’s often a sign of a dopamine dip. Instead of reaching for a candy bar, have one of these bars with a cup of coffee or tea. It’s a planned, satisfying break that gives you a little boost without the sugar crash.
- The Pre-Portioned Dessert: The “out of sight, out of mind” struggle is real. Once you’ve sliced the bars, store them in a clear, airtight container in the fridge. When you see your pre-portioned, healthy dessert waiting for you, you’re much less likely to impulsively order takeout or tear open a bag of chips. You’ve already made the decision for yourself.
By preparing and portioning these ahead of time, you remove the friction and decision fatigue from a future moment of craving. You’re setting yourself up for success. It’s a simple, practical system that honors your goals and works with your brain, not against it.
How To Store, Reheat, and Reuse Lemon Bars
Proper storage is essential for keeping these lemon bars fresh, delicious, and ready to go. Unlike many other baked goods, these are meant to be eaten chilled, so you never have to worry about reheating. In fact, their flavor and texture often get even better after a day in the fridge as everything settles and melds together.
The main goal with storage is to keep them from drying out and absorbing other fridge odors. An airtight container is your best friend here. After you’ve sliced the bars into individual portions, you have a couple of great options for keeping them fresh for the week or even longer.
Here’s how to store your high-protein lemon bars:
- In the Refrigerator: This is the best option for short-term storage. Place the sliced bars in a single layer in an airtight container. If you need to stack them, place a small piece of parchment paper between the layers to prevent them from sticking together. Stored this way, they will stay perfectly fresh and delicious for up to 7 days.
- In the Freezer: These lemon bars freeze beautifully, making them perfect for long-term meal prep. To freeze, wrap each individual bar tightly in plastic wrap. Then, place the wrapped bars into a larger freezer-safe bag or airtight container. This double-layer of protection prevents freezer burn. They can be stored in the freezer for up to 3 months.
When you’re ready to enjoy a frozen bar, simply take one out and let it thaw in the refrigerator for a few hours or overnight. Do not try to thaw it in the microwave, as the high heat will ruin the delicate, custardy texture of the filling. The ADHD-friendly pro move is to pull one from the freezer and place it in the fridge before you go to bed. When you wake up, you’ll have a perfect, ready-to-eat treat waiting for you.
Easy Swaps & Variations for Lemon Bars
One of our core principles is flexibility. A recipe is a template, not a rigid set of rules. You should feel empowered to adapt it based on what you have in your pantry, your dietary needs, or just your personal taste. These lemon bars are very forgiving, and there are several easy swaps you can make without sacrificing the final result.
Remember, the goal is consistency, not perfection. If a small tweak makes it easier for you to make and enjoy this recipe, then it’s the right choice. Don’t let not having one specific ingredient stop you from making a batch.
Here are some simple and effective variations:
- Change the Citrus: The easiest way to change things up is to swap the lemon for another citrus fruit. Use the exact same amount of fresh lime juice and zest to create incredible high-protein key lime pie bars. You could even try orange juice and zest for a sweet, creamsicle-inspired flavor.
- Adjust the Flours: If you don’t have both oat and almond flour, you can adjust the ratio. Using all almond flour will result in a slightly softer, more tender crust. Using all oat flour will make the crust a bit denser and heartier. Just be sure to use certified gluten-free oat flour if you need the recipe to be fully gluten-free.
- Experiment with Protein Flavors: While vanilla protein powder is a great neutral base, you could experiment with other flavors. A lemon-flavored protein powder would obviously be amazing here. Even an unflavored protein powder would work, though you might want to add a teaspoon of vanilla extract and a touch more sweetener to the recipe.
- Dairy-Free Modifications: Creating a fully dairy-free version is challenging due to the Greek yogurt and whey protein. However, you could try using a thick, dairy-free yogurt (like a coconut or almond-based one) and a plant-based protein powder. Be aware that this will significantly change the texture and baking time, so you’ll need to watch it closely.
The key is to keep the wet-to-dry ingredient ratios similar. Play around with it and find the version that you love the most. A recipe you enjoy is a recipe you’ll make again and again, which is the foundation of a sustainable fitness lifestyle.
High-Protein Lemon Bars
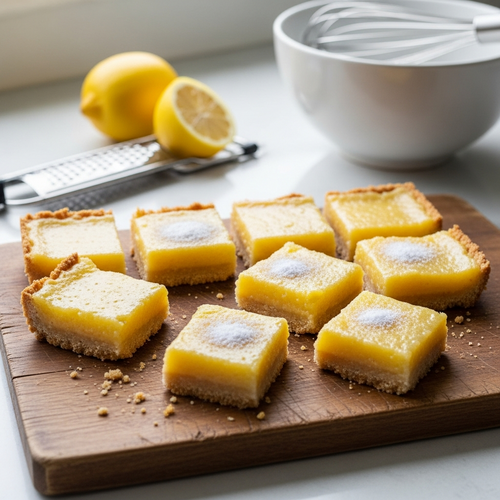
Description: A delicious, macro-friendly dessert that satisfies your sweet tooth without the sugar crash. These lemon bars feature a protein-packed crust and a creamy, tangy filling, making them the perfect treat for a fat-loss lifestyle.
Prep Time: 15 minutes | Cook Time: 35 minutes
Servings: 12 bars
Macros per Serving | Calories: 155 | Protein: 12g | Fat: 7g | Carbohydrates: 11g
Ingredients
- For the Crust: 1/2 cup oat flour, 1/2 cup almond flour, 1/2 cup vanilla protein powder, 1/4 tsp salt, 3 tbsp light butter (melted), 2 tbsp unsweetened applesauce, 1-2 tbsp water.
- For the Filling: 3/4 cup plain nonfat Greek yogurt, 1/2 cup vanilla protein powder, 1/3 cup granulated erythritol, 3 large eggs, 1/2 cup fresh lemon juice, 1 tbsp lemon zest, 2 tbsp cornstarch, dash of turmeric (optional).
Instructions
- Preheat oven to 350°F (175°C). Line an 8×8 pan with parchment paper.
- Mix dry crust ingredients. Add melted butter, applesauce, and water until dough forms. Press into the pan.
- Bake crust for 12-15 minutes until lightly golden.
- While crust bakes, whisk all filling ingredients together until smooth.
- Pour filling over the warm crust and bake for another 20-25 minutes, until the center is just set.
- Cool completely at room temperature, then chill in the refrigerator for at least 2 hours or overnight before slicing.
Notes
Using a whey or whey-casein blend protein powder will yield the best texture. Do not skip the chilling step, it is crucial for the filling to set properly.
FAQs About Lemon Bars For Weight Loss
Here are some straightforward answers to the most common questions I receive about this lemon bars recipe.
Can I really eat these lemon bars and still lose weight?
Absolutely, yes. This is one of the most important mindset shifts for sustainable fat loss. Weight loss comes down to being in a consistent calorie deficit, meaning you consume fewer calories than your body burns. These lemon bars are designed specifically to fit into that equation. They are significantly lower in calories, sugar, and fat than traditional lemon bars, which are often calorie bombs.
More importantly, they are high in protein. Protein is your secret weapon for fat loss because it keeps you feeling full and satisfied, which makes it much easier to stick to your calorie deficit without feeling constantly hungry. It also helps preserve muscle mass while you lose fat. By including planned, satisfying, and macro-friendly treats like these lemon bars, you avoid the feelings of deprivation that often lead to quitting a diet altogether. It’s not about restriction; it’s about smart inclusion.
My lemon bar filling didn’t set properly, what went wrong?
This is the most common issue people face, and it almost always comes down to one of two things: baking time or chilling time. First, make sure you bake the bars until the center is *almost* set. It should still have a slight wobble or jiggle to it. If you bake it until it’s completely firm in the oven, it will become dense and rubbery as it cools. The filling will continue to cook and set from the residual heat after you remove it from the oven.
Second, and most critically, you cannot rush the cooling and chilling process. The bars must cool to room temperature on a wire rack first, and then chill in the refrigerator for at least two hours, though overnight is truly best. This long, slow chill is what allows the proteins and cornstarch in the filling to fully set up into that perfect, creamy, sliceable texture. If you try to cut them while they are still warm or only slightly chilled, the filling will be runny.
Can I make these lemon bars without protein powder?
For this specific recipe, the protein powder is not an optional ingredient. It serves a crucial function in both the structure and the nutritional profile of the bars. In the crust, it replaces a significant amount of flour, providing structure while boosting the protein content. In the filling, it works alongside the Greek yogurt and eggs to create the thick, custardy texture and, of course, to make these a genuinely high-protein dessert.
If you were to leave it out, you would need to completely re-engineer the recipe with different amounts of flour, sugar, and thickeners. This would fundamentally change the bars into a completely different, and likely much higher-calorie, dessert. The entire purpose of this recipe is to create lemon bars that are a tool for your fitness journey, and the protein powder is the key ingredient that makes that possible.
How can I make the crust for these lemon bars gluten-free?
Great news! This recipe is already designed to be easily made gluten-free. The two flours used in the crust are almond flour and oat flour. Almond flour is naturally gluten-free. The only thing you need to be mindful of is the oat flour. Oats themselves do not contain gluten, but they are often processed in facilities that also handle wheat, which can lead to cross-contamination.
To ensure the crust is 100% gluten-free, simply purchase oat flour that is explicitly labeled as “certified gluten-free.” Alternatively, you can make your own by blending certified gluten-free rolled oats in a high-speed blender until they reach a fine, flour-like consistency. The rest of the ingredients in the recipe are naturally gluten-free, so this one simple swap is all you need to make.
What’s the best way to get fresh lemon juice for these lemon bars?
Using fresh lemon juice is the single best thing you can do to guarantee amazing flavor. Bottled juice can taste dull or even slightly chemical. To get the most juice out of your lemons, start by rolling them firmly on your countertop for about 15-20 seconds. This helps break down the membranes inside and makes them easier to juice.
You don’t need a fancy gadget. A simple handheld citrus reamer or squeezer works perfectly. You can even just use a fork; stick the tines into the cut half of the lemon and twist while you squeeze to release the juice. You will likely need two to three medium-sized lemons to get the half-cup of juice required for the filling. And don’t forget to zest one of the lemons *before* you juice it! The zest adds a powerful, bright lemon aroma and flavor.
Try These High-Protein Recipes Next
If you loved these simple and delicious high-protein lemon bars, here are a few other recipes you should try next.
- High-Protein Key Lime Pie: A similar vibe to the lemon bars, this recipe features a creamy, tart filling and a simple crust that’s perfect for a refreshing, macro-friendly dessert.
- Low-Calorie Shortbread Cookies: If you loved the buttery crust on these bars, you have to try this recipe for simple, melt-in-your-mouth shortbread cookies that won’t wreck your calorie goals.
- Oh So Lemon Bars from This Gal Cooks: For a more traditional take on lemon bars that’s still packed with amazing flavor, check out this classic recipe.
Building a collection of go-to healthy recipes is the key to long-term success and consistency.