For years, I thought bread was the enemy of fat loss. I completely cut it out during the first phase of my journey where I lost 65 pounds. It felt like a necessary sacrifice. But living without bread, especially as a busy single dad, was tough. Sandwiches are easy. Toast is fast. I missed the convenience and the comfort.
When I started to figure out a truly sustainable lifestyle, I knew I had to bring bread back into my life. The problem was that most store-bought breads are loaded with processed ingredients and don’t offer much nutritional value. They spike your blood sugar and leave you feeling hungry an hour later. That’s a recipe for disaster when you’re trying to manage ADHD cravings.
That’s what led me to create this easy bread recipe. I needed something that was simple to make, even on days when my executive function was at zero. It had to be packed with protein to keep me full and focused. It needed to taste good, like real, satisfying bread.
This recipe is the result of a lot of trial and error. It’s built for our brains. It uses simple ingredients, comes together in one bowl, and gives you a delicious, high-protein loaf that supports your fitness goals. It’s proof that you don’t have to give up your favorite foods to get lean and healthy.
Skip to My Flexibe Diet Recipe!
Why Easy Bread Is Great For Fat Loss
When you hear “bread” and “fat loss” in the same sentence, it can sound like a contradiction. We’ve been taught that carbs are the enemy. But the truth is, the right kind of bread can be a powerful tool in your fitness journey, especially for those of us with ADHD. This easy bread recipe is designed specifically for that purpose.
The first and most important reason is protein. This isn’t your average loaf. We pack it with unflavored protein powder and non-fat Greek yogurt. A single slice provides a significant protein boost that you won’t find in store-bought options. Protein is the king of macros for fat loss. It keeps you feeling full for hours, which crushes the random, impulsive cravings that can derail our progress.
Hunger management is the next big win. The combination of protein and fiber from the whole wheat flour slows down digestion. This prevents the sharp blood sugar spikes and crashes that often lead to brain fog and mindless snacking. For the ADHD brain, stable energy levels are a game-changer. It means more focus and less time thinking about your next meal.
Finally, this recipe embraces our core principle of flexible eating. Completely restricting foods you love is a path to failure. It leads to a “cheat meal” mentality that can easily spiral into a week-long binge. By having a delicious, satisfying, and macro-friendly bread option on hand, you never feel deprived. You can have a sandwich, toast with your eggs, or a slice with some butter. It fits into your life, making consistency feel effortless. And consistency is what delivers results.
Ingredients You’ll Need for Easy Bread
One of the biggest hurdles to cooking with ADHD is a complicated ingredient list. That’s why we keep things brutally simple here. This easy bread recipe uses straightforward ingredients that are easy to find and work with. The key is how we combine them to create something that’s both delicious and supportive of our fat loss goals.
The magic really happens with two key ingredients: unflavored protein powder and non-fat Greek yogurt. The protein powder is a game-changer, turning a simple carb into a balanced, muscle-supporting food. I recommend using a whey or casein blend as they tend to bake well, but feel free to use what you have. Just make sure it’s unflavored, or you’ll end up with some strange-tasting bread.
The Greek yogurt not only adds another layer of protein but also provides moisture and a slight tang, giving the bread a wonderful texture and depth of flavor. It acts as a binder and replaces a lot of the fat you’d find in traditional recipes. Using non-fat keeps the calories in check while maximizing the protein content. Here’s everything you’ll need to get started.
- 1 cup whole wheat flour
- ½ cup unflavored protein powder
- ¼ cup almond flour
- 2 teaspoons baking powder
- ½ teaspoon baking soda
- ½ teaspoon salt
- 1 cup plain non-fat Greek yogurt
- 2 large eggs
- 2 tablespoons olive oil
- 2 tablespoons honey or maple syrup
- ¼ cup unsweetened almond milk or water, as needed
A quick note on the flours: the whole wheat flour provides fiber and substance, while the small amount of almond flour adds healthy fats and a tender crumb. This combination creates a texture that feels much more like traditional bread than many other “healthy” versions I’ve tried.
How To Make Easy Bread (Step-By-Step)
Let’s get baking. I’ve designed this process to be as straightforward as possible, minimizing steps and cleanup. When motivation is low, the last thing you need is a complex recipe with a dozen bowls and precise techniques. This is a mix-and-bake recipe that delivers consistent results without the fuss. Remember, we’re aiming for consistency, not perfection.
Step 1: Prep Your Oven and Pan
First things first, preheat your oven to 375°F (190°C). Getting this done at the start is a classic ADHD hack for task initiation. While it heats up, grab your 9×5 inch loaf pan and give it a light greasing. You can use cooking spray, a little olive oil on a paper towel, or some butter. This prevents the bread from sticking, ensuring you don’t have to fight with it later.
Step 2: Combine the Dry Ingredients
In a large bowl, add all your dry ingredients: the whole wheat flour, unflavored protein powder, almond flour, baking powder, baking soda, and salt. Use a whisk to mix them together thoroughly. This is an important step because it ensures the baking powder and soda are evenly distributed, which helps the bread rise properly. Don’t skip it!
Step 3: Combine the Wet Ingredients
Now, grab a separate medium-sized bowl. Add the Greek yogurt, eggs, olive oil, and your choice of honey or maple syrup. Whisk these together until everything is smooth and well-combined. You want to break up the egg yolks and make sure the yogurt is fully incorporated. This should only take about a minute.
Step 4: Mix It All Together
Pour the wet ingredients into the large bowl with the dry ingredients. Use a spatula to gently fold everything together until it’s just combined. A key mistake here is overmixing. If you work the batter too much, the bread can become tough and dense. Stop mixing as soon as you no longer see dry flour. The batter will be very thick, almost like a dough. If it seems too stiff to spread, add the almond milk or water one tablespoon at a time until it’s manageable.
Step 5: Pour and Smooth
Scrape the thick batter into your prepared loaf pan. Use the back of your spatula to spread it evenly and smooth out the top. It doesn’t have to be perfect, but an even surface will help it bake more consistently.
Step 6: Bake the Bread
Place the pan in your preheated oven and bake for 30-35 minutes. The best way to check for doneness is with a toothpick or a thin knife. Insert it into the center of the loaf; if it comes out clean, your bread is ready. The top should be golden brown and firm to the touch.
Step 7: Cool It Down
This final step is crucial for the bread’s texture. Let the loaf cool in the pan for about 10 minutes. This allows it to set. After 10 minutes, carefully turn it out onto a wire rack to cool completely. Slicing into hot bread can make it gummy and dense, so resist the temptation and let it cool all the way down. Patience here pays off!
How To Serve Easy Bread (ADHD-Friendly)
Having a loaf of this high-protein, easy bread ready to go is like having a secret weapon for your week. It’s a blank canvas for quick, satisfying meals that keep you on track. The goal here is to make healthy eating as easy as possible, reducing decision fatigue and making it simple to hit your protein targets. When you’re hungry and your brain is buzzing, you need grab-and-go options.
For an ADHD-friendly approach, I highly recommend pre-slicing the entire loaf once it has cooled completely. Store the slices in a sealed container or bag. This way, when you need a quick meal or snack, the work is already done. You just have to grab a slice or two and add your toppings. This small act of pre-planning can prevent you from reaching for less healthy, hyper-palatable snacks when hunger strikes.
This bread is incredibly versatile. It works for breakfast, lunch, or a post-workout snack. The key is to pair it with other nutrient-dense foods to create a balanced meal. Here are a few of my favorite ways to serve it:
- Avocado Toast: A classic for a reason. Mash half an avocado on a toasted slice and top with everything bagel seasoning. For an extra protein kick, add a fried or scrambled egg on top.
- Protein-Packed Sandwich: Use two slices to make a sandwich with lean protein like sliced turkey or chicken breast, a slice of cheese, and plenty of greens like spinach or lettuce. A little light mayo or mustard completes it.
- Nut Butter & Fruit: Toast a slice and spread it with your favorite nut butter. Top with sliced banana or berries for some extra fiber and micronutrients.
- With Soup or Chili: A hearty slice of this bread is perfect for dipping into a warm bowl of soup or my high-protein turkey chili. It makes the meal more filling and satisfying.
Remember, food is 75 percent of your results. By having this easy bread on hand, you’re setting yourself up for success. You’re making the healthy choice the easy choice, which is a fundamental principle we live by at ADHD FIT.
How To Store, Reheat, and Reuse Easy Bread
One of my biggest struggles with ADHD is object permanence. If I put leftovers in the back of the fridge, they cease to exist until they’ve become a science experiment. That’s why having a simple, repeatable system for storing and using food is so important. This easy bread is designed for meal prep, so let’s talk about how to keep it fresh and ready to eat.
Proper storage will ensure your bread stays delicious and doesn’t go to waste. Because it’s made with fresh ingredients like Greek yogurt and eggs and lacks the preservatives of store-bought bread, it won’t last as long on the counter. Your storage method will depend on how quickly you plan to eat it.
Here are the best ways to store, reheat, and even reuse your bread, tailored for a busy lifestyle and an ADHD brain:
- On the Counter (1-2 Days): If you plan on eating the loaf within a couple of days, you can store it in an airtight container or a bread bag at room temperature. Slicing it as you need it will keep it from drying out too quickly.
- In the Refrigerator (Up to 1 Week): For longer storage, the fridge is your best bet. I recommend pre-slicing the entire loaf and storing it in a large zip-top bag or sealed container. This keeps it fresh for up to a week and makes it incredibly easy to grab a slice for a quick meal.
- In the Freezer (Up to 3 Months): The freezer is the ultimate ADHD-friendly tool. Pre-slice the loaf and place parchment paper between each slice to prevent them from sticking together. Put the slices in a freezer-safe bag. You can pull out exactly what you need, and it will last for months.
When it comes to reheating, a toaster or toaster oven is your best friend. It brings back that fresh-baked texture perfectly. You can toast slices directly from the fridge or freezer. If you’re in a hurry, a quick 15-20 seconds in the microwave will soften it up, but it won’t be crispy. If your bread gets a little stale, don’t throw it out! Cut it into cubes, toss with a little olive oil and seasoning, and bake until crispy for amazing homemade croutons.
Easy Swaps & Variations for Easy Bread
The best recipes are the ones you can adapt to what you have in your pantry. Rigidity is the enemy of consistency, especially for those of us with ADHD. If you realize you’re missing one ingredient, it can be enough to make you abandon the whole plan and order takeout. That’s why I’ve built this easy bread recipe to be flexible.
Don’t be afraid to experiment a little based on your dietary needs, preferences, or what’s currently in your kitchen. The core structure of the recipe is solid, but there’s plenty of room to play around. This is about making the recipe work for you, not the other way around. Embracing these small changes can be the difference between a home-cooked meal and another night of frustration.
Here are some simple and reliable swaps and variations you can try to make this bread your own:
- Flour Swaps: If you don’t have whole wheat flour, you can use all-purpose flour or white whole wheat flour. For a gluten-free version, try a 1:1 gluten-free baking blend. Keep in mind that different flours absorb liquid differently, so you may need to adjust the amount of almond milk or water.
- Protein Powder Options: While I prefer a whey/casein blend for baking, you can use straight whey, casein, or a plant-based protein powder like soy or pea protein. Plant-based powders can be more absorbent, so you’ll likely need to add a bit more liquid to get the right consistency.
- Sweetener Choices: If you’re looking to reduce sugar, you can use a calorie-free liquid sweetener like stevia or monk fruit drops instead of honey or maple syrup. You could also omit the sweetener entirely for a more savory loaf.
- Savory Add-ins: Make this bread a savory masterpiece by adding about a half cup of shredded cheese (like cheddar or parmesan), chopped herbs (like rosemary or thyme), or some garlic powder directly into the batter.
- Sweet Add-ins: For a sweeter treat, mix in a handful of nuts (walnuts or pecans), seeds (chia or flax), or a half cup of blueberries or chocolate chips. Just be mindful of the extra calories if you’re tracking your macros.
Think of this recipe as a template. Once you’ve made it a couple of times, you’ll get a feel for the batter and can confidently start making your own adjustments. The goal is to create a recipe that you’ll actually make, again and again.
High-Protein Easy Bread
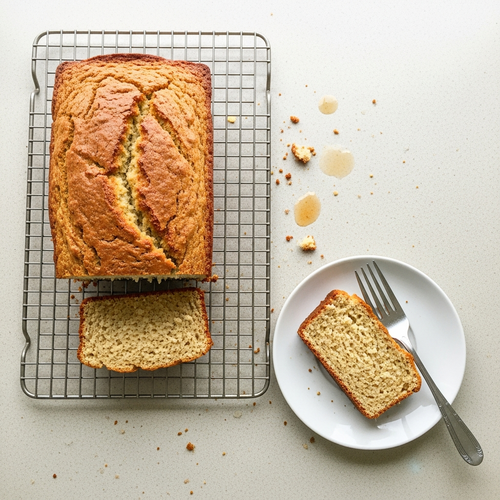
Description: A simple, high-protein bread recipe designed for fat loss and a busy lifestyle. It’s packed with protein from Greek yogurt and protein powder to crush cravings and keep you full for hours. Perfect for toast, sandwiches, or a satisfying snack.
Prep Time: 10 minutes | Cook Time: 35 minutes
Servings: 12 slices
Macros per Serving | Calories: 125 | Protein: 10g | Fat: 4g | Carbohydrates: 12g
Ingredients
- 1 cup whole wheat flour
- ½ cup unflavored protein powder
- ¼ cup almond flour
- 2 teaspoons baking powder
- ½ teaspoon baking soda
- ½ teaspoon salt
- 1 cup plain non-fat Greek yogurt
- 2 large eggs
- 2 tablespoons olive oil
- 2 tablespoons honey or maple syrup
- ¼ cup unsweetened almond milk or water, as needed
Instructions
- Preheat oven to 375°F (190°C) and grease a 9×5 inch loaf pan.
- In a large bowl, whisk together all dry ingredients (flours, protein powder, baking powder, baking soda, salt).
- In a separate bowl, whisk together all wet ingredients (Greek yogurt, eggs, olive oil, honey/maple syrup).
- Pour the wet ingredients into the dry ingredients and mix with a spatula until just combined. Add milk/water if needed.
- Spread the thick batter into the prepared loaf pan.
- Bake for 30-35 minutes, or until a toothpick inserted into the center comes out clean.
- Cool in the pan for 10 minutes, then transfer to a wire rack to cool completely before slicing.
Notes
Do not overmix the batter, as this can result in a dense and tough loaf. The batter should be thick. Let the bread cool completely before slicing for the best texture.
FAQs About Easy Bread For Weight Loss
Here are some straightforward answers to the most common questions I receive about this easy bread recipe. My goal is to make this as simple and successful for you as possible.
Can I make this easy bread without protein powder?
Yes, you can absolutely make this bread without protein powder, but it will change the nutritional profile significantly. The protein powder is a key component for making this a “fat loss” recipe because it dramatically increases the protein content per slice, which is crucial for satiety and muscle maintenance. If you choose to omit it, you’ll need to replace its volume with more flour.
To do this, I would suggest replacing the ½ cup of protein powder with an additional ½ cup of whole wheat flour or all-purpose flour. The resulting bread will have a texture that is a bit more traditional and tender. However, the protein per slice will drop from around 10 grams to closer to 4-5 grams. It will still be a healthier option than most store-bought breads due to the Greek yogurt and whole grains, but it won’t be as effective at managing hunger.
Is this easy bread recipe gluten-free?
As written, this recipe is not gluten-free because it uses whole wheat flour. However, you can easily adapt it to be gluten-free with a simple substitution. The most reliable way to do this is to replace the whole wheat flour and almond flour with a high-quality, 1:1 gluten-free all-purpose baking flour. Brands like Bob’s Red Mill or King Arthur Flour make excellent blends that are designed to be swapped directly into recipes like this.
When you make this swap, simply use 1 ¼ cups of the gluten-free flour blend in place of the combined whole wheat and almond flours. Gluten-free flours can sometimes absorb more moisture, so you may find you need to add an extra tablespoon or two of almond milk or water to get the right batter consistency. The final texture might be slightly different, but it will still be a delicious and high-protein loaf.
Why is my easy bread so dense?
A dense loaf is usually caused by one of two common issues: overmixing the batter or slicing the bread while it’s still warm. Both are easy mistakes to make, especially when you’re in a hurry. When you mix the batter after combining the wet and dry ingredients, you’re developing the gluten in the flour. The more you mix, the more gluten develops, which leads to a tough, dense, and chewy texture instead of a soft, tender one. You should only mix until you no longer see streaks of dry flour.
The second culprit is impatience during the cooling process. The steam inside the loaf needs time to settle and finish the cooking process even after it comes out of the oven. If you slice into it while it’s still hot, the interior can be gummy and will compress, making it feel very dense. Letting it cool completely on a wire rack is a non-negotiable step for achieving the best possible texture.
How many calories are in a slice of this easy bread?
Based on the ingredients listed, a single slice of this easy bread (assuming you slice the loaf into 12 equal slices) contains approximately 125 calories. This is an estimate, and the exact number can vary slightly depending on the specific brands of ingredients you use, particularly the protein powder and Greek yogurt. The macros for one slice are roughly 10 grams of protein, 4 grams of fat, and 12 grams of carbohydrates.
This macro breakdown is what makes this bread so powerful for a fat loss plan. For only 125 calories, you get a substantial 10 grams of protein. Compare that to a typical slice of store-bought whole wheat bread, which has about 80-100 calories but only 3-4 grams of protein. The higher protein-to-calorie ratio of this recipe will keep you feeling fuller and more satisfied for much longer.
Can I use regular yogurt instead of Greek yogurt in this easy bread recipe?
You can substitute regular plain yogurt for Greek yogurt, but you’ll need to make a small adjustment. Regular yogurt has a much higher water content and is thinner than Greek yogurt. It also has about half the protein. Because of the difference in consistency, using it as a direct 1:1 substitute will result in a much wetter batter, which can affect the final texture of the bread, making it more cake-like and potentially gummy.
If regular yogurt is all you have, I recommend reducing the amount to ¾ cup instead of a full cup to compensate for the extra liquid. You may also need to omit the almond milk or water entirely. The protein content of the final loaf will be lower, but it will still be a delicious and healthier homemade bread. For the best results in terms of both texture and protein, sticking with non-fat plain Greek yogurt is highly recommended.
Try These High-Protein Recipes Next
If you loved how simple and effective this easy bread recipe is, I have a few others I think you’ll enjoy.
- High Protein Bread Recipe: This is another fantastic bread recipe from our site that offers a slightly different texture and flavor profile, also packed with protein.
- Viral Cottage Cheese Bread Recipe: Jump on the viral trend with this incredibly simple, high-protein bread made primarily from cottage cheese. It’s naturally gluten-free and ridiculously easy to make.
- 15 Easy Bread Recipes for Thanksgiving: This roundup offers a wide variety of simple bread recipes that are perfect for any occasion, giving you even more options to explore.
Building a library of go-to, macro-friendly recipes is the key to long-term success.