To be honest, for years I thought bone broth was just overhyped soup. I saw it all over the internet, touted as some kind of magic elixir, and I just rolled my eyes. During the first phase of my fat loss journey, where I lost about 70 pounds without medication, I was focused on the basics: protein, calories, and lifting heavy things. Broth just wasn’t on my radar.
Then I hit a wall. It was the evening cravings that always got me. After a long day of work and being a dad, my executive function was shot. I’d find myself standing in front of the pantry, looking for something crunchy, salty, or sweet. It was a classic ADHD dopamine-seeking spiral, and it was stalling my progress.
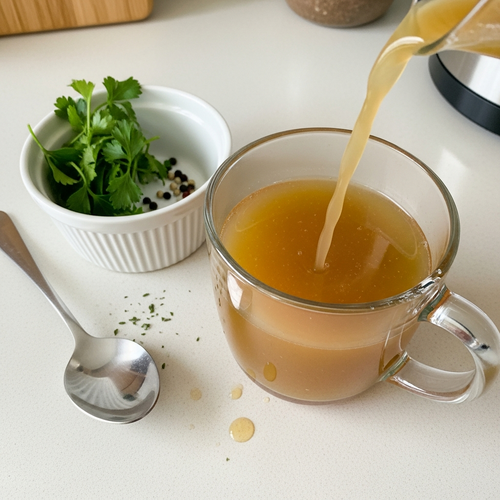
I needed a tool. A pattern interrupt. Something warm, savory, and filling that wouldn’t blow my calorie budget. Reluctantly, I decided to give making my own bone broth a real try. The first time I made a truly rich, gelatinous batch and sipped a hot mug of it before bed, it was a revelation. It felt like a hug in a mug. It was deeply satisfying, killed my cravings, and packed a solid protein punch for almost no calories.
It quickly became a non-negotiable part of my routine. It’s not magic, but it’s a brutally practical tool that helps you stay consistent. This recipe is the one I perfected over years of trial and error. It’s simple, flavorful, and designed to work for you, especially on those low-motivation days.
Skip to My Flexibe Diet Recipe!
Why Bone Broth Is Great For Fat Loss
Let’s get straight to the point. Fat loss is about managing your calorie intake, and the biggest obstacle to that is hunger. This is where a high-quality bone broth becomes one of the most effective tools in your arsenal, especially for the ADHD brain that craves instant gratification and struggles with impulse control.
First and foremost, it’s about protein and satiety. A well-made bone broth is packed with collagen and gelatin, which are forms of protein. Protein is the most satiating macronutrient, meaning it helps you feel full and satisfied for longer. Sipping on a mug of warm broth can crush hunger pangs between meals or satisfy late-night cravings for a fraction of the calories you’d get from snacks.
Think of it as a strategic move. Instead of mindlessly snacking on 300 calories of chips, you can have a 50-calorie mug of broth that actually makes you feel full. That calorie difference adds up massively over a week. For me, it was the perfect way to end my eating window for the day. It signaled to my brain, “We’re done eating,” and kept me out of the kitchen.
It’s also incredibly hydrating. Sometimes our brains mistake thirst for hunger. A warm, savory broth provides hydration along with valuable electrolytes like sodium and potassium, which are important when you’re active and managing your diet. It’s far more satisfying than plain water and helps keep everything in balance.
Finally, it’s a low-effort, high-reward food. You make one big batch and you have a high-protein, low-calorie tool ready to go for the entire week. This is huge for managing ADHD. When you’re tired or overwhelmed, you don’t have to think. You just have to heat and sip. It simplifies decision-making and makes consistency easier, and consistency is what drives results.
Ingredients You’ll Need for Bone Broth
The beauty of this bone broth recipe is its simplicity and flexibility. You don’t need a bunch of fancy, hard-to-find ingredients. It’s all about using quality basics to extract as much flavor and nutrition as possible. Here’s exactly what you’ll need to make a rich, gelatinous broth.
The most important part of this recipe is the bones themselves. You want a good mix. Don’t just use one type. This is the key that unlocks a truly exceptional broth. The mix of beef and chicken bones creates a depth of flavor and a superior nutritional profile you can’t get from just one or the other. Beef bones like knuckles, marrow, and oxtail provide that deep, roasted, savory flavor and lots of collagen. Chicken bones, especially feet and wings, are packed with gelatin, which is what gives your cooled broth that satisfying, jiggly texture.
Another key ingredient here is the mushrooms. They are an umami powerhouse. While the bones and aromatics provide a solid base, the cremini mushrooms add a layer of earthy, savory complexity that makes the final product taste less like plain stock and more like a gourmet soup base. Don’t skip them if you can help it.
-
4-5 pounds of a mix of beef and chicken bones (e.g., beef knuckles, marrow bones, oxtail, chicken feet, and wings)
-
2 tablespoons apple cider vinegar
-
2 large carrots, roughly chopped
-
2 celery stalks, roughly chopped
-
1 large onion, quartered
-
1 head of garlic, sliced in half horizontally
-
8 ounces cremini mushrooms, halved
-
1 teaspoon black peppercorns
-
2 bay leaves
-
1 bunch fresh parsley
-
5-6 sprigs fresh thyme
-
Cold, filtered water
-
Sea salt to taste (add after cooking)
-
Optional: 1-2 scoops of unflavored collagen peptides per serving for an extra protein boost
A quick note on sourcing: try to get the best quality bones you can find. Ask the butcher at your local grocery store, visit a local farm, or look for grass-fed options. Better bones mean a more nutrient-dense and flavorful broth. It makes a noticeable difference.
How To Make Bone Broth (Step-By-Step)
Making bone broth is more about patience than skill. It’s a low-and-slow process that is surprisingly ADHD-friendly because most of the time is hands-off. You do a little prep, and then your stove or slow cooker does all the heavy lifting. Here’s how to do it right.
Step 1: Roast The Bones
Preheat your oven to 400°F (200°C). Spread the beef bones on a large baking sheet. Roasting is a critical step you should not skip. This process caramelizes the meat and marrow on the bones, creating a deep, rich, savory flavor through the Maillard reaction. Roast for 30-40 minutes until they’re nicely browned. This is where the foundational flavor of your broth comes from.
Step 2: Combine Ingredients in The Pot
Transfer the roasted beef bones, along with any fat and browned bits from the pan, into a very large stockpot or slow cooker. Add the raw chicken bones. Then, add your roughly chopped carrots, celery, onion, the halved head of garlic, mushrooms, black peppercorns, and bay leaves. No need for perfect knife skills, just a rough chop is fine.
Step 3: Add Liquid and Simmer
Pour in the apple cider vinegar; its acidity helps draw minerals and collagen from the bones. Then add enough cold, filtered water to cover everything by at least two inches. Bring it to a boil, then immediately reduce the heat to the lowest possible setting where you still see a few bubbles. Skim off any foam that rises to the top in the first hour. Cover and let it simmer for at least 12-24 hours. The longer, the better.
Step 4: Add Herbs
During the last 30 minutes of cooking, add the fresh parsley and thyme. Adding them at the end keeps their flavor bright and fresh. If you add them at the beginning of a 24-hour simmer, they can become bitter.
Step 5: Strain The Broth
Turn off the heat and let it cool down a bit so it’s safe to handle. Use tongs to remove the large bones and vegetable chunks. Then, pour the remaining broth through a fine-mesh sieve or cheesecloth into another large pot or bowl to catch all the small bits. You want a clean, clear broth.
Step 6: Chill and Skim The Fat
Let the strained broth cool to room temperature before moving it to the fridge to chill completely, preferably overnight. As it chills, the fat will rise to the top and solidify into a hard layer. Use a spoon to easily skim this off and discard it. This step is key to keeping the broth low in calories and fat.
Step 7: Store and Season
Your finished broth is now ready. The final, crucial step is to season it with salt to your liking *after* cooking and reheating. Never salt it during the long simmer, as the liquid reduces and it can become overly salty. For an extra protein kick, you can also whisk in unflavored collagen peptides into your warm mug before drinking.
How To Serve Bone Broth (ADHD-Friendly)
Having a huge batch of delicious bone broth is great, but it’s useless if you don’t make it easy to consume. For those of us with ADHD, reducing friction is everything. If the healthy choice isn’t the easy choice, it’s not going to happen consistently. So, let’s make drinking your bone broth brutally practical.
The simplest way is to treat it like coffee or tea. I keep a large jar of broth in the fridge at all times. When I feel a craving coming on or just need something warm and savory, I pour a mugful, microwave it for 90 seconds, add a pinch of salt, and it’s ready. This is my go-to pattern interrupt for mindless snacking. The whole process takes less than two minutes from fridge to first sip.
For an even bigger win, you can use it as a base for quick and simple meals. It transforms leftovers and simple ingredients into something satisfying. Here are a few ways I use it to build high-protein mini-meals:
-
Protein Noodle Soup: Heat up a big serving of bone broth and pour it over a scoop of leftover shredded chicken, some frozen spinach, and maybe some quick-cooking rice noodles. It’s a 5-minute meal that is packed with protein and nutrients.
-
Enhanced Scrambled Eggs: Add a splash of bone broth to your eggs before scrambling them. It makes them fluffier and adds a boost of protein and savory flavor. A simple way to upgrade a breakfast staple.
-
Savory “Work” Thermos: On days when I’m chained to my desk, I heat up bone broth in the morning and pour it into a thermos. I can sip on it throughout the day. This keeps my energy stable, prevents dehydration, and stops me from getting up to forage for snacks when I’m trying to focus.
The key is to have it accessible and ready. Don’t hide it in the back of the fridge. Put it front and center. You can even pre-portion it into individual glass jars or mugs. That way, when decision fatigue hits, the right choice is staring you right in the face, requiring zero executive function to execute.
How To Store, Reheat, and Reuse Bone Broth
Batch-prepping is an ADHD superpower, and this bone broth recipe is perfect for it. You invest a few hours of mostly passive time to create a tool you can use for weeks or even months. Proper storage is key to making this system work. You need to make your future self’s life as easy as possible.
Once your broth is cooked, strained, and skimmed, you have a few great storage options depending on how quickly you plan to use it. The goal is to create single-serving portions that you can grab without having to thaw a giant container. This is a non-negotiable for keeping things simple and sustainable.
Here are the best methods I’ve found for storing bone broth:
-
Refrigerator (Short-Term): If you plan to drink it daily, you can store the broth in large glass jars (like mason jars) in the refrigerator. It will last for up to a week. Make sure you leave some headspace at the top of the jar. I usually keep one large jar in the fridge for daily sipping.
-
Freezer “Pucks” (Long-Term): This is my favorite method. Pour the cooled broth into silicone muffin tins or, even better, large silicone ice cube trays like Souper Cubes. Freeze them solid, then pop out the “broth pucks” and store them in a large freezer bag. Each puck is a perfect single serving. When you want some broth, you just grab one or two pucks and heat them in the microwave or a small saucepan.
-
Freezer Bags (Flat Storage): If you’re short on freezer space, you can pour pre-measured amounts (like 1 or 2 cups) into freezer-safe bags. Lay them flat on a baking sheet to freeze. Once they’re solid, you can stack them vertically like files, taking up very little space.
To reheat, simply place your refrigerated broth or frozen broth pucks in a small pot on the stove over medium heat until hot. Or, for the quickest option, microwave it in a mug until steaming. Remember to add your salt and any other seasonings *after* reheating for the best flavor. This grab-and-go system removes all the barriers, making it easy to stay consistent.
Easy Swaps & Variations for Bone Broth
One of the core principles at ADHD FIT is flexibility. A recipe is useless if it’s too rigid. Life happens, ingredients can be hard to find, and sometimes you just need to use what you have. This bone broth recipe is incredibly forgiving and easy to adapt. Don’t let perfection be the enemy of getting it done.
The most important part is the bones, but even here you have options. If you can’t find a good mix of beef and chicken, just use one or the other. An all-chicken broth (using a whole chicken carcass plus extra feet and wings) will be lighter in flavor and color. An all-beef broth will be deeper and more robust. Both are fantastic. The goal is to get it done, not to perfectly replicate the recipe every single time.
Here are some simple and practical swaps you can make:
-
Use a Slow Cooker or Pressure Cooker: If you don’t want to leave your stove on for 24 hours, a slow cooker is the perfect “set it and forget it” tool. Just put everything in, set it on low, and let it go for 24-48 hours. An Instant Pot or other pressure cooker can also drastically speed things up, cooking the broth in just 2-4 hours.
-
Vegetable Swaps: The vegetables are there for flavor, so feel free to use what you have. Leeks can stand in for onions. You can add parsnips for a little sweetness. A great ADHD-friendly hack is to keep a “scrap bag” in your freezer. Throughout the week, toss in onion ends, carrot peels, celery butts, and mushroom stems. When it’s time to make broth, you can just dump this bag in.
-
Spice It Up: You can easily change the flavor profile. For an Asian-inspired broth, add a star anise, a knob of ginger, and some scallions. For a more “immune-boosting” feel, add a piece of turmeric root. Don’t be afraid to experiment with the aromatics once you’ve nailed the basic technique.
The point is to make this recipe work for your life. Use the tools you have, the ingredients you can easily find, and the flavors you enjoy. Consistency will always beat a “perfect” but impractical plan.
The Ultimate Fat Loss Bone Broth
Description: A rich, gelatinous, and deeply flavorful bone broth designed to crush cravings, boost protein intake, and support sustainable fat loss. This is a brutally practical tool for hunger management.
Prep Time: 20 minutes | Cook Time: 12-24 hours
Servings: 16 (about 16 cups)
Macros per Serving (1 cup) | Calories: 80 | Protein: 15g | Fat: 2g | Carbohydrates: 1g
Ingredients
- 4-5 pounds of a mix of beef and chicken bones (e.g., beef knuckles, marrow bones, chicken feet)
- 2 tablespoons apple cider vinegar
- 2 large carrots, roughly chopped
- 2 celery stalks, roughly chopped
- 1 large onion, quartered
- 1 head of garlic, sliced in half
- 8 ounces cremini mushrooms, halved
- 1 teaspoon black peppercorns
- 2 bay leaves
- 1 bunch fresh parsley
- 5-6 sprigs fresh thyme
- Cold, filtered water
- Sea salt to taste (after cooking)
- Optional: 1-2 scoops unflavored collagen peptides per serving
Instructions
- Preheat oven to 400°F. Roast beef bones for 30-40 minutes until browned.
- Transfer roasted beef bones and raw chicken bones to a large stockpot or slow cooker.
- Add carrots, celery, onion, garlic, mushrooms, peppercorns, and bay leaves.
- Add apple cider vinegar and cover with cold water by 2 inches.
- Bring to a boil, then reduce to a low simmer. Skim any foam. Cover and simmer for 12-24 hours.
- Add parsley and thyme during the last 30 minutes.
- Strain the broth through a fine-mesh sieve.
- Cool to room temperature, then chill in the fridge overnight.
- Skim the solidified fat layer from the top.
- Store in the fridge or freezer. Reheat individual servings and season with salt to taste.
Notes
For a guaranteed protein boost, whisk 1-2 scoops of unflavored collagen peptides into your hot mug of broth before drinking. This can add an extra 10-20g of protein per serving.
FAQs About Bone Broth For Weight Loss
Here are some straightforward answers to the most common questions I receive about this bone broth recipe.
Is homemade bone broth really better for weight loss than store-bought?
Yes, absolutely. While store-bought bone broth can be a convenient option in a pinch, making it yourself gives you complete control over the two most important factors for fat loss: protein content and sodium. Many commercial broths are high in sodium and surprisingly low in protein. They are often just glorified stocks, lacking the thick, gelatinous quality that signals a high collagen content. When you look at the nutrition label, you might see as little as 5-9 grams of protein per serving.
When you make it at home using a variety of collagen-rich bones like knuckles and chicken feet, you are maximizing the protein extraction. A good homemade broth can easily have 15 grams of protein or more per cup. This higher protein content is what makes it so effective for satiety and hunger management. You also control the salt, adding it only to taste right before you drink it. This prevents you from consuming excess sodium, which can cause water retention and bloating.
How much bone broth should I drink per day for fat loss?
There’s no magic number, because bone broth is a tool, not a prescription. The best way to use it is to listen to your body and integrate it strategically. A great starting point for most people is one to two cups per day. Think about the times when you are most vulnerable to cravings or mindless snacking. For me, that’s mid-afternoon and late evening.
Having a cup of warm bone broth during those periods can be a game-changer. It fills you up, satisfies the need for something savory, and stops the snacking spiral before it starts. It’s not about replacing whole meals with broth, but rather using it as a low-calorie, high-satiety bridge between meals to help you stick to your overall calorie goals. If it helps you avoid a 400-calorie snack, it has done its job perfectly.
Why did my bone broth not gel?
This is the most common issue people face, and it almost always comes down to one of three things. The first, and most likely, reason is the type of bones you used. For a broth to gel, it needs a high concentration of gelatin, which comes from collagen. The best sources for this are connective tissues found in parts like chicken feet, beef knuckles, and oxtails. If you only use lean marrow bones or bones from a rotisserie chicken, you won’t get enough collagen to achieve that signature jiggle.
The second reason could be your water-to-bone ratio. If you use too much water, you will dilute the gelatin concentration, and it won’t be able to set. You want just enough water to cover the bones by about two inches. The third factor is simmer time. Collagen takes a very long time to break down into gelatin. If you only simmer your broth for a few hours, you won’t extract enough. Aim for at least 12 hours for chicken and 24 hours for beef for the best results. A non-gelling broth is still nutritious and tasty, but for maximum satiety, you want that gel.
Can I make this bone broth recipe in a slow cooker?
Absolutely, and for many people with ADHD, it’s actually the superior method. A slow cooker is the ultimate “set it and forget it” kitchen appliance. It eliminates any anxiety about leaving a pot simmering on the stove overnight. The process is virtually identical. You still roast the beef bones for flavor, then you add everything to the slow cooker basin.
Cover the ingredients with cold water and the vinegar, then set it on low for 24 hours. Some slow cookers can even go for longer. It provides a very gentle, consistent heat that is perfect for extracting all the goodness from the bones without ever boiling the broth, which can make it cloudy. It simplifies the process and allows you to go about your life without having to monitor the stove.
What’s the real protein count in homemade bone broth?
This is a tricky question because it’s impossible to give an exact number. The final protein content of your homemade bone broth can vary significantly based on the types of bones used, the bone-to-water ratio, and the simmer time. A broth made with lots of collagen-rich parts like feet and knuckles, a lower amount of water, and a 24-hour simmer will have a much higher protein count than a watery broth made from leftover bones and simmered for 8 hours.
While lab testing is the only way to know for sure, a good visual indicator is the quality of the gel. A broth that sets up firm like Jell-O when chilled is a high-protein broth, likely in the range of 12-20 grams per cup. To remove the guesswork and ensure you’re hitting your protein goals, I highly recommend the optional step of adding a scoop or two of unflavored collagen or protein powder to your mug. This guarantees a high-protein serving every single time, turning a great tool into a powerhouse for your fitness goals.
Try These High-Protein Recipes Next
If you love using savory, high-protein recipes to hit your fat loss goals, you’ll want to try these next.
-
High Protein Pho (Phở) Recipe: A simplified, macro-friendly version of the classic Vietnamese soup that is packed with flavor and over 50g of protein.
-
Healthy French Onion Soup Recipe: All the rich, comforting flavor of the bistro classic, redesigned to be high in protein and lower in calories.
-
Jamaican Braised Oxtail Recipe: A delicious and tender oxtail recipe that falls off the bone and is perfect for batch prepping a high-protein meal.
These recipes all follow the same principles: simple, delicious, and built to support your goals.