If you told me ten years ago that cheesecake would be a regular part of my fat loss plan, I would have laughed. Back then, cheesecake was a reward. It was a once-in-a-while, guilt-ridden indulgence I’d have after a week of “perfect” eating. It was the kind of dessert that signaled the end of a diet and the beginning of a spiral.
When I started my journey and lost 65 pounds, my relationship with food had to change completely. I have ADHD, which means my brain is wired for dopamine. Restriction and bland food just don’t work for me long-term. Depriving myself of things I loved, like a rich, creamy cheesecake, only made me crave them more. It was a recipe for failure.
So, I had to figure out a way to work with my brain, not against it. That meant creating versions of my favorite foods that were packed with protein and fit my macros. This high-protein cheesecake recipe wasn’t born out of a desire to be a fancy baker. It was born out of a practical need to make my fitness journey sustainable and, honestly, enjoyable. It’s the result of years of tweaking, testing, and finding a way to have it all: the flavor I crave and the results I work for.
Skip to My Flexibe Diet Recipe!
Why Cheesecake Is Great For Fat Loss
The words “cheesecake” and “fat loss” don’t usually appear in the same sentence. We’re conditioned to see dessert as the enemy of progress. But at ADHD FIT, we throw that all-or-nothing thinking out the window. This cheesecake isn’t a “cheat meal.” It’s a strategic tool for sustainable fat loss.
The magic is in the macros. A typical slice of cheesecake from a restaurant can pack over 700 calories, loaded with sugar and fat, and offering very little protein. It spikes your blood sugar, leaves you hungry an hour later, and can easily blow your calorie budget for the day. This recipe fundamentally flips that script.
Each slice is packed with protein, thanks to the triple-threat combination of Greek yogurt, low-fat cottage cheese, and vanilla whey protein. Protein is the cornerstone of effective fat loss. It’s highly satiating, meaning it keeps you feeling full and satisfied for longer. This dramatically reduces the likelihood of mindless snacking or late-night cravings. It also helps preserve muscle mass while you’re in a calorie deficit, which is crucial for keeping your metabolism firing.
By building in delicious, satisfying foods like this cheesecake, we eliminate the feeling of deprivation that so often leads to bingeing. For the ADHD brain, which constantly seeks reward and stimulation, having a genuinely tasty and macro-friendly treat to look forward to can be the difference between staying on track and giving up. It’s flexible eating in action.
Ingredients You’ll Need for Cheesecake
We’re using simple, high-impact ingredients to build a truly satisfying cheesecake. No weird, hard-to-find items here. Everything is designed to maximize protein and flavor while keeping fats and carbs in check. The real game-changer in this recipe is the use of cottage cheese and Greek yogurt to build a creamy, protein-dense filling.
Here’s exactly what you will need.
For the Crust:
- 1 cup almond flour
- 1/2 cup pecans
- 1/4 cup powdered erythritol sweetener
- 1/4 cup unsalted butter, melted
For the Filling:
- 16 ounces reduced-fat cream cheese, softened
- 2 cups plain non-fat Greek yogurt
- 2/3 cup low-fat cottage cheese
- 1/2 cup vanilla whey protein powder
- 3/4 cup powdered erythritol sweetener
- 3 large eggs
- 1 tablespoon lemon juice
- 2 teaspoons vanilla extract
- 1 tablespoon cornstarch
A few notes on these ingredients. Make sure your cream cheese is truly softened to room temperature. This is non-negotiable for a smooth, lump-free filling. For the Greek yogurt, stick with plain non-fat to control the macros. The quality of your vanilla whey protein will also significantly impact the final flavor. Choose a brand you genuinely enjoy drinking as a shake. Lastly, blending the cottage cheese until it’s perfectly smooth is the secret weapon. It adds an incredible boost of protein without any of the texture you might associate with it.
How To Make Cheesecake (Step-By-Step)
Making a cheesecake can seem intimidating, but this process is straightforward. We’re focused on the core steps without any unnecessary complexity. The most important tool you’ll need is a 9-inch springform pan, which allows you to release the cheesecake easily without ruining its shape.
ADHD Tip: Feeling overwhelmed? Break this into two sessions. Make the crust one day, cover it, and store it in the fridge. Make the filling and bake the cheesecake the next day. Task chunking is your best friend in the kitchen.
Step 1: Prepare the Oven and Crust
First, get your oven preheating to 350°F (175°C). While it heats up, combine the almond flour, pecans, and powdered sweetener in a food processor. Pulse them together until the pecans are broken down into a fine, sandy texture. Then, pour in the melted butter and pulse again until the mixture clumps together like wet sand. Don’t overdo it. Press this mixture firmly and evenly into the bottom of your springform pan. I use the bottom of a flat glass to get it really compact. Bake the crust for 10 minutes, then pull it out and set it aside to cool. Don’t forget this next part: reduce your oven temperature to 325°F (163°C) for the filling.
Step 2: Create the Smooth Filling Base
The key to a creamy cheesecake is a lump-free base. Start by putting the cottage cheese into a blender or food processor and blending it until it is completely, utterly smooth. This might take a minute or two. Scrape down the sides as needed. In a separate large bowl, use an electric mixer to beat the softened cream cheese until it’s light and fluffy. Then, add the blended cottage cheese and the Greek yogurt, mixing until everything is well combined and smooth.
Step 3: Combine and Bake
In a small bowl, whisk together your dry ingredients: the vanilla whey protein, powdered sweetener, and cornstarch. This prevents the protein powder from clumping when you add it to the wet mixture. Add the dry mix to the cream cheese base gradually, mixing on low speed until just combined. Overmixing builds up too much air. Add the eggs one at a time, mixing on low just until the yolk disappears. Finally, stir in the lemon juice and vanilla. Pour the finished filling over your cooled crust, spread it evenly, and bake for 45-55 minutes. The edges should be set, but the center should still have a slight wobble. This is crucial for the perfect texture.
Step 4: The All-Important Cool Down
To prevent cracks, you need to cool the cheesecake slowly. Turn the oven off, but leave the cheesecake inside with the door closed for 30 minutes. Then, crack the oven door and let it continue to cool for another 30 minutes. After that, remove it from the oven and let it cool completely on a wire rack at room temperature. Once it’s no longer warm, cover it and refrigerate for at least four hours, but overnight is even better. Patience here is rewarded with the perfect classic cheesecake texture.
How To Serve Cheesecake (ADHD-Friendly)
Once your cheesecake has chilled to perfection, it’s time to enjoy the rewards. The beauty of this recipe is its versatility. It’s delicious on its own, but a few simple toppings can elevate it and keep things interesting, which is key for the novelty-seeking ADHD brain.
The goal is to add flavor and texture without adding a ton of sugar or calories. A handful of fresh berries like strawberries, raspberries, or blueberries is my go-to. They add a natural sweetness and a pop of color that makes the dessert feel even more satisfying. A dollop of extra Greek yogurt or a drizzle of sugar-free chocolate or caramel syrup also works incredibly well.
Here are a few ADHD-friendly serving strategies to make this fit seamlessly into your life:
- Pre-Portion for Success. As soon as the cheesecake is fully chilled, slice the entire thing into 12 equal servings. Place each slice in its own small container or use parchment paper to separate them in a larger container. This removes all friction and decision-making when you want a treat. You just grab one serving and you’re done. No temptation to cut a slightly bigger slice.
- Build a “Dessert Bowl.” If a plain slice feels a little boring, deconstruct it. Crumble a slice of the cheesecake into a bowl, add a scoop of Greek yogurt, a sprinkle of berries, and maybe a few chopped nuts or seeds for crunch. This makes it feel like a completely new and exciting meal.
- Plan It In. Don’t leave your treat to chance. Log a slice of cheesecake into your calorie tracking app at the beginning of the day. Knowing you have that satisfying dessert waiting for you can make it much easier to stick to your meal plan and resist impulsive, less-healthy choices.
By preparing and planning how you’ll enjoy your cheesecake, you turn it from a potential diet-derailer into a powerful tool for consistency. It becomes a reliable, dopamine-boosting part of your routine that supports your goals instead of sabotaging them.
How To Store, Reheat, and Reuse Cheesecake
Proper storage is essential to keep your high-protein cheesecake fresh and delicious. Since you’ve invested the time to make it, you want to make sure you can enjoy every last slice. Thankfully, cheesecake stores incredibly well in both the refrigerator and the freezer, making it a perfect recipe for meal prep.
For short-term storage, the refrigerator is your best bet. Once the cheesecake has cooled completely, you should keep it covered to prevent it from drying out or absorbing other food odors. You can store it in the springform pan with plastic wrap or foil stretched tightly over the top. It will stay fresh and delicious in the fridge for up to 5 days.
For longer-term storage, the freezer is an amazing tool. It’s also an excellent ADHD strategy for portion control and managing impulsivity. If a whole cheesecake in the fridge feels too tempting, the freezer adds a helpful barrier. Here’s the best way to do it:
- Freeze by the Slice. This is my preferred method. After the cheesecake has chilled firm in the fridge, slice it into individual portions. Place the slices on a baking sheet lined with parchment paper and put them in the freezer for about an hour, until they are firm to the touch. This is called flash-freezing, and it prevents them from sticking together.
- Wrap for Freshness. Once the slices are firm, wrap each one individually and tightly in plastic wrap, followed by a layer of aluminum foil. This double layer protects against freezer burn. Place the wrapped slices in a large freezer-safe bag or container. They will keep well for up to 2 months.
- Thawing Your Treat. When you’re ready for a slice, simply take one out and let it thaw in the refrigerator for a few hours. You can also let it sit on the counter for about 30-60 minutes if you’re in more of a hurry. Do not microwave it, as this will ruin the delicate, creamy texture.
As for reusing, my favorite trick is to crumble a slightly thawed slice over a bowl of Greek yogurt or protein pudding. It creates an instant, high-protein dessert parfait that feels incredibly decadent. This is a great way to use up the last slice or just to switch things up.
Easy Swaps & Variations for Cheesecake
One of the core principles at ADHD FIT is flexibility. A recipe is only useful if it can adapt to what you have on hand and what you enjoy. This cheesecake recipe is a fantastic base, but you can easily modify it to suit your preferences or what’s in your pantry. Don’t be afraid to experiment a little.
The goal is to keep the protein high and the structure sound, but there’s plenty of room to play with flavors and textures. Sometimes the smallest change can make it feel like a brand new recipe, which is great for keeping boredom at bay and staying consistent with your plan.
Here are some simple and reliable swaps you can make:
- Crust Variations: If you don’t have pecans, walnuts or even hazelnuts work beautifully in the crust. For a more classic flavor, you can make a simple protein graham cracker crust by crushing high-protein cookies or crackers and mixing them with melted butter. Just be mindful that this will change the final macro count.
- Flavoring the Filling: The vanilla base is a blank canvas. Try using a different flavor of whey protein, like chocolate or strawberry, for a completely different cheesecake. You can also add other extracts, like 1 teaspoon of almond extract for a nutty flavor or the zest of a lemon or orange for a brighter, citrusy kick.
- Cottage Cheese Swap: If you are completely against cottage cheese, you can substitute it with more non-fat Greek yogurt or even ricotta cheese. However, I highly recommend trying it blended first. It adds a unique richness and a significant protein boost that’s hard to replicate.
- Topping and Mix-In Ideas: For a chocolate chip cheesecake, gently fold in a half-cup of sugar-free chocolate chips into the batter before baking. You can also create a simple berry swirl by slightly mashing fresh or frozen berries and swirling them into the top of the filling with a knife before it goes into the oven.
Remember, the best healthy recipe is the one you’ll actually make and eat consistently. Use these variations to make this cheesecake recipe your own and keep it as an exciting and reliable part of your fitness journey.
High-Protein Cheesecake for Fat Loss
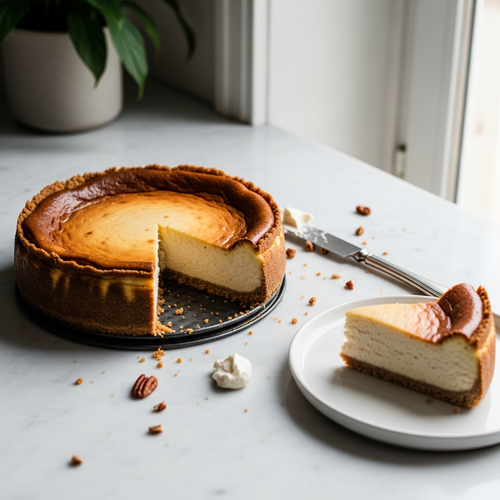
Description: A rich, creamy cheesecake designed to crush cravings and support your fitness goals. Packed with protein, this recipe works with your ADHD brain by delivering satisfaction without derailing your progress, making it the perfect sustainable treat.
Prep Time: 20 minutes | Cook Time: 55 minutes
Servings: 12 slices
Macros per Serving | Calories: 252 | Protein: 16g | Fat: 18g | Carbohydrates: 6g
Ingredients
- For the Crust: 1 cup almond flour, 1/2 cup pecans, 1/4 cup powdered erythritol sweetener, 1/4 cup unsalted butter, melted
- For the Filling: 16 ounces reduced-fat cream cheese (softened), 2 cups plain non-fat Greek yogurt, 2/3 cup low-fat cottage cheese, 1/2 cup vanilla whey protein powder, 3/4 cup powdered erythritol sweetener, 3 large eggs, 1 tablespoon lemon juice, 2 teaspoons vanilla extract, 1 tablespoon cornstarch
Instructions
- Preheat oven to 350°F (175°C). Combine all crust ingredients in a food processor and pulse until like wet sand. Press into a 9-inch springform pan and bake for 10 minutes. Let cool.
- Reduce oven to 325°F (163°C).
- Blend cottage cheese until completely smooth. In a large bowl, beat softened cream cheese until fluffy. Mix in blended cottage cheese and Greek yogurt.
- In a small bowl, whisk together protein powder, sweetener, and cornstarch. Gradually add to the wet ingredients, mixing on low.
- Add eggs one at a time, mixing on low until just incorporated. Stir in lemon juice and vanilla.
- Pour filling over crust and bake for 45-55 minutes, until edges are set and center is slightly jiggly.
- Turn off the oven and cool the cheesecake in the oven with the door closed for 30 minutes, then with the door cracked for another 30 minutes.
- Cool completely at room temperature, then refrigerate for at least 4 hours or overnight before serving.
Notes
Ensure all dairy ingredients (cream cheese, eggs, yogurt) are at room temperature for the smoothest possible filling. Do not overmix the batter after adding the eggs, as this can cause the cheesecake to crack.
FAQs About Cheesecake For Weight Loss
Here are some straightforward answers to the most common questions I receive about this cheesecake recipe.
Can you really eat cheesecake and still lose weight?
Absolutely, yes. This is the entire philosophy behind flexible eating and what makes it so sustainable. Weight loss comes down to being in a consistent calorie deficit over time. It is not about eliminating specific foods or entire food groups. The problem with traditional cheesecake is that a single slice is extremely calorie-dense, making it very difficult to fit into a calorie-controlled day without sacrificing nutrients from other meals.
This recipe changes the equation. By intelligently swapping ingredients to boost protein and reduce fat and sugar, we create a cheesecake that is far more macro-friendly. Each slice provides a significant amount of protein, which helps with satiety and muscle maintenance. This allows you to satisfy a craving for a rich dessert, get a dopamine hit, and stay within your calorie and protein targets. It’s about working smarter, not just restricting harder.
What makes this high-protein cheesecake different from a regular one?
The core differences lie in the filling and the crust. A traditional cheesecake gets its richness from full-fat cream cheese, sour cream, and a large amount of sugar, all of which contribute to its high calorie count. The crust is typically made from graham crackers or cookies held together with a lot of butter and sugar. Our version makes three strategic changes to build a more fitness-oriented dessert.
First, we reduce the amount of cream cheese and supplement it with non-fat Greek yogurt and blended low-fat cottage cheese. This slashes the fat content while dramatically increasing the protein. Second, we replace all of the refined sugar with powdered erythritol, a zero-calorie sweetener that doesn’t impact blood sugar. We also add a scoop of vanilla whey protein for an extra protein boost and flavor. Finally, the crust uses almond flour and pecans instead of processed cookies, providing healthy fats and fiber instead of empty carbs.
Will using protein powder in this cheesecake make it taste chalky?
This is a very common and valid concern. The wrong protein powder can definitely ruin the texture of a baked good. However, there are two key things we do in this recipe to avoid that dreaded chalkiness. First, the choice of protein powder matters immensely. A high-quality whey protein isolate or a whey-casein blend tends to bake better and have a smoother texture than cheaper concentrates. Choose a brand with a flavor you already enjoy.
Second, and more importantly, is the technique. We never just dump the protein powder directly into the wet ingredients. In the instructions, we have you whisk the protein powder together with the powdered sweetener and cornstarch first. This separates the fine particles and allows them to incorporate much more smoothly into the creamy base, preventing clumps and ensuring the final texture is rich and smooth, not gritty or chalky.
My cheesecake cracked on top, is it ruined?
Not at all! A cracked cheesecake is a cosmetic issue, not a taste or texture issue. It will still be absolutely delicious. Cracks are incredibly common, even for experienced bakers, and they usually happen for one of two reasons: overmixing the batter (especially after adding the eggs), which incorporates too much air, or cooling the cheesecake too quickly, which causes it to contract and split.
We try to prevent this with the slow cooling method outlined in the instructions (cooling in the turned-off oven). But if it still happens, don’t worry about it. It’s a sign that it’s homemade! The easiest solution is to simply cover it with a delicious topping. A layer of fresh berries, a dollop of Greek yogurt, or a drizzle of sugar-free chocolate syrup will hide any imperfections and add another layer of flavor.
Can I make this cheesecake without a springform pan?
While a springform pan is ideal because its removable sides make for a clean presentation, you can still make this cheesecake without one. The best alternative is a 9-inch deep-dish pie plate. The baking time and temperature will remain the same. The only difference will be in how you serve it. You won’t be able to remove the cheesecake whole.
Instead, you will have to serve it by scooping slices directly out of the pie plate, more like a custard or a crustless cheesecake pie. To make this easier, you can press the crust mixture just onto the bottom of the plate and not up the sides. Another option is to line a 9-inch square baking pan with parchment paper, leaving an overhang on two sides. After the cheesecake is fully chilled, you can use the parchment “handles” to carefully lift the entire cake out of the pan and onto a cutting board to slice.
Try These High-Protein Recipes Next
If you enjoyed this flexible, high-protein approach to dessert, here are a few other recipes you should try.
- The Easiest High-Protein Apple Pie: A simple and delicious way to get the classic apple pie flavor you love, with a protein-packed twist that makes it perfect for a post-workout treat.
- Simple High-Protein Pumpkin Pie: This recipe is a holiday favorite that you can enjoy year-round, offering a creamy, spiced filling that supports your fitness goals.
- Easy Classic Cheesecake Recipe from This Gal Cooks: For those times when you want to make a traditional, full-fat cheesecake for a special occasion, this is a fantastic and straightforward recipe to follow.
Building a library of go-to healthy recipes is one of the best ways to ensure long-term success on your fitness journey.