Chili has always been one of my ultimate comfort foods. Growing up, a big pot of it meant family, football games, and cozy nights. But when I started my fat loss journey, the traditional beef and cheese-loaded chili felt like a diet-wrecker. It was heavy, high in fat, and often left me feeling sluggish.
I refused to give it up entirely. I knew there had to be a way to create a version that was both comforting and aligned with my goals. That’s how this high-protein chicken chili was born. It was one of the first recipes I perfected in those early days when I lost 65-70 pounds.
My goal was simple. I needed something packed with protein to keep me full, loaded with flavor so I wouldn’t feel deprived, and easy enough to make on days when my ADHD brain had zero extra energy. This recipe is the result. It’s creamy without heavy cream, hearty without fatty meats, and so satisfying you’ll forget it’s “health food.”
Skip to My Flexibe Diet Recipe!
Why Chicken Chili Is Great For Fat Loss
When it comes to fat loss, food is about 75 percent of the battle. This chicken chili recipe is engineered to make that battle easier, especially for those of us with ADHD. It’s built on the principles that drive sustainable results: protein first, hunger management second, and convenience always.
The primary weapon here is protein. With boneless, skinless chicken breast, two types of beans, and a secret boost from Greek yogurt and bone broth, each serving is loaded with protein. Protein is the most satiating macronutrient. It keeps you feeling full and satisfied for hours, which is critical for managing the impulsive snacking and cravings our ADHD brains are famous for.
Next up is hunger management through fiber. The black beans, cannellini beans, corn, and heaps of vegetables provide a massive dose of dietary fiber. Fiber slows down digestion, stabilizes blood sugar levels, and helps you feel physically full. No more wild energy spikes and crashes that lead to raiding the pantry for a quick dopamine hit from sugary snacks.
This recipe is also incredibly nutrient-dense. You’re getting a wide array of vitamins and minerals from the bell peppers, onions, and fire-roasted tomatoes. Fueling your body properly is just as important as managing calories. When your body has what it needs, cravings for junk food often diminish.
Finally, this recipe is a masterclass in flexible eating. A huge batch provides multiple meals, eliminating decision fatigue for days. It’s proof that you don’t need “cheat meals.” You just need smarter, more satisfying versions of the foods you already love. This is how you build a lifestyle, not just follow a diet.
Ingredients You’ll Need for Chicken Chili
The beauty of this chicken chili lies in its simplicity and reliance on pantry staples. We’re building maximum flavor with minimal fuss. No hunting for obscure ingredients that you’ll use once and forget about in the back of the cabinet.
Here’s exactly what you’ll need to get started.
- 1.5 lbs boneless, skinless chicken breast, cooked and shredded
- 1 tbsp olive oil
- 1 large yellow onion, diced
- 1 red bell pepper, diced
- 1 green bell pepper, diced
- 1 poblano pepper, diced
- 4 cloves garlic, minced
- 2 tbsp chili powder
- 1 tbsp ground cumin
- 2 tsp smoked paprika
- 1 tsp dried oregano
- 1/2 tsp black pepper
- 1/4 tsp cayenne pepper (optional, for extra heat)
- 32 oz low-sodium chicken bone broth
- 1 (28-ounce) can crushed fire-roasted tomatoes
- 1 (15-ounce) can black beans, rinsed and drained
- 1 (15-ounce) can cannellini beans (or other white beans), rinsed and drained
- 1 (15-ounce) can corn, drained
- 1 (4-ounce) can diced green chiles
- 1 cup non-fat plain Greek yogurt
- Juice of 1 lime
- 1/2 cup chopped fresh cilantro
The key ingredient, the one that gives this chili its incredible texture and a hidden protein punch, is the non-fat plain Greek yogurt. We blend it into the chili base to create a rich, creamy consistency without a drop of heavy cream or a block of cream cheese. It’s a game-changer for keeping calories and fat in check while boosting protein.
A quick note on a few other ingredients. Using fire-roasted tomatoes adds a subtle smokiness that you just don’t get from regular crushed tomatoes. It’s a small detail that makes a big difference in the final flavor. For the chicken, feel free to use a store-bought rotisserie chicken for a massive shortcut. Just pull the meat and shred it. Working with your energy levels is key.
How To Make Chicken Chili (Step-By-Step)
This recipe is designed to be as straightforward as possible. It’s mostly a “dump and stir” operation, perfect for low-motivation days. Using a heavy-bottomed pot or a Dutch oven will give you the best results, as it distributes heat evenly and prevents scorching.
Step 1: Sauté Your Vegetables
Start by heating the olive oil in your pot over medium-high heat. Once it shimmers, add the diced onion and all three types of bell peppers. Let them cook for about 5-7 minutes, stirring occasionally. You want them to soften up and maybe get a tiny bit of color. This step builds the first layer of flavor, so don’t rush it.
Step 2: Bloom Your Spices
Add the minced garlic and all of your dry spices: chili powder, cumin, smoked paprika, oregano, black pepper, and cayenne if you’re using it. Stir constantly for about one minute until you can really smell them. This is called “blooming” the spices, and it unlocks their full flavor potential. Just be careful not to burn the garlic.
Step 3: Add Liquids and Canned Goods
Now for the easy part. Pour in the chicken bone broth, the can of crushed fire-roasted tomatoes, and all the rinsed beans, corn, and diced green chiles. Give everything a really good stir to make sure it’s all combined and the spices are distributed evenly.
Step 4: Simmer and Meld Flavors
Bring the chili to a gentle simmer. Once it starts bubbling, reduce the heat to low, put the lid on, and let it do its thing for at least 30 minutes. If you have the time and patience, letting it go for a full hour will make the flavors even deeper and more delicious. This is a great time to set a timer and walk away.
Step 5: Create the Creamy Base
This is the magic step. Carefully scoop out about two cups of the chili, focusing on getting plenty of the broth and some of the beans. Transfer this to a blender and add the non-fat plain Greek yogurt. Blend it until it’s perfectly smooth and creamy. An immersion blender directly in the pot works great here too and means less cleanup.
Step 6: Combine Everything
Pour that creamy blended mixture right back into the pot with the rest of the chili. Now, add your cooked and shredded chicken. Stir it all together until the chili is uniform in color and texture. You’ll see it thicken up almost immediately.
Step 7: Final Simmer
Let the chili simmer uncovered for another 10 minutes. This allows the chicken to heat through completely and gives the chili a final chance to thicken into that perfect, hearty consistency.
Step 8: Finish and Serve
Take the pot off the heat. The final touch is stirring in the fresh lime juice and chopped cilantro. This brightens up all the deep, savory flavors. Don’t skip this part. A little bit of acid at the end makes a huge difference. Now it’s ready to serve.
How To Serve Chicken Chili (ADHD-Friendly)
Serving this chicken chili is all about making it feel like a satisfying, complete meal, not a restrictive “diet” food. For the ADHD brain, novelty and customization are king. Serving the same bowl of chili every day can lead to boredom and derail your consistency. The solution? A toppings bar.
Set up a few small bowls with different toppings. This allows you to build a different experience with each meal, keeping things interesting. It empowers you to make choices, which feels a lot better than being told what to eat. It also accommodates different preferences if you’re feeding family or friends.
Here are some of my favorite ADHD-friendly topping ideas:
- More Protein & Creaminess: A dollop of non-fat plain Greek yogurt is my go-to substitute for sour cream. It adds a tangy flavor and even more protein.
- Healthy Fats: Diced avocado adds a wonderful creamy texture and healthy fats that contribute to satiety.
- A Little Crunch: Instead of a mountain of Fritos, measure out a small serving of crushed tortilla chips. This is a perfect example of flexible eating. You get the crunch and flavor you crave in a controlled portion.
- Flavor Bombs: Pickled jalapeños, a sprinkle of sharp cheddar cheese, extra chopped cilantro, or a squeeze of fresh lime juice can completely change the character of your bowl.
My biggest ADHD tip is to prep your toppings when you make the chili. Chop the cilantro, shred the cheese, and dice some red onion. Store them in clear, labeled containers in the fridge. This eliminates the friction of having to prep every time you want a bowl, making it much more likely you’ll reach for this healthy meal instead of ordering takeout.
How To Store, Reheat, and Reuse Chicken Chili
This chicken chili recipe is a meal prepper’s dream. In fact, it tastes even better the next day as the flavors have more time to meld together. Properly storing your leftovers is key to making your week easier and ensuring you have a healthy, delicious meal ready to go when decision fatigue hits.
Here’s the best way to handle your leftovers to set your future self up for success.
- Cool It Down: Before you store the chili, let it cool down to room temperature. Putting a huge, hot pot directly in the fridge can raise the internal temperature and put other food at risk.
- Portion It Out: This is my number one tip for anyone, especially those with ADHD. Store the chili in single-serving, airtight containers. This eliminates guesswork, helps with portion control, and makes grabbing lunch a no-brainer. I prefer clear glass containers so I can see exactly what’s inside.
- Label Everything: Grab some masking tape and a marker. Write “Chicken Chili” and the date on each container. This prevents the dreaded “mystery leftover” problem and helps you use things before they go bad.
When you’re ready to eat, reheating is simple. You can pop a container in the microwave for a couple of minutes, stirring halfway through. Or, for the best texture, gently reheat it in a small saucepan on the stove. You might need to add a splash of chicken broth or water to loosen it up as it will thicken in the fridge.
Don’t be afraid to get creative with the leftovers to prevent boredom. Use the chili as a topping for a baked potato, mix it with some whole wheat pasta for a high-protein chili mac, or serve it over a bed of quinoa. Re-purposing leftovers makes them feel like an entirely new meal.
Easy Swaps & Variations for Chicken Chili
One of the core principles of ADHD FIT is flexibility. A recipe is a blueprint, not a rigid set of rules. This chicken chili is incredibly adaptable to your tastes, what you have on hand, or your specific dietary needs. Don’t be afraid to experiment and make it your own.
Here are a few simple swaps and variations to get you started:
- Change Up the Protein: If you don’t have chicken breast, this recipe works beautifully with lean ground chicken or ground turkey. Just brown it in the pot along with the onions and peppers at the beginning. Drain any excess fat before moving on.
- Make It Vegetarian: To make a vegetarian version, simply omit the chicken and add an extra can or two of beans. A mix of kidney beans, pinto beans, and black beans would be fantastic. Use vegetable broth instead of chicken broth.
- Boost the Veggies: This chili is a great vehicle for using up vegetables lingering in your fridge. Diced zucchini, carrots, celery, or even some chopped mushrooms can be added with the peppers and onions for extra nutrients and fiber.
- Adjust the Heat: If you love spicy food, add a diced jalapeño or serrano pepper along with the other veggies. A teaspoon of chipotle powder can also add a wonderful smoky heat. If you prefer it mild, skip the cayenne and use a green bell pepper instead of the poblano.
- ADHD-Friendly Shortcut: On a really low-energy day, you can use a pre-made low-sodium chili seasoning packet instead of the individual spices. No shame in that game. Convenience is key to consistency.
- Dairy-Free Option: To make this dairy-free, you can substitute the Greek yogurt with a dairy-free plain yogurt (like coconut or soy-based) or even blend in a small amount of silken tofu to get that creamy texture.
The goal is to create a meal you love and will actually eat consistently. Use these ideas as a starting point and see what delicious combinations you can come up with.
Creamy High-Protein Chicken Chili
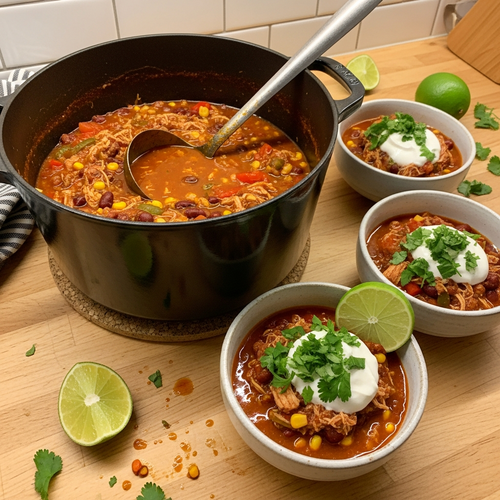
Description: A hearty and satisfying chicken chili made creamy with a secret, high-protein ingredient. Perfect for fat loss, meal prep, and busy weeknights.
Prep Time: 15 minutes | Cook Time: 45 minutes
Servings: 8
Macros per Serving | Calories: 338 | Protein: 35g | Fat: 3g | Carbohydrates: 23g
Ingredients
- 1.5 lbs boneless, skinless chicken breast, cooked and shredded
- 1 tbsp olive oil
- 1 large yellow onion, diced
- 1 red bell pepper, diced
- 1 green bell pepper, diced
- 1 poblano pepper, diced
- 4 cloves garlic, minced
- 2 tbsp chili powder
- 1 tbsp ground cumin
- 2 tsp smoked paprika
- 1 tsp dried oregano
- 1/2 tsp black pepper
- 1/4 tsp cayenne pepper (optional)
- 32 oz low-sodium chicken bone broth
- 1 (28-ounce) can crushed fire-roasted tomatoes
- 1 (15-ounce) can black beans, rinsed and drained
- 1 (15-ounce) can cannellini beans, rinsed and drained
- 1 (15-ounce) can corn, drained
- 1 (4-ounce) can diced green chiles
- 1 cup non-fat plain Greek yogurt
- Juice of 1 lime
- 1/2 cup chopped fresh cilantro
Instructions
- Heat oil in a large pot. Sauté onion and peppers for 5-7 minutes until soft.
- Add garlic and all spices. Cook for 1 minute until fragrant.
- Stir in broth, tomatoes, beans, corn, and green chiles. Bring to a simmer, then cover and cook on low for at least 30 minutes.
- Transfer 2 cups of the chili mixture to a blender with the Greek yogurt. Blend until smooth.
- Pour the creamy mixture back into the pot. Stir in the shredded chicken.
- Simmer for 10 more minutes to heat through and thicken.
- Remove from heat and stir in lime juice and cilantro before serving.
Notes
For a shortcut, use a pre-cooked rotisserie chicken. The chili tastes even better the next day, making it perfect for meal prep.
FAQs About Chicken Chili For Weight Loss
Here are some straightforward answers to the most common questions I receive about this chicken chili recipe.
Can I make this chicken chili in a slow cooker?
Absolutely. A slow cooker is an amazing tool for anyone with ADHD because it’s the ultimate “set it and forget it” appliance. To adapt this recipe, I still recommend doing the first couple of steps on the stovetop. Sautéing the vegetables and blooming the spices in a separate pan before adding them to the slow cooker builds a much deeper flavor profile that you would miss by just dumping everything in raw.
After you’ve done that, transfer the cooked veggies and spices to your slow cooker. Then, add the broth, tomatoes, beans, corn, and green chiles. You can even add the raw chicken breasts directly to the slow cooker at this stage. Cook on low for 6-8 hours or on high for 3-4 hours. About 30 minutes before serving, remove the chicken breasts, shred them with two forks, and then return them to the pot. Blend the yogurt with some of the chili liquid as described in the original recipe and stir that in at the very end. This prevents the yogurt from curdling from prolonged heat.
Is this chicken chili recipe good for meal prep?
This recipe isn’t just good for meal prep; it’s one of the best. The flavors actually get better as they sit in the fridge overnight, making Monday’s lunch even more delicious than Sunday’s dinner. The key to successful meal prep, especially with ADHD, is reducing future friction. By making a big batch of this chicken chili, you are making a decision for your future self. You’re guaranteeing you have a healthy, high-protein meal waiting for you.
My advice is to portion it out into single-serving containers right after you’re done cooking. This avoids the “giant container of chili” problem, where scooping some out feels like a chore. Having it in grab-and-go portions makes it just as easy as ordering takeout. Labeling them clearly helps you keep track and reduces the mental load of figuring out what to eat. It’s a simple system that pays huge dividends in consistency.
What makes this chicken chili healthier than traditional chili?
Traditional chili, while delicious, is often very high in calories, saturated fat, and sodium. This chicken chili recipe makes several key swaps to align it with fat loss goals without sacrificing flavor. First, we use lean boneless, skinless chicken breast instead of ground beef, which significantly cuts down on the saturated fat and overall calorie count. This lets us pack in more protein for fewer calories.
Second, the creaminess comes from non-fat Greek yogurt instead of sour cream, heavy cream, or large amounts of cheese. This swap not only slashes the fat content but also adds another layer of protein. We also load the chili with vegetables and beans, which boosts the fiber content dramatically. This fiber helps keep you full and supports digestive health. Finally, by using low-sodium broth and rinsing our beans, we have full control over the sodium level, avoiding the bloat and water retention that can come with pre-packaged or restaurant versions.
Can I freeze this chicken chili?
Yes, this chili freezes exceptionally well. It’s a fantastic way to stock your freezer with healthy meals for those emergency days when you have no time or energy to cook. To freeze it, first let the chili cool completely to room temperature. You can then portion it into freezer-safe airtight containers or, my preferred method, heavy-duty freezer bags.
If using bags, ladle the chili in, squeeze out as much air as possible, and lay them flat on a baking sheet to freeze. Once they are solid, you can stack them like books, which saves a ton of freezer space. The chili will last for up to 3 months in the freezer. To reheat, simply thaw a portion overnight in the refrigerator and then warm it up on the stovetop or in the microwave. The texture remains almost perfect.
How can I adjust the spice level of this chicken chili?
This recipe is designed to have a mild-to-medium level of heat, but it’s incredibly easy to customize to your preference. The main sources of heat are the poblano pepper and the optional cayenne pepper. For a milder chili, you can substitute the poblano pepper with another green bell pepper and completely omit the cayenne. This will give you all the flavor without the kick.
If you’re a spice lover and want to turn up the heat, you have a few options. You can add one or two finely diced jalapeños or serrano peppers when you sauté the onions and bell peppers. Another great option is to add a teaspoon of chipotle powder along with the other spices for a smoky heat. And of course, you can increase the amount of cayenne pepper. Start with a little, taste, and add more until you reach your desired level of spice.
Try These High-Protein Recipes Next
If you loved this easy and delicious chili, I have a few others I think you’ll enjoy.
- My Other White Chicken Chili Recipe: A slightly different take on this classic, with a focus on green chiles and a zesty flavor profile.
- The Best Damn Healthy Chili Recipe: My go-to classic chili recipe, made healthier with lean ground beef and packed with flavor.
- Easy White Chicken Chili from This Gal Cooks: A fantastic and simple recipe that uses cream cheese for a rich and decadent finish.
Building a rotation of reliable, healthy meals is the secret to long-term success.