I used to think turkey was just for Thanksgiving. And even then, I mostly saw it as a dry, boring obligation on the way to the stuffing and mashed potatoes. It was “healthy” protein, which in my mind meant it had to be tasteless. This was a huge problem when I started my fat loss journey, trying to lose 65 pounds as a single dad with ADHD.
Eating high-protein is the foundation of sustainable fat loss. But my ADHD brain craves flavor and satisfaction. If my food is bland, I will eventually spiral into a takeout binge. That’s just a fact. I needed a way to make lean protein, like turkey, something I genuinely looked forward to eating. That’s when I discovered the magic of this turkey brine.
This isn’t just a recipe. It’s a strategy. It’s a way to turn the leanest, most budget-friendly protein powerhouse into the juiciest, most flavorful meat you’ve ever had. It transformed my meal prep from a chore into an exciting event. Roasting a whole brined turkey on a Sunday means I have delicious, craving-crushing protein ready to go all week long.
It’s a brutally practical system that works with my brain, not against it. It proves that you don’t have to choose between food that tastes amazing and food that gets you results. You can have both.
Skip to My Flexibe Diet Recipe!
Why Turkey Brine Is Great For Fat Loss
Let’s be direct. The secret to fat loss is consistency, and the secret to consistency is eating food you actually enjoy. This is where a great turkey brine becomes a powerful tool in your fitness arsenal. It’s not about the brine itself having magical fat-burning properties. It’s about what the brine does to the turkey.
Turkey is a top-tier protein source. It’s lean, packed with muscle-building amino acids, and incredibly satiating. Protein is king for fat loss because it keeps you feeling full, which helps manage cravings and reduce overall calorie intake. The problem? Turkey, especially the breast meat, can be notoriously dry and bland if not cooked properly.
This recipe solves that problem completely. The salt in the brine helps the turkey absorb a significant amount of moisture. This process, called osmosis, ensures that even if you slightly overcook the bird (something my ADHD brain has definitely done), it remains succulent and juicy. You get a safety net for your cooking.
More importantly, the aromatics like citrus, garlic, and fresh herbs infuse the meat with incredible flavor from the inside out. This means you have delicious, satisfying protein that doesn’t need to be drowned in high-calorie sauces or gravies to taste good. You can eat it plain and be perfectly happy. When your core protein source is this tasty, building healthy meals around it becomes effortless, making it easier to stick to your plan day after day.
By making a huge batch of delicious protein, you are setting your future self up for success. It’s a simple meal prep strategy that prevents decision fatigue and keeps you on track when motivation is low.
Ingredients You’ll Need for Turkey Brine
The beauty of this recipe is its simplicity. We are using common, powerful ingredients to create something special. No need to hunt down obscure items. Everything here is designed for maximum flavor impact with minimal fuss. This is what you’ll need to make the best turkey of your life.
The key twist in this recipe is the combination of low-sodium broth and bright citrus. The broth adds a savory depth that water alone can’t provide, while the oranges and lemons cut through the richness and add a fresh, zesty layer. It creates a more complex and interesting flavor profile.
- 1 gallon (16 cups) of water
- 1 gallon (16 cups) of low-sodium chicken or vegetable broth – Using low-sodium is critical. Regular broth plus a cup of salt will make your final product way too salty. This gives us control.
- 1 cup of kosher salt – Use kosher salt or coarse sea salt. Table salt is much finer and denser, so if you use it, you’ll need to cut the amount by almost half to avoid an overly salty brine.
- 2 oranges, quartered
- 2 lemons, quartered
- 1 head of garlic, sliced in half horizontally – No need to peel the cloves. Just slice the whole head in half to expose the insides. Simple.
- 1 large yellow onion, roughly chopped – Again, no need for perfect dicing. A rough chop is all you need to release the flavor.
- 1 bunch of fresh thyme
- 1 bunch of fresh rosemary
- 1 bunch of fresh sage – Fresh herbs make a noticeable difference, but you can substitute with dried if needed. A good rule of thumb is one tablespoon of dried herbs for every bunch of fresh.
- 2 tablespoons of whole black peppercorns
- 4-5 bay leaves
These ingredients work together to not only moisturize the turkey but also to season it from within. It’s a foundational step that guarantees a delicious result, taking the guesswork out of cooking a perfect bird.
How To Make Turkey Brine (Step-By-Step)
Making a turkey brine sounds complicated, but it’s really just a few simple steps. The most important part is planning ahead, especially for the cooling time. Don’t let that trip you up. Set a reminder on your phone if you need to.
Step 1: Combine and Boil
In a very large stockpot (big enough to hold at least 2 gallons of liquid), combine 8 cups of the water, the full cup of kosher salt, and all your aromatics. That includes the quartered oranges and lemons, the halved garlic head, chopped onion, the entire bunches of thyme, rosemary, and sage, plus the peppercorns and bay leaves. Give it a stir and place it on the stove over medium-high heat. The goal here is to bring it to a boil to completely dissolve the salt. If the salt isn’t fully dissolved, it won’t work its magic properly.
Step 2: Simmer and Infuse
Once the mixture is boiling and you can see the salt is gone, reduce the heat to low and let it simmer for about 15 to 20 minutes. This is a crucial step. Simmering allows all those amazing flavors from the herbs, citrus, and garlic to get extracted into the liquid. Your kitchen will start to smell incredible. This is where the flavor foundation is built.
Step 3: Cool It Down
Remove the pot from the heat. Now, pour in the remaining 8 cups of cold water and the entire gallon of cold broth. This is a hack to rapidly decrease the temperature of the brine. However, it will still be warm. You must let the brine cool completely to room temperature, or even better, to refrigerator temperature. This is a non-negotiable food safety step. Adding a turkey to warm liquid is a recipe for bacterial growth. To speed things up, you can place the pot in an ice bath in your sink.
Step 4: Submerge the Turkey
Once the brine is completely cold, it’s time to introduce the turkey. Make sure your turkey is fully thawed and you’ve removed the giblets and neck from the cavity. Place the turkey in a brining bag, a clean 5-gallon bucket, a cooler, or a pot large enough to hold the bird and the liquid. Pour the cooled brine over the turkey, making sure the entire bird is submerged. You might need to place a heavy plate on top to keep it from floating.
Step 5: Brine and Wait
Seal your brining container and place it in the refrigerator. Let the turkey brine for 12 to 24 hours. A good rule of thumb is about one hour per pound, but a solid 24 hours is great for a standard 12-15 pound turkey. For very large birds, you can go up to 36 hours. After brining, remove the turkey, discard the brine, and pat the bird completely dry with paper towels before roasting. This dry surface is key to getting crispy skin.
How To Serve Turkey Brine (ADHD-Friendly)
Okay, you’ve made this incredible, juicy turkey thanks to the turkey brine. Now what? The biggest win here for the ADHD brain is leveraging this one big cooking effort into multiple easy meals. This is proactive meal prep that prevents future “what’s for dinner?” paralysis.
Don’t just think of this as a holiday meal. Think of it as creating a supply of high-quality, delicious protein for the week. The moment that turkey is cooked and has rested, the work isn’t over. The most important ADHD-friendly step is to carve it up right away. If you put the whole turkey in the fridge “for later,” “later” might never come. Avoid that task initiation barrier.
Carve the breast meat into slices, pull the dark meat from the legs and thighs, and store it all in airtight containers in the fridge. Now you have grab-and-go protein that’s ready for anything. This dramatically lowers the effort required to eat a healthy meal during a busy week.
Here are a few brutally simple ways to use your pre-cooked turkey:
- The Quick Plate: A handful of turkey slices, a microwaved sweet potato, and a bag of steamed green beans. Dinner is ready in 5 minutes. No complex cooking required.
- The Protein-Packed Salad: Throw a big pile of shredded turkey on top of a bed of mixed greens. Add some nuts, cheese, and a simple vinaigrette. It’s a satisfying lunch that crushes afternoon cravings.
- The Speedy Wrap: Roll up some turkey slices in a low-carb tortilla with hummus or avocado and some spinach. It’s portable, easy, and requires zero cooking.
- The “Clean Out The Fridge” Soup: Simmer some broth with leftover veggies and add a bunch of shredded turkey at the end to heat through. It’s a perfect low-effort, high-reward meal for a cold day.
By turning one big task (roasting a turkey) into a component for many small, easy tasks (assembling meals), you are working with your brain. You’re making the path of least resistance the healthy one.
How To Store, Reheat, and Reuse Turkey Brine
First, a critical food safety announcement: you cannot reuse the turkey brine itself. Once it has been in contact with raw poultry, it must be discarded immediately to prevent cross-contamination. This section is all about how to handle the delicious, cooked turkey you’ve made.
Proper storage is key to making your meal prep efforts last. Once the turkey has been carved, you want to get it into the refrigerator as quickly as possible. Don’t leave it sitting out on the counter for hours. Divide the meat into airtight containers. I like to separate the breast and dark meat, and sometimes I’ll even portion it out into single-serving sizes to make grabbing a quick meal even easier.
Here’s how to store your cooked turkey for maximum freshness and convenience:
- Refrigeration: Cooked turkey will last for 3 to 4 days in an airtight container in the refrigerator. If you plan to eat it within this window, the fridge is your best bet. I recommend pouring a little bit of chicken broth over the sliced meat before storing it to help it stay moist.
- Freezing: Turkey freezes beautifully, making it an amazing tool for long-term meal prep. You can freeze it sliced, shredded, or cubed. I recommend using freezer-safe zip-top bags and pressing out as much air as possible to prevent freezer burn. It will last for up to 3 months in the freezer.
- Reheating: The goal when reheating is to preserve moisture. The microwave is fast but can dry out the meat. My preferred method is to place the turkey in an oven-safe dish with a splash of chicken broth, cover it with foil, and warm it in a 300°F (150°C) oven until heated through. For a quicker method, you can gently pan-fry it with a little bit of oil or broth.
For frozen turkey, you can thaw it overnight in the refrigerator before reheating. By taking a few extra minutes to store and reheat your turkey properly, you ensure that meal number five is just as juicy and delicious as the first one. It honors the effort you put in upfront.
Easy Swaps & Variations for Turkey Brine
One of our core principles at ADHD FIT is flexibility. A recipe is a blueprint, not a rigid set of laws. This turkey brine is fantastic as written, but you can absolutely adapt it based on what you have on hand, your personal tastes, or your budget. Don’t let a missing ingredient stop you from making it.
The core components are liquid, salt, and aromatics. As long as you keep those elements, you can play around with the specifics. This is a great way to use up produce that’s about to go bad or to try out new flavor combinations. Don’t be afraid to experiment a little; it’s hard to go wrong.
Here are some simple and effective swaps you can make:
- Citrus Swap: No oranges or lemons? Grapefruit, limes, or even a cup of apple cider can be used instead. Apple cider will add a lovely, subtle sweetness that’s perfect for a fall-themed meal.
- Herb Variations: If you don’t have fresh herbs, you can use dried. The general conversion is one teaspoon of dried for every tablespoon of fresh. So for this recipe, about 2-3 tablespoons of each dried herb would work. You could also add other woody herbs like marjoram or a few sprigs of oregano.
- Spice It Up: Feel free to add other whole spices to the brine. A few star anise pods, a tablespoon of coriander seeds, or a cinnamon stick can add warmth and complexity. A few dried chili peppers can add a nice background heat.
- Sweetener Option: For a brine that helps with browning and adds a hint of sweetness, you can dissolve a half-cup of brown sugar or maple syrup into the initial boiling step along with the salt. This is optional but creates a delicious sweet-and-savory balance.
- Broth Flexibility: While chicken or vegetable broth is recommended, in a pinch, you could use all water. The brine will still do its primary job of adding moisture and seasoning the bird with salt, but you’ll lose some of the savory depth from the broth.
The goal is to make this work for you. Use this recipe as your starting point and adjust it to fit your kitchen and your cravings. The best plan is the one you’ll actually follow.
The Best Turkey Brine For A Juicy Bird
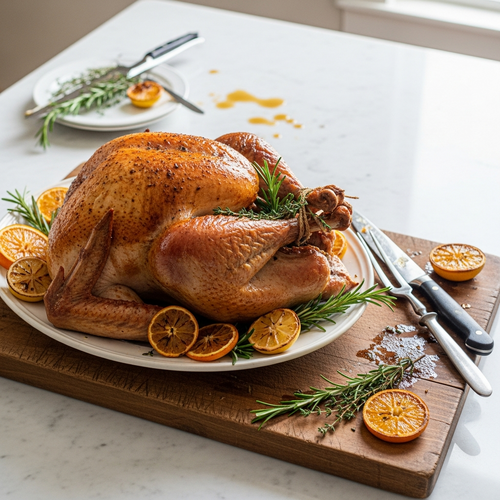
Description: A simple, flavor-packed turkey brine recipe that guarantees a moist, succulent, and delicious turkey every time. Perfect for meal prep and making healthy eating enjoyable.
Prep Time: 20 minutes | Brine Time: 12-24 hours
Servings: Varies (for one 12-15 lb turkey)
Macros per 4oz Serving of Cooked Turkey Breast | Calories: 150 | Protein: 30g | Fat: 3g | Carbohydrates: 1g
Ingredients
- 1 gallon (16 cups) of water
- 1 gallon (16 cups) of low-sodium chicken or vegetable broth
- 1 cup of kosher salt
- 2 oranges, quartered
- 2 lemons, quartered
- 1 head of garlic, sliced in half horizontally
- 1 large yellow onion, roughly chopped
- 1 bunch of fresh thyme
- 1 bunch of fresh rosemary
- 1 bunch of fresh sage
- 2 tablespoons of whole black peppercorns
- 4-5 bay leaves
Instructions
- In a large stockpot, combine 8 cups water, kosher salt, and all aromatics.
- Bring to a boil, stirring until salt dissolves. Reduce heat and simmer for 15-20 minutes.
- Remove from heat and add the remaining cold water and cold broth.
- Allow the brine to cool completely to room temperature or colder.
- Place thawed turkey in a brining bag or large container and cover completely with the cooled brine.
- Refrigerate and brine for 12-24 hours.
- Remove turkey, discard brine, and pat the turkey completely dry before roasting.
Notes
It is critically important for food safety that the brine is completely cool before you add the raw turkey. Do not skip this step. Patting the turkey skin dry after brining is the secret to getting crispy skin when you roast it.
FAQs About Turkey Brine For Weight Loss
Here are some straightforward answers to the most common questions I receive about this turkey brine recipe.
Can I use this turkey brine on a turkey breast instead of a whole bird?
Absolutely. This brine works wonderfully for smaller cuts of turkey, like a bone-in turkey breast or even individual boneless, skinless turkey breasts. The process is exactly the same, but you will need to significantly reduce the brining time. Over-brining a smaller cut can result in a texture that is too soft or spongy.
For a bone-in turkey breast (typically 6-8 pounds), I recommend brining for 6 to 8 hours. For smaller, boneless breasts, just 2 to 4 hours is plenty of time to get the benefits of moisture and flavor. This is a fantastic strategy for smaller households or for weekly meal prep when roasting a whole bird feels like too much of a project. It gives you all the flavor benefits on a smaller, more manageable scale.
Is this turkey brine recipe too high in sodium for a weight loss diet?
This is a common and very valid concern. Seeing a full cup of salt can be alarming, but it’s important to understand how brining works. The turkey does not absorb all of that salt. The salt’s primary role is to create a solution that allows the turkey to absorb water, and with it, a small amount of salt and flavor. The vast majority of the sodium is discarded with the brine.
We also mitigate the sodium by using low-sodium broth and not adding any additional salt to the turkey before roasting. For most people, the amount of sodium that actually ends up in a serving of turkey is well within the range of a healthy diet. As always, if you have specific health concerns or have been advised by a doctor to follow a low-sodium diet, you should proceed with caution or consider a salt-free rub instead.
Do I have to use fresh herbs in this turkey brine?
No, you don’t. While I believe fresh herbs provide the best, most vibrant flavor, dried herbs are a perfectly acceptable and convenient substitute. This is all about flexibility and working with what you have. If using dried herbs, you’ll want to use less than you would with fresh, as they are more concentrated.
A good rule of thumb is to use one-third the amount of dried herbs as fresh. Since the recipe calls for one bunch of each, I would suggest using about 2 tablespoons of dried thyme, 2 tablespoons of dried rosemary, and 2 tablespoons of dried sage. The flavor profile will be slightly different, a bit more earthy and less bright, but it will still be delicious and infuse your turkey with wonderful aromatic notes.
What is the biggest mistake people make with a turkey brine?
By far, the most critical and common mistake is not cooling the brine completely before adding the turkey. I cannot stress this enough. Adding your raw turkey to a lukewarm or warm brine is a major food safety risk. It puts the turkey in the “danger zone” (40°F to 140°F), which is the temperature range where bacteria can multiply rapidly.
This can lead to foodborne illness. Beyond the safety issue, a warm brine will also start to cook the outside of the bird, resulting in a strange, rubbery texture on the skin and outer layers of meat. Always plan for the cooling time. It can take several hours for a large pot of brine to cool. An ice bath in the sink is a great way to speed this up, but patience is your best tool here.
How does using a turkey brine help with meal prep?
Using a turkey brine is a game-changer for meal prep because it transforms a standard protein into a premium, crave-worthy food. The number one reason people fall off their meal plan is boredom. This recipe makes your primary protein source juicy, flavorful, and exciting to eat, which drastically increases your adherence.
Furthermore, it encourages you to cook in a large batch. Roasting a whole 15-pound turkey provides you with pounds of ready-to-eat protein for the entire week. This front-loads the effort. You have one big cooking day, and in return, you get nearly a week’s worth of fast, healthy meal components. It reduces decision fatigue on busy weeknights and makes it incredibly easy to hit your protein goals without even thinking about it.
Try These High-Protein Recipes Next
If you loved how this brine transforms turkey, here are a few more recipes to keep your high-protein meals delicious and interesting.
- ADHD-Friendly Turkey Recipe: This is my go-to method for roasting the turkey after it comes out of the brine, designed for perfect results with minimal fuss.
- High-Protein Stuffing Recipe: A fantastic, macro-friendly side dish that pairs perfectly with your juicy turkey without derailing your progress.
- Classic Oven Roasted Turkey: Another excellent, straightforward roasting recipe that provides great tips on achieving that perfectly golden-brown, crispy skin.
Cooking delicious, healthy food is a skill, and these recipes will help you build on your success.