My relationship with sushi has been a long and complicated one. For years, it was my go-to “healthy” meal when I was trying to lose weight. I figured fish and rice had to be good for me. But I always felt hungry an hour later, which usually led to me grabbing a snack I didn’t plan for. The culprit was always the traditional sushi rice. It’s mostly simple carbs and sugar, which sent my blood sugar on a rollercoaster and kicked off a cycle of cravings.
When I first started my 70-pound fat loss journey, managing that cycle was everything. I had to build meals that provided steady energy and kept me full for hours. Later, after starting medication for my ADHD, my appetite took a nosedive, and getting enough protein became my number one challenge. I needed my meals to work harder for me.
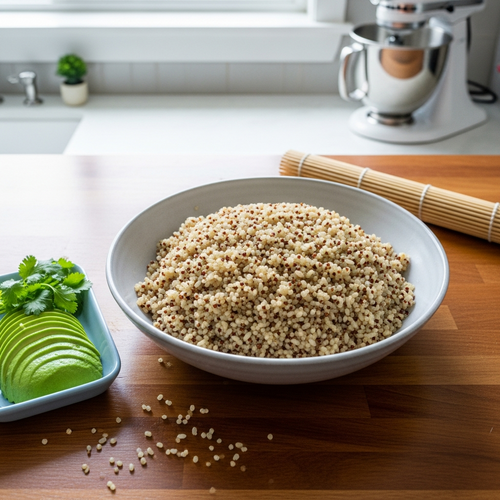
That’s what led me to create this high-protein sushi rice. I wanted that classic tangy, slightly sweet flavor I loved, but built on a foundation that actually supported my fitness goals. I needed something that would fight hunger, provide sustained energy, and be simple enough to make even when my executive function was at zero.
This recipe is the result of that mission. It’s a game-changer for anyone with ADHD who wants to enjoy their favorite flavors without derailing their progress. It’s practical, delicious, and designed to work with your brain, not against it.
Skip to My Flexibe Diet Recipe!
Why Sushi Rice Is Great For Fat Loss
Let’s be direct. Traditional sushi rice, made with polished white rice and a surprising amount of sugar, isn’t the best choice for steady fat loss. It can cause a rapid spike and subsequent crash in your blood sugar, leaving you feeling tired and hungry shortly after eating. For those of us with ADHD, managing energy levels and impulse control around food is already a battle. We don’t need our food making it harder.
This recipe turns that entire concept on its head. We’re not just making a “healthier” version; we’re building a tool for hunger management and muscle support. The foundation is built on protein first, hunger management second. Food makes up 75 percent of your results, and this recipe is designed to maximize that 75 percent.
The magic comes from a few key ingredients. We swap out white rice for a mix of short-grain brown rice and quinoa. This immediately boosts the fiber content, which slows down digestion and provides a much more stable release of energy. No more post-meal crashes. The fiber also helps you feel physically full for a longer period.
But the real superstar is the unflavored protein powder. By whisking it directly into the cooking liquid, we transform a simple carbohydrate dish into a balanced, protein-rich meal component. Protein is the most satiating macronutrient. It crushes cravings and signals to your brain that you are full and satisfied. It’s also critical for preserving lean muscle mass while you’re in a calorie deficit, which is essential for a healthy metabolism. This high-protein sushi rice makes it easy to hit your protein goals, even on days when your appetite is low or you don’t feel like cooking a separate protein source.
Ingredients You’ll Need for Sushi Rice
The beauty of this recipe is its simplicity and the powerful impact of a few smart additions. We’re taking a classic concept and optimizing it for our fitness goals and our ADHD brains. You won’t need any specialty cooking skills, just a few key ingredients that work together perfectly.
Here’s exactly what you’ll need to make this high-protein sushi rice:
- 1 cup short-grain brown rice, rinsed
- 1/2 cup quinoa, rinsed
- 2 1/2 cups water
- 1 scoop unflavored, unsweetened protein powder
- 2 tablespoons nutritional yeast
- 1/4 cup rice vinegar
- 1 tablespoon zero-calorie sweetener (e.g., stevia or monk fruit)
- 1 teaspoon salt
The two ingredients that give this recipe its unique, fat-loss-friendly twist are the unflavored protein powder and the nutritional yeast. The protein powder is a non-negotiable for boosting the macros and satiety of this dish. I recommend a whey isolate or a plant-based blend that dissolves well. Make sure it is truly unflavored and unsweetened, or you will get a very strange result.
Nutritional yeast adds a savory, slightly cheesy, umami depth of flavor that is incredibly satisfying. It also provides a great boost of B-vitamins, which can be helpful for energy metabolism. For the rice, using short-grain brown rice is important for achieving that slightly sticky texture we associate with sushi rice. Long-grain rice won’t work as well here. And remember to rinse your rice and quinoa! This removes excess starch and any bitterness from the quinoa, which is a small step that makes a big difference in the final taste and texture.
How To Make Sushi Rice (Step-By-Step)
Making this high-protein sushi rice is straightforward. We’re just adding a couple of small but crucial steps to the standard process of cooking rice. Following these steps will ensure you get a perfect texture and flavor every single time, without any clumps or scorching.
Step 1: Combine Grains and Water
In a medium, heavy-bottomed saucepan, combine your rinsed short-grain brown rice, rinsed quinoa, and water. Using a heavy-bottomed pot is a small detail that helps distribute heat more evenly and prevents the bottom from burning while the top is still undercooked. Rinsing the grains is a step you don’t want to skip; it makes a big difference in the final texture.
Step 2: Whisk in Powders
This is the most important step for getting a smooth result. While the water is still cold, add the scoop of unflavored protein powder and the nutritional yeast. Use a whisk to mix everything vigorously until the powders are completely dissolved. If you wait until the water is hot, the protein powder will instantly clump up and you’ll have a lumpy mess. Do this first!
Step 3: Cook the Grains
Place the saucepan on the stove over high heat and bring the mixture to a rolling boil. As soon as it boils, immediately reduce the heat to the lowest possible setting, place a tight-fitting lid on the pot, and let it simmer for 20-25 minutes. Set a timer so you don’t forget. The goal is for the grains to absorb all the water. Avoid the temptation to lift the lid and peek while it’s simmering.
Step 4: Prepare the Seasoning
While the rice is cooking, you can multitask by preparing the seasoning. In a small bowl, whisk together the rice vinegar, zero-calorie sweetener, and salt. Keep whisking until you can no longer see any granules of sweetener or salt. This ensures the flavor is distributed evenly throughout the rice.
Step 5: Let it Rest
Once the 20-25 minutes are up, remove the pot from the heat but keep the lid on. Let it stand undisturbed for another 10 minutes. This resting period allows the grains to steam and finish cooking, resulting in a fluffier, more perfect texture. Another great time to set a timer!
Step 6 & 7: Season the Rice
Transfer the cooked rice and quinoa mixture to a large, non-metallic bowl. A wooden or glass bowl is best, as metal can sometimes react with the vinegar. Gently pour the vinegar mixture over the rice. Use a rice paddle or a flat wooden spoon to “cut and fold” the seasoning into the rice. Avoid stirring or mashing, as this can break the grains and make the rice mushy. The goal is to separate the grains while coating them evenly.
Step 8: Cool it Down
Allow the sushi rice to cool to room temperature before using it. If you’re in a hurry, you can accelerate the process by fanning the rice with a piece of cardboard or a fan while you fold it. This is a traditional technique that also helps give the rice a beautiful, glossy sheen. Once cool, it’s ready to be used in your favorite bowls or meals.
How To Serve Sushi Rice (ADHD-Friendly)
One of the best things about this high-protein sushi rice is its versatility. You don’t have to go through the complex, time-consuming process of making sushi rolls to enjoy it. For those of us with ADHD, the path of least resistance is often the one we can stick to. So, we focus on brutally practical and delicious serving methods.
My absolute favorite way to serve this is in a deconstructed sushi bowl, sometimes called a poke bowl. It gives you all the flavors and satisfaction of sushi with about 10% of the effort. This method is perfect for low-motivation days because it relies on assembly rather than intricate cooking. It also prevents the “task initiation” barrier that often comes with recipes that have too many steps.
An ADHD-friendly tip is to create a simple bowl template to eliminate decision fatigue. Just pick one item from each category, and you’ve got a perfectly balanced meal every time.
- Protein First: Top your bowl with a simple, no-cook protein. Think canned tuna or salmon (I like to mix mine with a little Greek yogurt and sriracha), pre-cooked frozen shrimp that you just have to thaw, edamame, or leftover rotisserie chicken.
- Add Color with Veggies: Use vegetables that require minimal prep. Sliced cucumber, avocado, shredded carrots from a bag, or mini bell peppers are all fantastic options. The goal is to add nutrients and crunch with as few steps as possible.
- Flavor and Texture: Finish it off with a simple sauce and a crunchy topping. A drizzle of low-sodium soy sauce, tamari, or coconut aminos is great. For a crunch, add a sprinkle of sesame seeds or some furikake seasoning.
You can also use this sushi rice as a simple side dish for a piece of grilled salmon or baked chicken. The bright, tangy flavor pairs beautifully with simply cooked proteins. The key is to make it easy to build a satisfying meal that supports your goals without draining your limited daily supply of executive function.
How To Store, Reheat, and Reuse Sushi Rice
Meal prep is a superpower for managing ADHD and staying on track with fitness goals. This high-protein sushi rice is a perfect candidate for making ahead of time. Storing it correctly ensures it stays fresh, safe to eat, and ready for a quick meal when you need it most. This removes the “what’s for dinner” spiral before it can even start.
First, always let the rice cool completely to room temperature before you put it away. Storing warm rice creates condensation, which can make it clumpy and affect the texture. Once cooled, transfer the sushi rice into an airtight container. It will keep well in the refrigerator for up to 4 days. I highly recommend portioning it out into single-serving containers right after you make it. This is a fantastic ADHD hack. It eliminates a future step, making it incredibly easy to grab a ready-made base for a healthy meal.
When you’re ready to eat it, you have a couple of options.
- Enjoy it Cold: This sushi rice is delicious served cold or at room temperature, especially in sushi bowls. Just pull a container from the fridge, add your toppings, and your meal is ready in minutes. This is my preferred method for maximum convenience.
- Reheat in the Microwave: If you prefer your rice warm, you can easily reheat it. Cold rice can be a bit dry and hard. To fix this, sprinkle about a tablespoon of water over the top of your portion of rice. Cover the container (you can just rest the lid on top) and microwave for 60-90 seconds, until it’s heated through. The steam from the water will soften the grains and bring them back to life.
Beyond bowls, you can reuse leftovers as a base for a quick stir-fry. Just add it in at the very end of cooking with your protein and veggies, tossing just long enough to heat it through. The key is to make a batch once and eat it multiple times, saving you time, energy, and decision-making power throughout the week.
Easy Swaps & Variations for Sushi Rice
The core principle of a sustainable eating plan is flexibility. You need to be able to adapt recipes based on what you have on hand, what’s on sale at the grocery store, or simply what you’re in the mood for. This high-protein sushi rice recipe is a perfect template for experimentation. Don’t be afraid to make it your own.
If you need to make a substitution, here are a few simple swaps that work well. Remember, changing ingredients will alter the final nutritional information, but the goal is consistency, not perfection.
- Grain Swaps: If you don’t have short-grain brown rice, you can use regular short-grain white sushi rice; just know you’ll be losing the fiber benefits. You could also make this recipe using 1.5 cups of just quinoa for an even bigger protein and fiber boost, though the texture will be less sticky.
- Protein Powder Options: Any truly unflavored and unsweetened protein powder will work here. I’ve used whey isolate, casein, and various plant-based blends (like pea or soy protein). You could also use unflavored collagen peptides, which dissolve very easily, but they don’t offer the same complete amino acid profile or satiating power as a complete protein powder.
- Sweetener Choices: I use a monk fruit blend, but pure stevia, erythritol, or another zero-calorie sweetener will work just fine. If you’re not strictly counting calories or sugar, a teaspoon or two of maple syrup or honey can be used instead for a more natural sweetness.
- Vinegar Variations: While rice vinegar provides the most authentic flavor, apple cider vinegar can be used in a pinch. It will give the rice a slightly different, fruitier tang.
You can also get creative with the flavor profile. For a bit of a kick, add a pinch of red pepper flakes or a dash of wasabi paste to the vinegar mixture. For a deeper, savory flavor, whisk in a teaspoon of white miso paste. Or for a bright, citrusy twist, add a squeeze of fresh lime juice or yuzu juice along with the vinegar. The possibilities are endless.
High-Protein Sushi Rice
Description: A game-changing sushi rice recipe packed with protein and fiber. It’s designed to crush cravings, manage hunger, and support your fat loss goals without sacrificing the flavor you love. Perfect for ADHD-friendly meal prep.
Prep Time: 5 minutes | Cook Time: 35 minutes
Servings: 4
Macros per Serving | Calories: 288 | Protein: 18g | Fat: 3g | Carbohydrates: 50g
Ingredients
- 1 cup short-grain brown rice, rinsed
- 1/2 cup quinoa, rinsed
- 2 1/2 cups water
- 1 scoop unflavored, unsweetened protein powder
- 2 tablespoons nutritional yeast
- 1/4 cup rice vinegar
- 1 tablespoon zero-calorie sweetener
- 1 teaspoon salt
Instructions
- In a saucepan, combine rinsed rice, rinsed quinoa, and water. Whisk in protein powder and nutritional yeast until dissolved.
- Bring to a boil, then reduce heat to low, cover, and simmer for 20-25 minutes.
- While rice cooks, whisk together rice vinegar, sweetener, and salt in a small bowl.
- Remove rice from heat and let stand, covered, for 10 minutes.
- Transfer rice to a large non-metallic bowl. Pour vinegar mixture over the rice and use a paddle to cut and fold until combined.
- Allow to cool to room temperature before serving.
Notes
Ensure your protein powder is completely dissolved in the cold water before heating to avoid clumping. This rice is excellent for meal prep and can be stored in the fridge for up to 4 days.
FAQs About Sushi Rice For Weight Loss
Here are some straightforward answers to the most common questions I receive about this sushi rice recipe.
Can you really eat sushi rice and still lose weight?
Absolutely, yes. But the key is in the type of sushi rice you’re eating. If you’re consistently eating traditional sushi rice from a restaurant, which is made from refined white rice and sugar, it can be challenging. That combination can lead to blood sugar spikes and subsequent cravings, making it harder to stick to a calorie deficit.
This recipe, however, is specifically engineered for fat loss. By using a base of high-fiber brown rice and quinoa, we slow down digestion and promote stable energy levels. The addition of protein powder is the most critical part; it dramatically increases the satiety of the meal, helping you feel fuller for much longer on fewer calories. Protein is also essential for muscle retention during weight loss. So yes, you can and should enjoy this sushi rice as part of a balanced, effective fat loss plan.
Why add protein powder to sushi rice? Does it taste weird?
The reason we add protein powder to sushi rice is purely functional: it’s the easiest and most effective way to turn a carbohydrate-heavy side dish into a balanced, hunger-fighting meal component. For many people, especially those on ADHD medication that suppresses appetite, hitting daily protein targets is a huge struggle. Integrating protein into the food you already enjoy is a simple and powerful strategy.
As for the taste, I can assure you it does not taste weird, provided you follow one crucial rule: you must use an unflavored and unsweetened protein powder. A high-quality whey isolate, casein, or plant-based blend will be virtually undetectable. The strong, tangy, and savory flavors from the rice vinegar, sweetener, and nutritional yeast completely mask any subtle taste the powder might have. The texture also remains perfect. It’s a seamless way to boost your protein intake without changing the classic flavor experience.
Can I make this sushi rice in a rice cooker?
Yes, and using a rice cooker is an excellent ADHD-friendly hack to make this recipe even more hands-off and foolproof. The process is very similar to the stovetop method. You’ll simply combine the rinsed rice, rinsed quinoa, and water directly in the pot of your rice cooker.
Next, add the protein powder and nutritional yeast and use a whisk to mix it thoroughly while the water is still cold. This is still the most important step to prevent clumping. Once it’s dissolved, close the lid and set your rice cooker to the “brown rice” setting. While it’s cooking, prepare the vinegar seasoning mixture in a separate bowl. When the rice cooker finishes its cycle, let the rice sit for about 10 minutes, then transfer it to a separate bowl to fold in the seasoning. It’s a great “set it and forget it” method.
Is this high-protein sushi rice good for meal prep?
This recipe is an absolute champion for meal prep. In fact, that’s one of its primary design features. The ADHD brain thrives on systems that reduce friction and in-the-moment decision making. By cooking a large batch of this sushi rice over the weekend, you are setting yourself up for success all week long.
It stores perfectly in an airtight container in the refrigerator for up to four days. I recommend portioning it into single-serving containers as soon as it cools. That way, when you’re hungry and need a quick lunch or dinner, the base of your meal is already measured, cooked, and ready to go. You just need to add a protein topper and some veggies. This strategy helps you avoid the takeout spiral on busy days and ensures you always have a healthy, goal-oriented option available.
What’s the difference between this sushi rice and regular steamed brown rice?
While both are healthy carbohydrate sources, there are two massive differences: flavor and function. Regular steamed brown rice is a blank canvas. It’s nutritious, but it’s plain. This high-protein sushi rice is seasoned with a tangy and slightly sweet vinegar mixture that makes it feel like a component of a special, deliberate meal. It elevates the entire eating experience, making your diet meal feel more like a restaurant-quality bowl.
The second, and more important, difference is the nutritional profile. This recipe is functionally a different food because of the added protein powder and nutritional yeast. It’s not just a carb source anymore; it’s a balanced mix of complex carbs and high-quality protein. This makes it far more satiating and better for muscle support and hunger management than plain brown rice. It’s an intentional upgrade designed to make your meal work harder for you.
Try These High-Protein Recipes Next
If you enjoyed this recipe, here are a few more simple, high-protein options that pair perfectly with it.
- High-Protein Miso Soup Recipe: A warm, savory, and incredibly comforting soup that takes just a few minutes to make and pairs perfectly with a sushi rice bowl.
- 2-Minute Sugar-Free Teriyaki Sauce: Ditch the sugary store-bought sauces. This simple, flavorful teriyaki sauce is perfect for drizzling over your sushi bowls.
- Yuzu Sushi Rice Recipe: For times when you want to try a different flavor, this recipe offers a bright, fresh citrus twist on classic sushi rice.
Building a collection of simple, flexible recipes is the key to long-term success.