Banana bread used to be one of my biggest food temptations. For years, I saw it as a “cheat” food, something I could only have if I’d been “good” all week. It was sugary, loaded with butter, and basically a cake disguised as breakfast. When I started my fat loss journey, losing that first 65 pounds, I cut it out completely. I thought that was the only way.
But that all-or-nothing thinking is a classic ADHD trap. It leads to burnout and binge cycles. When I finally started building a sustainable lifestyle, I realized the goal wasn’t to eliminate the foods I loved. The goal was to rebuild them to fit my goals.
That’s what this high-protein banana nut bread is all about. It took a lot of trial and error in the kitchen. I wanted that same comforting, moist texture and warm, spiced flavor without the sugar crash and calorie bomb. I wanted a slice to feel satisfying, not send me spiraling into cravings for the rest of the day.
This recipe is the result of that process. It’s built for people like us. It’s packed with protein to keep you full, uses smart swaps to cut down on fat and sugar, and is simple enough to make even on a low-energy day. This is how you enjoy the foods you love while consistently moving toward your fitness goals.
This is banana bread that works with your brain, not against it.
Skip to My Flexibe Diet Recipe!
Why Banana Nut Bread Is Great For Fat Loss
Let’s be direct. Traditional banana bread is not a fat loss food. It’s usually packed with sugar, butter, and refined flour. A single slice from a coffee shop can easily pack 400-500 calories with very little protein, setting you up for a blood sugar spike and crash that fuels more cravings.
This recipe turns that entire formula on its head. We’re not just making a “less bad” version. We are building a slice of banana nut bread that actively supports your fat loss goals. The magic is in the ingredient swaps, which are designed to boost protein, increase satiety, and lower the overall calorie count without sacrificing flavor or texture.
First, we tackle protein. By adding a whey/casein blend protein powder and non-fat Greek yogurt, we dramatically increase the protein content. Protein is the king of macros for fat loss. It keeps you feeling full for hours, which helps manage hunger and reduce mindless snacking. It also helps preserve lean muscle mass while you are in a calorie deficit, ensuring you are losing fat, not muscle.
Next, we cut the empty calories. We replace butter and oil with a combination of unsweetened applesauce and Greek yogurt. This provides incredible moisture while slashing the fat content. We also swap out refined sugar for a zero-calorie granulated sweetener. This gives you the sweetness you crave without the calories or the blood sugar rollercoaster that often triggers ADHD impulsivity with food choices.
Finally, we focus on fiber and healthy fats. Using white whole wheat flour and almond flour adds fiber, which aids in digestion and fullness. The walnuts provide a dose of healthy omega-3 fatty acids and a satisfying crunch. This isn’t about restriction. It’s about strategic construction, creating a delicious treat that fits perfectly into a flexible, sustainable eating plan.
Ingredients You’ll Need for Banana Nut Bread
The key to making this recipe work is using the right ingredients. Each one is chosen specifically to maximize flavor and texture while keeping the macros aligned with fat loss goals. There are no random, fussy ingredients here, just smart, practical choices.
The secret weapon in this banana nut bread is the combination of non-fat Greek yogurt and a whey/casein blend protein powder. The Greek yogurt provides moisture and a protein boost, replacing the need for oil or butter. The protein powder is crucial. A whey/casein blend is best for baking because the casein prevents the bread from becoming dry and tough, a common issue with whey-only recipes. Vanilla flavor works perfectly, but unflavored is also a great option.
Here’s the full list of what you will need:
- Very Ripe Mashed Bananas: The riper, the better. They should be heavily speckled or even black. This is where most of the natural sweetness and banana flavor comes from.
- Non-Fat Plain Greek Yogurt: This is our primary fat replacement. It adds protein and ensures a moist, tender crumb.
- Unsweetened Applesauce: Another fat replacement that adds natural sweetness and moisture.
- Large Eggs: They act as a binder and add structure to the loaf.
- Vanilla Extract: A non-negotiable for that classic bakery flavor.
- White Whole Wheat Flour: This flour has the nutritional benefits of whole wheat but with a lighter, softer texture that’s closer to all-purpose flour. Whole wheat pastry flour is another excellent choice.
- Vanilla or Unflavored Whey/Casein Blend Protein Powder: The key to making this a high-protein recipe. The blend is critical for texture.
- Almond Flour: Adds healthy fats, a tender texture, and a subtle nutty flavor.
- Zero-Calorie Granulated Sweetener: An erythritol or monk fruit blend works best as a 1-to-1 replacement for sugar.
- Baking Powder & Baking Soda: Our leavening agents that help the bread rise.
- Ground Cinnamon & Nutmeg: These warm spices are essential for that classic banana bread taste.
- Salt: Balances all the flavors.
- Chopped Walnuts: Provides a great crunch and healthy fats. Toasting them beforehand deepens their flavor.
How To Make Banana Nut Bread (Step-By-Step)
One of my core principles is making things brutally practical, especially for the ADHD brain. That means simple, clear steps that don’t require a ton of focus or complicated techniques. We’re going to use a two-bowl method here, which keeps things organized and prevents you from overworking the batter.
ADHD Tip: Before you start, pull out every single ingredient and piece of equipment. Measure everything out. This is called “mise en place,” and it’s a game-changer. It turns the process into a simple assembly line instead of a chaotic scramble, preventing that feeling of being overwhelmed mid-recipe.
Step 1: Prep Your Oven and Pan
First things first, preheat your oven to 350°F (175°C). Ovens take time to heat up, so doing this first ensures it’s ready when your batter is. Lightly grease a 9×5 inch loaf pan. I prefer using a cooking spray, but you can also use a bit of butter or coconut oil. For guaranteed easy removal, line the pan with parchment paper, leaving some overhang on the sides to act as handles.
Step 2: Combine the Wet Ingredients
In a large bowl, add your mashed bananas. Use a fork or a potato masher to get them really broken down. The smoother they are, the more evenly the flavor will distribute. Then, add the Greek yogurt, unsweetened applesauce, eggs, and vanilla extract. Whisk everything together until it’s smooth and fully combined. Don’t worry about a few small banana lumps.
Step 3: Combine the Dry Ingredients
In a separate, medium-sized bowl, add the white whole wheat flour, protein powder, almond flour, granulated sweetener, baking powder, baking soda, cinnamon, nutmeg, and salt. Use a whisk to mix these ingredients thoroughly. This is a crucial step. It ensures the leavening agents and spices are evenly distributed, so you don’t get a bite that’s all baking soda.
Step 4: Mix Wet and Dry, But Don’t Overdo It
Pour the dry ingredients into the large bowl with the wet ingredients. Switch to a rubber spatula and gently fold the mixture together. You want to mix only until the flour streaks have just disappeared. Overmixing develops the gluten in the flour and can make your banana nut bread tough and dense. A few small lumps are perfectly fine.
Step 5: Fold in Walnuts and Bake
Gently fold in the ½ cup of toasted walnuts. Pour the batter into your prepared loaf pan and use the spatula to spread it into an even layer. Sprinkle the remaining 2 tablespoons of walnuts over the top. Bake for 45-55 minutes. Ovens vary, so start checking around the 40-minute mark. If the top is browning too quickly, you can loosely tent it with aluminum foil for the remainder of the baking time.
Step 6: Cool Before Slicing
The bread is done when a toothpick inserted into the center comes out clean. Let it cool in the pan for about 15 minutes. This allows it to set up. Then, use the parchment paper handles to lift it out and transfer it to a wire rack to cool completely. Slicing it while it’s warm is tempting, but it will be crumbly. Patience here pays off with clean, beautiful slices.
How To Serve Banana Nut Bread (ADHD-Friendly)
How you serve this banana nut bread can make a big difference in how it fits into your day and supports your goals. With ADHD, having pre-planned, easy-to-assemble meals and snacks is a superpower. It eliminates decision fatigue and prevents you from grabbing less healthy options when hunger strikes suddenly.
Think of each slice as a “base” you can build upon. On its own, it’s a fantastic, balanced snack. A slice is perfect for curbing that mid-afternoon slump when your medication might be wearing off and your brain is screaming for sugar. It provides steady energy without the crash, helping you stay focused.
For a more complete meal, especially for breakfast, you’ll want to pair it with an additional protein source to really maximize satiety and keep you full until lunch. Here are a few simple, ADHD-friendly ideas:
- With a Yogurt Boost: My go-to is to top a warm slice with a big dollop of non-fat plain Greek yogurt. It adds creaminess, another 10-15g of protein, and feels incredibly decadent. Sprinkle a little extra cinnamon on top.
- As a Pre-Workout Snack: Have a slice about 45-60 minutes before a workout. The carbs from the banana and flour will provide quick energy for your session, while the protein will help kickstart the muscle recovery process.
- With a Savory Side: Don’t be afraid to pair it with something savory for breakfast. A slice of banana bread alongside two scrambled eggs or a couple of turkey sausage links makes for a well-rounded meal with a great mix of protein, carbs, and fats.
- As a Healthy Dessert: Warm up a slice in the microwave for 15-20 seconds and add a small scoop of a high-protein ice cream or a drizzle of sugar-free maple syrup. It satisfies the dessert craving without derailing your progress.
The key is to have these options in mind ahead of time. When you know exactly how you’re going to eat it, you remove the guesswork and make it an easy, automatic choice that serves your body and your goals.
How To Store, Reheat, and Reuse Banana Nut Bread
One of the best things about this recipe is that it’s perfect for meal prep. For those of us with ADHD, having healthy, delicious food ready to go is essential for staying on track. If food isn’t convenient, it often doesn’t get eaten. Proper storage ensures your banana nut bread stays fresh and delicious all week long.
Once the loaf has cooled completely, you have a few options for storage. The method you choose depends on how quickly you plan to eat it. No matter what, avoid sealing it up while it’s still warm, as the trapped steam will make it soggy.
Here’s a simple breakdown for storing, reheating, and even reusing your bread:
- Room Temperature: If you plan to eat the bread within 2-3 days, you can store it at room temperature. Wrap the loaf tightly in plastic wrap or place it in an airtight container. Slicing it only as you eat it will help keep the rest of the loaf from drying out.
- Refrigerator: For longer storage, up to a week, the fridge is your best bet. Wrap it securely in plastic wrap or foil and place it in an airtight container. The fridge can sometimes dry out baked goods, but the high moisture content from the yogurt and applesauce in this recipe helps it stay fresh.
- Freezer (The ADHD Lifesaver): This is my favorite method. You can freeze the entire loaf or, for ultimate convenience, pre-slice it. To freeze, wrap each slice individually in plastic wrap, then place all the slices in a large freezer-safe bag or container. They will last for up to 3 months. This creates a perfect single-serving “grab and go” snack.
When you’re ready to eat, reheating is simple. A slice from the fridge or room temperature can be warmed in the microwave for about 15-20 seconds for that fresh-from-the-oven feel. From the freezer, you can microwave a slice for 30-45 seconds or pop it into the toaster or toaster oven until it’s warmed through and slightly crisp on the edges. If you have leftover slices that are getting a bit stale, don’t throw them out. Crumble them over a bowl of Greek yogurt and berries for a delicious parfait.
Easy Swaps & Variations for Banana Nut Bread
Flexible eating is a cornerstone of the ADHD FIT philosophy. Life happens, pantries run low, and sometimes you just want to try something different. This banana nut bread recipe is very forgiving and easy to adapt. Don’t be afraid to experiment to find what works best for you, your budget, and your taste buds.
The goal is to maintain the balance of protein, carbs, and fats that makes this recipe work for fat loss. When you make a swap, just be mindful of how it might change the nutritional profile. A small change is unlikely to derail your progress, and having a version you can consistently make is better than a “perfect” recipe you never touch.
Here are some simple, tested swaps and fun variations you can try:
- Flour Alternatives: If you don’t have white whole wheat flour, you can use regular all-purpose flour or whole wheat pastry flour. You could also try substituting half of the flour with oat flour for a slightly denser, heartier texture. For a gluten-free version, use a high-quality 1-to-1 gluten-free baking blend.
- Protein Powder Options: While a whey/casein blend is recommended for the best texture, you can use a 100% whey isolate. Just be aware the bread might be slightly drier. A plant-based protein powder can also work, but since they absorb more liquid, you may need to add a few tablespoons of milk or water to get the right batter consistency.
- Sweetener Swaps: If you prefer, you can use other sweeteners like coconut sugar or maple syrup. Just remember that these will add calories and sugar, so you’ll need to account for them in your daily macros.
- Mix-In Mania: The walnuts are fantastic, but you can easily swap them for other nuts like pecans or even leave them out entirely if you’re not a fan. For a more decadent treat, try folding in a half-cup of sugar-free chocolate chips or Lily’s dark chocolate chips along with the walnuts.
- Spice It Up: Feel free to adjust the spices. Add a pinch of allspice or cardamom for a different flavor profile, or increase the cinnamon if you love that warm, cozy taste.
Remember, the best recipe is the one you’ll actually make and enjoy. Use this as a template and feel free to customize it to fit your life.
High-Protein Banana Nut Bread
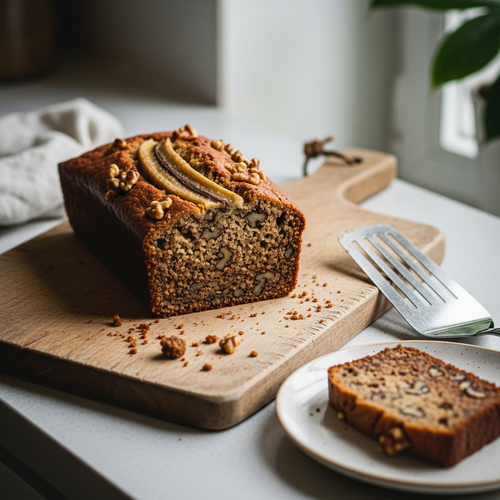
Description: A moist, flavorful, and easy-to-make banana nut bread packed with protein to support your fat loss goals. This recipe swaps out butter and sugar for healthier alternatives without sacrificing the classic taste you love, making it the perfect sustainable treat for a busy lifestyle.
Prep Time: 15 minutes | Cook Time: 50 minutes
Servings: 12 slices
Macros per Serving | Calories: 185 | Protein: 12g | Fat: 7g | Carbohydrates: 19g
Ingredients
- 1 ½ cups (360g) very ripe mashed bananas (about 3-4 large bananas)
- ½ cup (113g) non-fat plain Greek yogurt
- ¼ cup (60g) unsweetened applesauce
- 2 large eggs
- 1 teaspoon vanilla extract
- 1 cup (120g) white whole wheat flour or whole wheat pastry flour
- ¾ cup (75g) vanilla or unflavored whey/casein blend protein powder
- ½ cup (48g) almond flour
- ½ cup (96g) zero-calorie granulated sweetener (e.g., erythritol or monk fruit blend)
- 1 ½ teaspoons baking powder
- ½ teaspoon baking soda
- 1 teaspoon ground cinnamon
- ¼ teaspoon ground nutmeg
- ¼ teaspoon salt
- ½ cup (60g) chopped walnuts, toasted, plus 2 tablespoons for topping
Instructions
- Preheat oven to 350°F (175°C). Grease or line a 9×5 inch loaf pan with parchment paper.
- In a large bowl, whisk together mashed bananas, Greek yogurt, applesauce, eggs, and vanilla until smooth.
- In a separate bowl, whisk together the white whole wheat flour, protein powder, almond flour, sweetener, baking powder, baking soda, spices, and salt.
- Add the dry ingredients to the wet ingredients and fold with a spatula until just combined. Do not overmix.
- Gently fold in ½ cup of walnuts. Pour batter into the prepared pan and top with the remaining 2 tablespoons of walnuts.
- Bake for 45-55 minutes, or until a toothpick inserted into the center comes out clean. Tent with foil after 30 minutes if the top is browning too quickly.
- Cool in the pan for 15 minutes before transferring to a wire rack to cool completely.
Notes
For the best flavor, make sure your bananas are very ripe with lots of brown spots. Toasting the walnuts in a dry pan for a few minutes before adding them to the batter really enhances their nutty flavor.
FAQs About Banana Nut Bread For Weight Loss
Here are some straightforward answers to the most common questions I receive about this banana nut bread recipe.
Can you eat banana nut bread and still lose weight?
Absolutely, yes. But the type of banana bread matters tremendously. If you’re eating traditional, store-bought, or coffee shop banana bread, it’s going to be very difficult to fit into a fat loss plan consistently. Those versions are typically high in sugar, refined flour, and unhealthy fats, making them very calorie-dense with little nutritional value to keep you full.
The key to losing weight is maintaining a calorie deficit over time. This recipe is specifically designed to make that easier. By using protein powder, Greek yogurt, and whole wheat flour, we create a slice of banana bread that is high in protein and fiber. These two nutrients are critical for managing hunger, which is often the biggest battle in a weight loss journey. A slice of this bread will keep you feeling satisfied for hours, reducing the likelihood of you reaching for other high-calorie snacks.
So, instead of thinking of it as “cheating,” you can see this banana nut bread as a tool. It’s a delicious way to hit your protein goals, manage cravings for sweets in a controlled way, and enjoy a food you love without guilt or derailing your progress. It’s a perfect example of flexible eating, which is the only way to build a truly sustainable lifestyle.
What makes this banana nut bread recipe healthy?
This recipe is “healthy” because it’s built with purpose, focusing on nutrient-dense ingredients that support your body’s needs, especially during fat loss. We’ve made several strategic swaps from a traditional recipe. First, we’ve eliminated refined sugar and replaced it with a zero-calorie sweetener, which provides sweetness without the blood sugar spike and subsequent crash.
Second, we’ve removed the butter and oil, which are high in calories and saturated fat. Instead, we use non-fat Greek yogurt and unsweetened applesauce. This combination provides incredible moisture and a tender texture while adding protein and cutting down significantly on the overall fat and calorie content. The Greek yogurt also adds a bit of calcium and probiotics.
Finally, the foundation of the recipe is built on protein and fiber. The addition of whey/casein protein powder turns this from a carb-heavy snack into a balanced one. The white whole wheat flour and almond flour provide more fiber and nutrients than standard white flour. This combination works together to slow down digestion, keep you feeling full, and provide sustained energy. It’s not just about what we took out; it’s about what we intentionally put in.
How do I make this banana nut bread without protein powder?
You can definitely make this recipe without protein powder, but you will need to make an adjustment to the dry ingredients to maintain the right texture. Protein powder is very absorbent, so you can’t just omit it. If you remove the ¾ cup of protein powder, you will need to replace it with an equal amount of flour.
For the best results, I recommend replacing the protein powder with an additional ¾ cup of white whole wheat flour or all-purpose flour. This will keep the wet-to-dry ingredient ratio balanced so the bread bakes properly. However, it’s important to understand how this change will affect the nutritional profile of the banana bread.
By removing the protein powder, you will be significantly lowering the protein content of each slice and increasing the carbohydrate content. The bread will be less effective at managing hunger and won’t be as “macro-friendly.” It will still be a healthier option than traditional banana bread because it’s lower in sugar and fat, but it will function more as a standard carb-based snack rather than a high-protein one.
Why is my protein banana nut bread dry?
This is the most common problem when baking with protein powder, and it usually comes down to one of three things: the type of protein powder used, over-baking, or over-mixing. First, using 100% whey isolate protein is often the culprit. Whey absorbs a lot of moisture and can result in a dry, rubbery texture when baked. That’s why this recipe specifically calls for a whey/casein blend. Casein protein bakes much better and helps retain moisture, leading to a tender crumb.
Over-baking is another major cause. Protein-based baked goods can go from perfectly moist to dry very quickly. Ovens can vary, so it’s important to start checking for doneness a little early. Use the toothpick test. As soon as it comes out clean or with just a few moist crumbs attached, take the bread out of the oven. It will continue to cook slightly from the residual heat in the pan.
Lastly, be very careful not to over-mix the batter once you combine the wet and dry ingredients. Mixing develops the gluten in the flour, and when combined with protein powder, it can create a tough, dense, and dry loaf. Mix with a spatula only until you no longer see streaks of flour. A few lumps in the batter are perfectly okay.
Can I make this banana nut bread gluten-free?
Yes, you can adapt this recipe to be gluten-free with a couple of key substitutions. The primary source of gluten in this recipe is the white whole wheat flour. To make it gluten-free, you will need to swap this out for a good quality gluten-free all-purpose baking flour blend. Look for one that contains xanthan gum, as this will help provide the structure and binding that gluten normally would.
Replace the 1 cup of white whole wheat flour with 1 cup of your chosen gluten-free blend. The other ingredients, like almond flour, protein powder (ensure it’s certified gluten-free), and the wet ingredients, are typically gluten-free already, but it’s always wise to double-check the labels on your products to be sure, especially the protein powder and baking powder.
Keep in mind that gluten-free flours can sometimes absorb liquid differently and may result in a slightly different texture. The final bread might be a bit more dense or crumbly than the original version, but it will still be delicious and packed with protein. Following the rest of the recipe instructions, particularly not over-mixing, will help you achieve the best possible result.
Try These High-Protein Recipes Next
If you enjoyed this recipe, here are a few other simple, high-protein options that fit perfectly into a fat loss lifestyle.
- Jacob’s Original High Protein Banana Bread: My first version of this classic, a slightly different take that’s also delicious and macro-friendly.
- ADHD-Friendly Banana Protein Muffins: The same great flavor in a perfectly portioned, grab-and-go muffin format. Ideal for busy mornings.
- Easy Banana Bread from This Gal Cooks: A great example of a more traditional banana bread, perfect for when you’re baking for a crowd or not focused on macros.
Give them a try and let me know what you think!