For years, I was convinced that bread was the enemy of fat loss. As a single dad with ADHD trying to get fit, I cut it out completely. It was one of those simple, all-or-nothing rules my brain could easily follow. But I missed it. I missed toast with my eggs, a satisfying sandwich, and the simple comfort of a good slice of bread. When I finally hit my goal weight, I knew I needed a sustainable way to keep bread in my life without derailing my progress. That’s when I fell in love with sourdough.
Making my first loaf felt like a science experiment, and my ADHD brain loved the structured process. More importantly, I noticed I could eat it without feeling bloated or getting the intense cravings that regular store-bought bread gave me. It was satisfying on a completely different level. The slow fermentation process seemed to agree with my body, and the tangy flavor was incredible.
This wasn’t just any bread. This was a tool. So, I started tinkering. I asked myself, how could I make this amazing food work even harder for my fitness goals? I began experimenting with ways to boost the protein, making each slice more filling and macro-friendly. This high-protein sourdough recipe is the result of that journey. It’s the perfect blend of a comforting classic and a practical, muscle-supporting food that fits seamlessly into a fat-loss lifestyle.
It’s designed for people like us, who need our food to be simple, delicious, and effective. It’s proof that you don’t have to give up the foods you love to build a body you love.
Skip to My Flexibe Diet Recipe!
Why Sourdough Is Great For Fat Loss
When you’re focused on fat loss, the goal is to feel full and satisfied while staying in a calorie deficit. Most people think that means saying goodbye to bread, but this specific sourdough recipe is engineered to be part of the solution, not the problem. It aligns perfectly with our core principles: protein first, hunger management second.
First and foremost, we’ve packed it with protein. By using skim milk or unflavored whey protein instead of water and adding vital wheat gluten, we significantly increase the protein per slice. Protein is the superstar macro for fat loss. It keeps you feeling full for longer, reduces overall calorie intake, and helps your body preserve lean muscle mass while you lose fat. More muscle means a higher metabolism, which is exactly what you want.
This sourdough is also easier on your system. The natural fermentation process breaks down some of the gluten and phytic acid in the flour. This makes the bread easier to digest and its nutrients more bioavailable. For many people, this means less bloating and discomfort compared to conventional bread. When your digestion is running smoothly, everything about your fitness journey feels easier.
Finally, it helps manage cravings. Unlike sugary, processed white bread that can spike your blood sugar and lead to a crash, sourdough has a more moderate effect. The combination of protein, fiber from the whole wheat flour, and the fermented nature of the bread itself leads to a slower release of energy. This stable energy prevents the desperate, dopamine-seeking cravings that can send us spiraling towards the snack cabinet. It’s a satisfying, real food that helps you stay consistent, and consistency is what drives results.
Ingredients You’ll Need for Sourdough
The magic of this recipe is in its simplicity and the strategic choice of ingredients. Each one has a specific job to do, working together to create a loaf that’s not only delicious but also optimized for a fitness-focused diet. You won’t find any weird, hard-to-source items here, just powerful basics.
Here’s exactly what you’ll need to get started:
- 350g high-protein bread flour
- 100g whole wheat flour
- 50g vital wheat gluten
- 100g active sourdough starter
- 375g skim milk or unflavored whey
- 10g salt
- 50g mix of hemp, pumpkin, and sunflower seeds
The key ingredient that gives this recipe its fat-loss advantage is the vital wheat gluten. Think of it as a protein powder for your bread. It’s made by washing away the starch from flour, leaving almost pure gluten protein. Adding this gives the dough incredible strength and elasticity for a beautiful rise, and it’s the biggest contributor to the high protein count in the final loaf.
Your choice of liquid matters, too. Using skim milk or unflavored whey protein mixed with water is a simple hack to add another layer of protein. If you have unflavored whey protein powder from your workouts, this is a perfect place to use it. If not, skim milk works wonderfully, adding protein and a soft texture to the crumb.
Lastly, a quick note on your sourdough starter. Make sure it’s healthy and active. This means feeding it regularly and using it when it’s at its peak, usually a few hours after a feed when it’s bubbly and has doubled in size. A strong starter is the engine of your bread; a weak one will lead to a dense, disappointing loaf.
How To Make Sourdough (Step-By-Step)
Making sourdough can seem intimidating, but it’s just a series of simple steps spread out over time. This is actually perfect for an ADHD brain. You focus on one small task, then walk away for a while. Set timers on your phone for each step to keep you on track without having to keep it all in your head.
1. Autolyse
In a large mixing bowl, combine the high-protein bread flour, whole wheat flour, and vital wheat gluten. Pour in the skim milk or whey and mix with your hands or a spatula until it forms a shaggy dough and no dry bits of flour remain. Cover the bowl and let it rest for one hour. This step, called the autolyse, allows the flour to fully absorb the liquid, making the dough stronger and easier to knead.
2. Mix in Starter and Salt
After the rest, add your active sourdough starter and the salt to the dough. Using wet hands to prevent sticking, pinch and squeeze the ingredients into the dough until they are fully incorporated. Knead the dough in the bowl or on a lightly floured surface for 5 to 7 minutes. You’re looking for it to become smooth and elastic. Set a timer so you don’t get distracted!
3. Bulk Fermentation
Shape the dough into a ball, place it back in the bowl, and cover it. Let it rise in a warm spot for 4 to 6 hours. During the first two hours of this rise, you’ll perform three “stretch and folds.” To do this, wet your hands, grab one side of the dough, stretch it up, and fold it over the center. Rotate the bowl a quarter turn and repeat three more times. Do this every 30 to 45 minutes for the first three sets. This builds strength in the dough without traditional kneading.
4. Add Seeds
After your final stretch and fold, gently pull the dough out onto a clean counter. Gently stretch it into a large rectangle. Sprinkle your seed mix evenly over the surface. Fold the dough up like a letter to incorporate the seeds throughout the loaf.
5. Shape
Once the bulk fermentation is complete and the dough is airy and has grown in size, it’s time to shape. Gently coax the dough into a tight ball (a boule) or an oblong shape (a bâtard). The goal is to create surface tension, which will help the loaf hold its shape and rise tall in the oven.
6. Cold Fermentation (Proof)
Place your shaped loaf, seam-side up, into a proofing basket (banneton) or a bowl lined with a floured towel. Cover it and place it in the refrigerator for 12 to 24 hours. This is the cold proof, where all the amazing tangy sourdough flavor develops. It’s also a great stopping point that works with your schedule.
7. Preheat and Bake
Place a Dutch oven with its lid on inside your oven and preheat to 500°F (260°C) for at least 45 minutes. A screaming hot Dutch oven is critical for that explosive oven spring. Once preheated, carefully remove the Dutch oven. Turn your dough out onto parchment paper, score the top with a sharp blade, and lower it into the pot. Cover and bake for 20 minutes.
8. Finish Baking
After 20 minutes, remove the lid. This allows the crust to brown and crisp up. Reduce the oven temperature to 450°F (230°C) and bake for another 15 to 20 minutes. Your loaf is done when it’s a deep golden brown and sounds hollow when tapped on the bottom.
9. Cool Completely
This is the hardest step. You must let the bread cool on a wire rack for at least 2 hours before slicing. The inside is still setting, and cutting it too early will result in a gummy texture. Patience here is rewarded with the perfect slice.
How To Serve Sourdough (ADHD-Friendly)
One of the best ways to stick with a fat loss plan is to make your meals as easy and appealing as possible. This high-protein sourdough isn’t a “cheat” food; it’s a foundational component of your weekly meals. The key is to have simple, delicious ways to use it that don’t require a ton of effort or executive function on low-motivation days.
My number one ADHD tip for this bread is to pre-slice the entire loaf as soon as it has cooled completely. Store the slices in a zip-top bag in the freezer. This removes the single biggest barrier to using it: the effort of getting out a cutting board and knife. When a perfect slice of toast is just 60 seconds away, you’re far more likely to make a healthy choice.
Here are some brutally simple ways to serve it:
- The Ultimate Avocado Toast: A toasted slice topped with mashed avocado, a sprinkle of salt, and a dash of everything bagel seasoning. For an extra protein kick, top it with a fried or jammy soft-boiled egg.
- Protein-Packed “Cheese” Toast: Instead of cheese, spread a toasted slice with a thick layer of plain Greek yogurt or cottage cheese. It sounds weird, but it’s a creamy, savory, and high-protein base. Top with cracked black pepper or a few slices of tomato.
- Open-Faced Sandwiches: One slice of this hearty sourdough is often as filling as two slices of regular bread. Load it up with rotisserie chicken, tuna salad made with Greek yogurt, or lean turkey breast and a handful of spinach. It’s a quick lunch that’s balanced and satisfying.
- Simple & Satisfying Snack: Sometimes, all you need is a toasted slice with a thin layer of natural peanut butter or a drizzle of honey. It hits the spot for a carb craving while still providing protein and fiber to keep you full until your next meal.
Think of this bread as your healthy carb base. Pair it with a protein source and a fruit or vegetable, and you have a balanced mini-meal that supports your goals without complicated cooking. It’s about making the healthy choice the easy choice.
How To Store, Reheat, and Reuse Sourdough
Properly storing your homemade sourdough ensures that none of your hard work goes to waste. The best method depends on how quickly you plan to eat it. Since this bread has no preservatives, it won’t last as long on the counter as store-bought varieties, but with a couple of simple tricks, you can enjoy it for weeks.
For short-term storage, avoid plastic bags at all costs. They trap moisture and will turn that beautiful, crackly crust soft and chewy overnight. Instead, you have a couple of better options. You can store the loaf cut-side down on a wooden cutting board for up to two days. You can also place it in a paper bag or a dedicated bread box. These methods allow the bread to breathe, which preserves the crust’s texture.
For longer-term storage, the freezer is your best friend. This is my go-to method and a lifesaver for anyone with ADHD who loves having healthy options ready to go. Here’s the system:
- Slice Before You Freeze: Once the loaf is completely cool, slice the entire thing. This is a non-negotiable step. Trying to slice a frozen loaf is a nightmare and a safety hazard.
- Flash Freeze (Optional but Recommended): Lay the slices in a single layer on a baking sheet and pop them in the freezer for about 30 minutes. This prevents them from sticking together in a giant, frozen brick of bread.
- Bag and Store: Transfer the frozen slices into a large, airtight freezer bag. Squeeze out as much air as possible before sealing. Your sourdough slices will last for up to three months in the freezer with no loss of quality.
Reheating is incredibly simple. Just pull a slice or two directly from the freezer and pop them into your toaster or a hot pan. The bread thaws and toasts at the same time, reviving the crispy crust and soft interior perfectly. If your loaf has gone a bit stale on the counter, you can also run it under some water and bake it in a 350°F (175°C) oven for 5-10 minutes to bring it back to life.
Easy Swaps & Variations for Sourdough
One of the best things about a flexible eating plan is making recipes work for you. This sourdough recipe is a fantastic template, but you can easily adjust it based on what you have in your pantry or your personal preferences. The core of the recipe—the high-protein base—remains, but feel free to experiment with the details.
Remember, consistency beats perfection. If making a small swap means you’re more likely to actually bake the bread, then it’s the right choice. Here are a few simple swaps and variations you can try:
- Flour Variations: You can play with the ratio of bread flour to whole wheat flour. For a lighter loaf, use more bread flour. For a denser, nuttier loaf, increase the whole wheat. You could also swap in 50-100g of rye or spelt flour for a different flavor profile, but I recommend keeping the high-protein bread flour and vital wheat gluten as the primary components to maintain structure.
- Liquid Options: If you don’t have skim milk or unflavored whey protein, you can simply use water. The recipe will work perfectly fine, though the final protein count will be slightly lower. Any type of milk, including unsweetened plant-based milks, can also work.
- Mix-In Mania: The seed mix is just a starting point. Feel free to use any seeds you enjoy. For a savory twist, try adding a tablespoon of dried rosemary, some chopped olives, or even a handful of shredded sharp cheddar cheese. Just remember to account for the extra calories if you’re tracking your macros.
- Simplify the Seeds: For an ADHD-friendly shortcut, buy a pre-made “super seed” blend from the store. This saves you from buying and measuring three separate ingredients. It’s a small change that lowers the barrier to getting started.
If you don’t have vital wheat gluten, you can omit it. However, it is the main protein booster and also provides a lot of structure. If you leave it out, your dough will feel a bit slacker, and you might need to reduce the amount of liquid by 20-25g to get a manageable consistency. The bread will still be delicious, just not as high in protein.
High-Protein Sourdough Bread
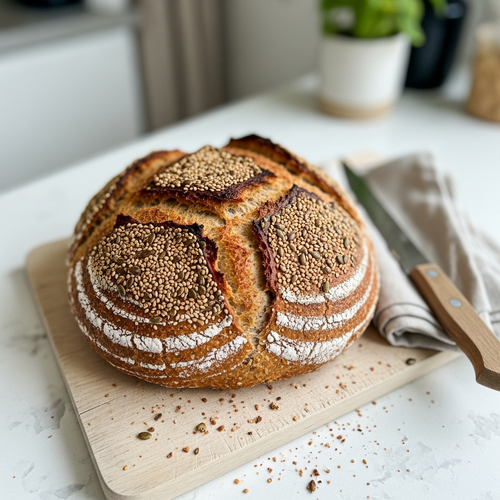
Description: A delicious, rustic sourdough bread recipe specifically designed for a fat loss lifestyle. It’s packed with extra protein to keep you full and satisfied, making it the perfect macro-friendly addition to your diet. The total time is over 24 hours, but most of it is hands-off resting and proofing.
Active Time: 25 minutes | Bake Time: 40 minutes
Servings: 12 slices
Macros per Serving | Calories: 210 | Protein: 11g | Fat: 2g | Carbohydrates: 37g
Ingredients
- 350g high-protein bread flour
- 100g whole wheat flour
- 50g vital wheat gluten
- 100g active sourdough starter
- 375g skim milk or unflavored whey
- 10g salt
- 50g mix of hemp, pumpkin, and sunflower seeds
Instructions
- Autolyse: Mix flours, gluten, and milk/whey. Rest covered for 1 hour.
- Mix: Add starter and salt. Knead for 5-7 minutes until smooth.
- Bulk Ferment: Let rise for 4-6 hours in a warm spot. Perform 3 sets of stretch-and-folds in the first 2 hours.
- Incorporate Seeds: After the final fold, gently laminate the dough and add the seeds.
- Shape & Proof: Shape the dough, place it in a proofing basket, and refrigerate for 12-24 hours.
- Bake: Preheat a Dutch oven to 500°F. Score the loaf, then bake covered for 20 minutes. Remove lid, reduce heat to 450°F, and bake for another 15-20 minutes until golden brown.
- Cool: Cool completely on a wire rack before slicing.
Notes
The success of this recipe heavily depends on a healthy, active sourdough starter. Ensure your starter is doubling in size consistently after feedings before you begin. Cooling completely is not optional; it’s essential for the bread’s final texture.
FAQs About Sourdough For Weight Loss
Here are some straightforward answers to the most common questions I receive about this sourdough recipe.
Can you really eat sourdough and lose weight?
Absolutely, yes. Fat loss is determined by being in a consistent calorie deficit, not by eliminating specific foods or entire food groups like carbohydrates. The reason so many people succeed by cutting out bread is that typical store-bought bread is often low in nutrients, low in fiber, and easy to overeat, which contributes to a calorie surplus.
This high-protein sourdough is a completely different tool. It’s designed to help you manage hunger. The high protein and fiber content make each slice incredibly satisfying, so you feel full on fewer calories. The slow-digesting nature of the carbs provides steady energy, preventing the blood sugar crashes that trigger cravings for junk food. By incorporating foods like this that you genuinely enjoy, you make your fat loss journey more sustainable and less about restriction.
Is this high-protein sourdough recipe difficult for beginners?
It might look intimidating because the process spans more than a day, but the actual hands-on time is very minimal. Each individual step is incredibly simple. You mix some things, you stretch the dough a few times, you shape it, and you bake it. The long waiting periods are where all the magic happens, and they require nothing from you.
In fact, this process is ideal for a busy schedule or an ADHD brain. You can fit the steps in around your life. Mix the dough in the morning, do a few folds while you work, shape it in the evening, and bake it the next day. Don’t chase the “perfect” loaf on your first try. Just follow the steps, and you’ll make delicious bread. The process is forgiving, and even the “ugly” loaves are tasty.
What if my sourdough starter isn’t active enough?
Your starter is the single most important factor in this recipe. An active, healthy starter is what gives the bread its rise and flavor. If your starter is sluggish, your bread will be dense and flat. An “active” starter is one that reliably doubles (or even triples) in volume within 4-8 hours after you feed it, looking bubbly and smelling pleasantly tangy.
If you’re unsure about your starter, give it a little boost. Keep it in a warm place (like on top of your fridge or in an oven with the light on) and give it a couple of consistent feedings every 12 hours before you plan to bake. You can test its readiness by dropping a small spoonful into a glass of water. If it floats, it’s ready to use. If it sinks, it needs more time or another feeding.
Why is my sourdough loaf so dense and gummy?
This is the most common frustration for new sourdough bakers, and it usually comes down to one of a few key issues. First, it could be a weak starter or under-fermentation. If the dough didn’t have enough time to rise and develop gas, it won’t have the airy structure you’re looking for. Make sure your starter is active and you see visible signs of fermentation—the dough should feel lighter and have grown in size.
Another culprit could be over-fermentation, where the dough rises and then collapses, having exhausted its food supply. The most common mistake, however, is slicing the bread before it has cooled completely. The loaf continues to cook and set internally from residual heat after it comes out of the oven. If you cut into it too soon, the steam escapes and the crumb collapses, resulting in a gummy, dense texture. You must wait at least two hours, but four is even better.
How does this sourdough recipe fit into an ADHD-friendly lifestyle?
This recipe is built for the ADHD brain. First, it breaks a big project (“bake bread”) into tiny, manageable steps with long breaks in between. You’re not stuck in the kitchen for hours. You mix, then you’re free for an hour. You fold, you’re free for 30 minutes. This structure allows you to feel productive without getting overwhelmed. Using phone timers for each step is a perfect way to externalize your executive functions.
Second, the “set it and forget it” cold proof in the fridge is a lifesaver. You can shape the loaf, put it away, and bake it anytime in the next 24 hours, fitting it to your energy levels. Finally, the freezer storage system creates a stockpile of “instant,” healthy food. This reduces decision fatigue and makes it easy to grab a nutritious option instead of falling back on dopamine-heavy, processed snacks when you’re hungry and unmotivated.
Try These High-Protein Recipes Next
If you enjoyed making this high-protein sourdough, here are a few other recipes that follow the same principles of being delicious, macro-friendly, and easy to fit into a busy life.
- ADHD Friendly Sourdough Bread Recipe For Weight Loss: Another take on sourdough, this post dives even deeper into the process and timing to fit a hectic schedule.
- High-Protein Bread Recipe: If you want high-protein bread without the time commitment of sourdough, this recipe uses commercial yeast for a much faster result.
- Small Batch Sourdough Bread: This recipe from This Gal Cooks is perfect if you’re baking for one or two people and want a smaller loaf.
Give these a try and keep building your arsenal of go-to healthy meals.